Team Overview
Ways of working
Principles
- We never work on production services alone, always at least two people.
- We do not refer to customers by name, if necessary abbreviations should be used.
- Customer information is incredibly sensitive and should not be shared outside of the Google Workspace.
- We avoid practices by convention and favour enforcement, e.g. code-style and linters enforced by CI.
Communications channels
Google Workspace
TBD
Slack
TBD
Onboarding
This section contains information related to onboarding engineers.
Server public key generation procedure
Install openssh and pwgen
A primary owner will generate ECDSA-SK (the SK stands for Security Key) keys using their local machine. This requires OpenSSH 8.2+ and is generated in combination with a U2F (FIDO2) device.
You may need to upgrade your local openssh installation (e.g. brew install openssh on OS X or sudo apt-get install openssh on Linux).
The key will require a minimum 24 character mixed case alphanumeric passphrase and a click of your first FIDO device. You should store the passphrase securely in at least 2 places.
You can use the pwgen tool (brew install pwgen on OS X or sudo apt-get install pwgen on Linux) to get a suitable passphrase.
Note on M1 OS X (ARM processor)
If you are using an M1 OS X (ARM processor) then the Homebrew tool may not work, so it is recommended to run the commands in the emulator:
arch -x86_64 brew install openssh
This may require the Rosetta 2 terminal
/usr/sbin/softwareupdate --install-rosetta --agree-to-license
Validating server key creation
The validating server infrastructure has a set of shared keys across all servers which is a slightly reduced security stance since there are no private keys on any of the servers.
Generate a collection of passwords to use when protecting the server keys (remember to copy the password somewhere safe and separate from the hardware):
pwgen -B 24
Enter the command (use prd, tst, dev for Production, Test and Development respectively):
ssh-keygen -t ecdsa-sk -f ~/.ssh/id_<initials>_prd_<1,2,3>
You should repeat the above step for two other devices (with fresh passwords for each) as backup credentials in case of device absence. Ensure that you remove all other FIDO devices and then insert the one you'll be using to avoid accidentally reusing a hardware key. It is wise to mark these devices with their ID so you don't lose track of them (a plastic keyring is recommended) - see the Storing Keys section later for more details.
This will give you a collection of local files as follows (for Alice Bob with initials ab):
~/.ssh/id_ab_prd_1
~/.ssh/id_ab_prd_1.pub

~/.ssh/id_ab_prd_2
~/.ssh/id_ab_prd_2.pub

~/.ssh/id_ab_prd_3
~/.ssh/id_ab_prd_3.pub
You now need to add the public keys to the github.com/attestantio/ops GitHub repository. First cat the public keys:
cat ~/.ssh/id_ab_prd_1.pub
cat ~/.ssh/id_ab_prd_2.pub
cat ~/.ssh/id_ab_prd_3.pub
Verify that each public key starts with:
sk-ecdsa-sha2-nistp256@openssh.com
Without this prefix then the 2FA mechanism will not be accepted and you won't have access.
Modify the “comment” section of the public key (after the “== ”)
to <initials>-<env>-<1,2,3> e.g. ic-dev-1
Typically new public keys will be added to /ops/ansible/roles/ssh/files. Follow the usual procedure for updating a GitHub repository to add new keys as they become available.
Setup Ansible
This guide details instructions on how to install and setup ansible so it can be used to deploy to development machines.
Install Ansible
Ansible can be installed as homebrew package:
brew install ansible
Install pass
Pass is an Ubuntu and Mac OS password manager and useful for storing such things as the Ansible vault password, which can then be accessed via scripts. Instructions can be found here: https://macappstore.org/pass/.
Use Homebrew to install:
brew install pass
Setting up pass instructions can be found here: https://linuxhint.com/pass-ubuntu/
You will need to create a PGP key for your password manager. Run the following and hit enter to use all the defaults:
gpg --full-generate-key
Kind: ECC (sign and encrypt)
Curve: 25519
Expiry: Forever
Enter your name and Attestant email address when prompted. Finally enter a strong password that will act as the master password for the vault.
The next step is to get the gpg-id which can be retrieved by running:
gpg --list-keys --keyid-format LONG

>Output
pub   ed25519/5BBE26FC8F47E10B 2022-07-25 [SC]
C059DB5CEAFD0DAC731342155AAE26FB7F47E10B
uid                 [ultimate] Test <test@attestant.io>
sub   cv25519/11A632B6650CA8AB 2022-07-25 [E]
Next we can initialise the pass keystore by using the gpg-id:
pass init <gpg-id>
Add pass script for Ansible support
Now you are ready to insert a password into the password manager, example for adding the dev ansible vault password:
pass insert Infrastructure/dev-ansible-vault
<add passphrase>
The final step is to create local scripts to echo the password to Ansible:
In your ~/.zshrc file add the following alias:
alias dev-ansible-playbook='ansible-playbook --vault-password-file $HOME/bin/dev-pass.sh'
Create a local ~/bin directory and add the script, dev-pass.sh:
dev-pass.sh:
#!/bin/bash

echo -n $(pass Infrastructure/dev-ansible-vault)
This will allow the GPG master password to unlock the different vaults for Ansible. Remember to make the script executable with:
chmod +x ~/bin/dev-pass.sh
Team members
Head of Ethereum Engineering
- Chris Berry
Developers
- Ahmed Mohamed
- Hoanh An
- Miguel Tenorio
- Xavier Basty
Platform Engineers
- Kyriakos Oikonomakos
- Igor Pejic
SREs
- Ian Chapman
- Abdul Khan
Wider team
Client Partnerships
- Steve Berryman (Head of Client Partnerships)
- Christy Breslin
Senior Management (Bitwise Onchain Solutions)
- Sreejith Das (CEO)
- Numaan Ahmed (CRO)
- Gary Russel (COO)
- Colin Lewis (Infra Architect)
- Kam Benbrik (Head of Research)
- Damien Scanlon (Head of Product)
Senior Management (Bitwise US)
- Hong Kim (CTO and lead of BOS)
- Hunter Horsley (CEO of Bitwise)
- Teddy Fusaro (President)
Useful links and messaging channels
Links
- Docs Server - This server!
- Dev Grafana - Dev environment dashboards in Grafana.
- Dev Jaeger - Dev environment tracing in Jaeger.
- Prod Grafana - Prod environment dashboards in Grafana.
- Prod Jaeger - Prod environment tracing in Jaeger.
Messaging channels
- Google chat (ask to be added):
- [Internal] Research and Development - mostly used to discuss new R&D potential.
- [Internal] Operations - channel for monitoring prod staking services.
- [Internal] Lido - discussion for anything Lido related.
- [Internal] Frontend Engineering - channel where website updates are advertised and signed off.
- [Internal] Discussions - general discussions for the wider team.
- Bitwise Slack (ask for access):
- Telegram (ask for access):
- Attestant
- BOS (Attestant) <> EF PandaOps
- Sepolia Validators
- Holesky genesis validators
- Hoodi genesis validators
- Lido <> Attestant (Bitwise Onchain Solutions)
- Lido Validators
- Lido Eth Validators - Announcements
- Attestant <> Eigen Labs
- NEAR Validators
- Bitwise <> Starknet Foundation <> Starkware
- Starknet Testnet and Mainnet Production
- Starknet-Staking
- Discord:
Monitoring Overview
Metrics
We monitor our applications primarily with metrics. Each application exposes a metrics endpoint and those metrics are scraped by prometheus running on the corresponding operations box for that environment (dev/prod).
Alerts
Alerts are defined in prometheus rules and are actively monitored by alertmanager. alertmanager is configured to send alerts to pagertree for those on call and slack for visibility to the wider dev team.
Slack channels:
- #bos-alerts-dev
- #bos-alerts-prod
The prometheus rules and configuration are managed via ansible in the ops repository. The prometheus configuration is generated using an in house tool called promgen that can be found in the ops-tools repository.
NOTE: pagertree allows alerts to be silenced - this is not reflected in the Slack channels and so the Slack channels can be very noisy.
Dashboards
We use grafana to visualise metrics and observe application behaviour. grafana is located at the following locations:
Access to these servers is controlled via IP whitelisting. The office location should already be whitelisted, but you may need to talk to the ops team in order to get access from other locations.
Logging
Logs are, by convention, output to /var/log/<app_name>/<app_name>.log on the server the application is running on.
In order to view the logs you need to ssh on to the host the application is running on and view the contents of the output file, e.g. tail -f /var/log/vouch/vouch.log.
For services running in docker we can use docker logs -f <container_name> to observe the logs.
Tracing
Some of our apps have tracing enabled. This can be userful to see system behaviour across multiple processes, e.g. in Vouch.
Business Continuity Management
BC.PR.01 · Policy & Procedure · Ethereum Staking Operations
Author: Colin Lewis · June 2026
Document Information
| Document Information | |
|---|---|
| Document Type | Policy & Procedure |
| Audience | All Attestant personnel |
| Classification | Confidential |
| Version | 7 (Working Baseline) |
| Date | 29 June 2026 |
| Prepared By | Colin Lewis |
Document History
| Version | Date | Author | Reviewer | Description |
|---|---|---|---|---|
| 0 | 01/09/2023 | Numaan Ahmed | Colin Lewis | Initial Version |
| 1 | 21/09/2024 | Numaan Ahmed | Colin Lewis | Minor amendments |
| 2 | 08/10/2025 | Numaan Ahmed | Colin Lewis | Annual review — no material changes |
| 3 | 24/02/2026 | Colin Lewis | Numaan Ahmed | Tailored for Ethereum Staking Operations |
| 4 | 25/02/2026 | Colin Lewis | Numaan Ahmed | Enhanced recovery objectives, BIA, threshold resilience, roles, triggers and third-party dependencies |
| 5 | 25/06/2026 | Colin Lewis | Numaan Ahmed | Baseline incorporating ISO 27001 pre-audit review: durable slashing-protection persistence and backup; authoriser succession; key-shard lifecycle; secure development and build integrity; expanded supplier and threat-intelligence controls; corrected BIA basis; cloud-service governance; and expanded testing and metrics |
| 6 | 25/06/2026 | Colin Lewis | Numaan Ahmed | V2 — incorporated agreed pre-audit review points: ESD/anti-slashing runbook enforcement and non-waivable gates; independent verification of the slashing-protection import; explicit EIP-3076 staleness reconciliation and softened absolute wording; added network-partition, intrusion, trust-anchor and DNS-fallback test scenarios and a trigger-to-test matrix; corrected ISO clause 10.2 and internal cross-references; harmonised CRO/COO authority wording; clarified cloud and quorum-restoration wording. Added the per-pod placement rule for DIRK signers and Vouch validator servers, with a documented data-residency exception. Documented the signer provisioning, Ansible lock-down, key-holder verification and key-holder-only live access controls (operations/SA build and are then locked out). Aligned the failover-checklist responsibilities for signer-touching steps (key-holder performs, SA four-eyes). Introduced the Pod and stripe concepts and the validator-shard custody model (offline encrypted SSDs, dual FIDO2 keys, two-copy off-site storage, max-two-stripe segregation). Set the validator-shard threshold to 3-of-5. Reworded the provider-concentration cap as a derived consequence of the per-pod rule. Aligned the slashing-protection description with the architect's design (durable, on-disk record), clarified that validator keys cannot move client funds (withdrawal keys are the client's), and expanded the DIRK acronym. Added §7.8 (planned maintenance / rolling zero-downtime upgrades) and neutralised the §7.5 client-diversity wording pending confirmation of the exact Vouch configuration. Extended the validator-placement rule to require different geographical regions (a different US state, or a different European country/jurisdiction). Clarified that validator keys are created by distributed key generation (never assembled on one machine, even at creation; inter-signer links removed afterwards). Corrected the §7.4 ESD description to match the esd process (head-event detection via the beacon API; runs a response script; near-real-time). Added the slashing-protection import-safety property (import only while stopped; never regresses) from the dirk source. |
| 7 | 29/06/2026 | Colin Lewis | Numaan Ahmed | Rev 7 — post-baseline fine-tuning verified against the operations source repository: corrected the ESD behaviour and the single-active-Vouch/BCP model; specified Vouch’s majority-of-two-of-four attestation strategy across four consensus clients; added third-party binary checksum-pinning; corrected the slashing-protection recovery model to structural (per-signer durable storage, 3-of-5 distribution, on-chain reconciliation) with no off-box backup of the signing store; clarified what the off-site backup covers (operations database and configuration); updated the regulatory position (UK GDPR/ICO today, forthcoming FSMA/FCA cryptoasset regime); recorded the Google Workspace backup (Afi) and a dated ops-database restore test; added a non-specialist primer and glossary terms; fixed internal references and standby/BCP wording. |
Contents
5. Roles and Responsibilities 12
6. Continuity Philosophy — Safety First 13
7. Automated Anti-Slashing Controls 14
7.1 Signing Integrity and Durable Slashing-Protection State 14
7.2 Threshold Signing Architecture (DIRK 3-of-5) 14
7.4 Emergency Shut-Down (ESD) Daemon 14
7.5 Client Diversity — Consensus and Execution 15
7.6 Validator Key Protection and Key-Shard Lifecycle 15
7.7 Secure Development and Build Integrity 17
7.8 Planned Maintenance and Rolling Upgrades 17
10. Business Impact Analysis 22
10.3 Monitoring Degradation 22
10.4 Corporate System Outage 22
11. Infrastructure Resilience 23
11.1 Multi-Vendor, Multi-Jurisdiction Model 23
11.4 Backup and Durable State 23
11.5 Beacon and Execution Nodes 24
12. Third-Party Dependencies and Supplier Management 25
13. Communication and Escalation 26
13.3 Incident Logging and Evidence 26
14. Emergency Action Process 27
15.4 Continuity Objectives and Metrics 29
Appendix A. Anti-Slashing Failover Checklist 30
Appendix B. ISO/IEC 27001:2022 Control Mapping 32
| Revision 7 — Working Baseline |
This Revision 7 working baseline continues the fine-tuning of the Revision 6 baseline: it incorporates points verified against Attestant’s operations source repository and subsequent reviews, and supersedes Revision 6 for ongoing refinement. Operational runbooks (Appendix A and the Emergency Action Process) are controlled as annexes so that routine runbook edits do not require full re-approval of this policy. Issued under Attestant’s ISO/IEC 27001:2022 ISMS — Annex A organisational, people and technological controls. Classification: CONFIDENTIAL. |
1. Management Commitment
Attestant is committed to maintaining continuous, secure and resilient Ethereum validator operations for its clients. The protection of client staked assets is the primary continuity objective of this organisation. Senior management recognises that business continuity within Ethereum staking requires a materially different philosophy to conventional IT continuity — one in which the prevention of protocol-level events, such as slashing penalties, takes precedence over the restoration of uptime.
This policy has been reviewed and approved by the named approver below and forms a binding component of Attestant’s ISO/IEC 27001 Information Security Management System (ISMS). Compliance is mandatory for all personnel with access to, or responsibility for, Attestant’s staking infrastructure or corporate systems.
Document Owner: Chief Risk Officer (CRO). Approved By: Numaan Ahmed, CRO. Date: 25/06/2026.
Out-of-cycle reviews shall be triggered by: any material change to the Ethereum consensus protocol; changes to the DIRK or Vouch architecture; addition or removal of a hosting provider; a significant security incident; or any triggered BCP event. The policy is reviewed at minimum annually given the importance senior management places on the resilience of its staking operations for clients.
2. Purpose
The purpose of this policy and procedure is to establish the framework by which Attestant maintains business continuity across its Ethereum staking operations. As a professional staking provider, Attestant’s primary continuity objective is the protection of validator integrity and client assets.
In brief — for non-specialist readers. Attestant runs Ethereum validators on behalf of its clients. A validator is an identity on the Ethereum network that uses a cryptographic signing key to routinely sign small messages — attestations (votes on the state of the chain) and, occasionally, proposed blocks; doing this correctly and on time earns rewards for the client. The single most serious risk is slashing: a protocol penalty for signing two conflicting messages, which is irreversible — so this policy treats avoiding it as more important than maximising uptime. Attestant’s design splits each signing key across several machines so that no one machine can sign alone, and separates the software that decides what to sign (Vouch) from the machines that hold the key shares and actually sign (the DIRK signers). The sections that follow describe how that design keeps validators running safely, and what happens when something fails.
Unlike traditional IT environments where uptime alone is the overriding concern, continuity within Ethereum staking must balance availability with the prevention of protocol-level penalties such as slashing. This document defines how Attestant ensures validator operations continue in a secure, controlled and resilient manner during infrastructure failures, vendor outages, protocol events or other emergencies, while meeting its contractual and regulatory obligations.
Obligations driving these objectives. Attestant’s continuity obligations arise from (a) client contractual commitments — including service-availability expectations and the allocation of liability for slashing losses — maintained in the client agreement register; and (b) applicable legal and regulatory requirements, maintained in the ISMS legal and regulatory register (A.5.31). Attestant is not currently authorised as a financial-services firm and is not yet required to be; its binding statutory obligations today are in data protection — the UK GDPR and the Data Protection Act 2018, regulated by the Information Commissioner’s Office (ICO) — under which the one externally-mandated reporting timeline is the ICO personal-data-breach notification, within 72 hours of awareness where the UK GDPR risk threshold is met. The UK is, however, bringing cryptoasset activities — staking included — within the Financial Services and Markets Act perimeter under the FSMA (Cryptoassets) Regulations 2026, with the FCA authorisation gateway opening in 2026 and the regime expected to take full effect in late 2027; Attestant anticipates that its institutional staking services will fall within scope, treats this as a formal review trigger (Section 15.3), and is preparing on the basis that its existing ISO 27001 ISMS — the governance, operational-resilience and key-management controls in this policy — already aligns with much of what the FCA is signalling. Recovery objectives (Section 8) and client-notification timelines (Section 13) are contractual and derive from these obligations and the Business Impact Analysis (Section 10), rather than being set arbitrarily.
This policy forms part of Attestant’s ISO/IEC 27001:2022 ISMS. It maps primarily to Annex A controls A.5.29, A.5.30, A.5.19–A.5.22, A.8.8, A.8.13, A.8.14 and A.8.25, with the full control mapping set out in Appendix B.
3. Scope
This policy applies to all Attestant information systems and operations, which fall into two domains:
Corporate Operations. Administrative systems including Google Workspace, internal communications platforms and documentation repositories. These support business functions but are not directly involved in validator signing operations.
Staking Infrastructure. All production and development validator infrastructure, including bare-metal servers, DIRK distributed signing nodes, Vouch validator clients, beacon and execution nodes, monitoring and alerting systems, and associated configuration-management systems. Attestant does not operate its own physical data centres; all infrastructure is deployed across multiple independent third-party bare-metal hosting providers, distributed across multiple geographic locations and jurisdictions to maximise resilience and reduce provider-concentration risk.
The following operating-model characteristics are material to this policy:
- All servers are bare-metal with Attestant’s own hardened build; no third-party managed cloud services or shared compute environments are used for validator operations.
-
The staking infrastructure is segregated into Pods. A pod typically comprises seven servers: two Vouch validator servers (a primary and a standby), each running the Vouch client together with multiple consensus and execution clients and holding everything required for attestation except signing; and five DIRK signer nodes. Off-the-shelf consensus and execution clients (for example Teku, Geth, Lighthouse) ship with built-in signing; Attestant disables that and deliberately separates signing onto the dedicated DIRK signers, which is what enables the 3-of-5 threshold model and its added security and resilience. The five signers in a pod are termed stripes (stripe 1 to stripe 5). Validator keys are distributed across many pods to provide additional resilience for clients.
-
No software other than the authorised Attestant build is permitted on any validator server. That build is produced and verified through the controlled secure-development and build-integrity process in Section 7.7.
-
Access to all infrastructure requires multi-factor authentication: authorised SSH public keys provisioned in advance; encrypted SSH authentication with a minimum 16-character passphrase; and FIDO2 hardware security keys.
-
No individual has access to the entirety of the validator fleet. Access is deliberately partitioned to prevent single-point compromise, internal or external.
-
Amazon Route 53 (AWS) is used for DNS only — the sole use of any hyperscaler managed service — with access tightly restricted to senior managers (see Sections 11.2 and 11.6).
4. Definitions
Emergency: Any unpredictable event — infrastructure failure, vendor outage, protocol vulnerability, network partition or security incident — that prevents normal validator operation or introduces material slashing risk.
Validator: An identity on the Ethereum network, activated by staked ETH, that earns rewards for its operator’s client by correctly performing signing duties — attesting and, when selected, proposing blocks. A validator is operated through software and a signing key; it is not a person.
Attestation: The routine vote a validator signs in each epoch on what it sees as the current head of the chain. Attesting correctly and on time earns rewards; signing two conflicting attestations is a slashable offence.
Slashing: A protocol-enforced penalty resulting in the permanent loss of a portion of staked ETH and forced exit of the affected validator from the Ethereum network.
DIRK (Distributed Remote Keymanager): Attestant's internally developed remote key-management and threshold-signing system, kept separate from the validator client so that those who operate the validator client hold no signing keys. A quorum of DIRK nodes (3 of 5) must participate to produce a valid signature; no single node can sign independently.
Vouch: Attestant’s internally developed multi-node validator client. Vouch coordinates signing requests to the DIRK clusters and maintains a standby instance within each Pod and a dedicated BCP instance outside the pod for extreme scenarios.
Beacon node: Software that runs a full copy of Ethereum’s consensus (proof-of-stake) layer. Vouch relies on beacon nodes to learn the current chain state and a validator’s upcoming duties; Attestant runs several, on different client implementations, for diversity and redundancy.
Execution node: Software that runs Ethereum’s execution layer — transactions and account state — paired with a beacon node. Attestant runs several execution clients for the same diversity and redundancy reasons.
Pod: A self-contained unit of Attestant’s staking infrastructure — typically seven servers: two Vouch validator servers (a primary and a standby) and five DIRK signer nodes (stripes 1 to 5). Validator keys are distributed across many pods, and a pod’s five signers operate the 3-of-5 threshold-signing quorum.
Stripe: Within a pod, each of the five DIRK signer nodes is a stripe (stripe 1 to stripe 5). Each stripe has a primary owner and a backup owner who hold its access credentials and the associated validator-key shard.
Critical Processes: Activities mandatory to prevent financial loss or protocol penalties: validator uptime, secure threshold signing, slashing-protection integrity and monitoring.
Slashing-Protection Data (EIP-3076): The record of a validator key’s prior signing history (highest signed attestation source/target epochs and block slots), held in the standardised EIP-3076 interchange format. Used to prevent a signer from producing a conflicting signature when it is restarted, rebuilt, migrated or promoted.
Inactivity (offline) penalty: The ordinary penalty for missing attestations while a validator is offline. It is broadly equal to the rewards foregone and is recovered over an equivalent period of uptime; it does not cause forced exit.
Inactivity Leak: A distinct protocol mechanism that activates only during network-wide non-finality (when the beacon chain fails to finalise for roughly four or more epochs, typically because over one third of all validators are offline). It is not triggered by an isolated outage of Attestant’s own validators.
Slot: A roughly 12-second interval in which a single block may be proposed; 32 slots make one epoch. Signing histories and slashing-protection checks are keyed to specific slots.
Epoch: A unit of beacon-chain time of 32 slots of ~12 seconds — approximately 6.4 minutes.
RTO / RPO: Recovery Time Objective — the target time to restore a service after disruption. Recovery Point Objective — the maximum acceptable loss of state, measured as a point in time before the disruption.
MTD: Maximum Tolerable Downtime — the outer time boundary beyond which the impact of disruption becomes unacceptable.
UAT: User Acceptance Testing — Attestant’s pre-production environment in which client and configuration changes are validated before deployment.
5. Roles and Responsibilities
BCM responsibilities are role-based; real names are maintained in the Attestant HR and access-control systems.
| Role | BCM Responsibilities | Authority |
|---|---|---|
| Chief Risk Officer (CRO) | Overall BCM ownership. Authorisation of intentional downtime; approval of restoration after major incidents; responsibility for client notifications. | May authorise BCP activation and restoration; leads where both the CRO and COO are available (see the delegation note in Section 5). |
| Chief Operating Officer (COO) | Operational ownership. Authorisation of intentional downtime; approval of restoration; client notifications, alongside the CRO. | May authorise BCP activation and restoration on the same basis as the CRO — either may act; the CRO leads when both are available. |
| Lead Engineer | Technical execution of recovery procedures; oversight of slashing-protection imports (run by a signer key-holder, SA-supervised); monitoring of quorum participation post-restoration; primary technical escalation. | Execute recovery runbooks; escalate for final approval |
| DevOps | Infrastructure provisioning and decommissioning; standby promotion under authorised runbooks; quorum-integrity checks; vendor liaison during outages. | Provision/decommission servers; manage quorum operations |
| All Staff | Prompt reporting of anomalies in validator performance, signing behaviour or system access to the CRO/COO or Lead Engineer; adherence to access controls at all times. | Incident-reporting obligations |
Delegation and succession of authority. Either the CRO or the COO may authorise any action requiring senior authorisation under this policy; where both are available, the CRO leads. If both the CRO and COO are unreachable within 30 minutes of a trigger, the Lead Engineer together with one other senior manager (a key-shard holder) are jointly authorised to approve restoration in accordance with the Safety-First philosophy, with the decision and rationale logged and reviewed by the CRO at the earliest opportunity. This ensures the plan is never blocked by the unavailability of a single individual. Deputy authorisers apply the same failover checklist and Safety-First decision test as the CRO/COO, and their competence to do so is maintained under the ISMS.
Monitoring and on-call coverage. Monitoring and alerting operate continuously. A 24/7 on-call rota ensures at least two suitably authorised engineers are available at any time; in line with Section 5 these engineers are geographically separated (for example one remote and one in the office) so that a single regional disruption cannot impair both responders. Out-of-hours alerts escalate to the on-call engineer and, for any trigger condition, to the CRO/COO via the incident contact register. Because corporate functions are cloud-based (Google Workspace), all staff retain remote access if the office is unavailable.
6. Continuity Philosophy — Safety First
Attestant’s approach is grounded in a single principle: the prevention of slashing takes precedence over the immediate restoration of validator uptime. The Ethereum protocol imposes irreversible, financially significant penalties for double-signing — submitting two valid but conflicting attestations or block proposals for the same slot. These penalties cannot be reversed, appealed or mitigated after the fact.
In any failure scenario where the current signing state of one or more validators cannot be verified with certainty — for example following an unexpected node restart, a network partition or a failover — the safe course of action is controlled downtime. A validator that is offline accrues modest, recoverable offline penalties; a validator that double-signs is slashed.
Accordingly, the CRO or COO may approve intentional temporary downtime for any portion of the validator fleet when signing state cannot be verified. No engineer may restore signing under ambiguous conditions without CRO or COO authorisation (or, where both are unavailable, the deputy authorisation defined in Section 5).
7. Automated Anti-Slashing Controls
Business continuity is reinforced through deterministic hardware and software controls designed to prevent double-signing under all normal and tested failure conditions. These controls operate independently of human intervention.
7.1 Signing Integrity and Durable Slashing-Protection State
Before producing any signature, every DIRK signer runs the request through a slashing-protection check: it compares the proposed operation against the validator's recorded signing history and refuses to sign anything that could cause a slashing event — a second block proposal for a slot already signed, or a double or surrounding attestation — regardless of the source of the instruction. This is a slashing-condition check, not merely a check for duplicate requests.
The signing history that underpins this check is written to durable, encrypted storage after every signature, in the standardised EIP-3076 format, so that it survives a restart, crash or rebuild; an in-memory copy is kept only to keep the pre-sign check fast. This durable record — not volatile memory — is the authoritative source of truth whenever a signer is restarted, rebuilt, migrated or promoted, and is the basis for the Recovery Point Objectives in Section 8. The control operates at the cryptographic layer and is not bypassable by ordinary operational error.
7.2 Threshold Signing Architecture (DIRK 3-of-5)
Signing operates on a threshold model: at least 3 of 5 DIRK nodes must independently co-sign a request before a valid signature is produced. Therefore:
-
Loss of one node has no effect on signing.
-
Loss of up to two nodes is tolerated — a quorum of three remains and signing continues uninterrupted.
-
No single compromised node can produce a valid signature.
-
Loss of three or more nodes simultaneously causes signing to cease — a safe failure mode — rather than degraded or incorrect signing.
DIRK nodes are distributed across multiple hosting providers and geographic locations to minimise the likelihood of correlated failure.
7.3 Vouch Operation
The Vouch validator client attests to the network only when the 3-of-5 DIRK quorum is achieved. If conflicting or anomalous data is detected in the signing responses from the DIRK cluster, Vouch will not attest.
7.4 Emergency Shut-Down (ESD) Daemon
In a worst-case scenario where any validators in a pod are slashed — most likely from a double-signing event — the Emergency Shut-Down (ESD) process detects the slashing and triggers an automatic shutdown to prevent any further slashing within the pod. ESD subscribes to the beacon node’s head-event stream (via the standard beacon API) and inspects each new head block for attester or proposer slashings; on finding one it checks whether the slashed validator is one of Attestant’s own and, if so, runs a pre-defined response script. Detection is event-driven and near-real-time — within a slot of the slashing being included on-chain — so ESD bounds any further slashing rather than the initial event. The response script immediately stops the Vouch validator client and raises a priority on-call alert. Only one Vouch instance is ever active for a pod at any time: the primary, the in-pod standby and a dedicated out-of-pod BCP instance are provisioned identically — ESD included — but the standby and BCP are held stopped and disabled until an operator deliberately activates one. Activation is a controlled, per-pod step that points the chosen Vouch at that pod’s signers and, in the same action, stops any other Vouch for the pod, so two instances can never sign for one pod at once. After an ESD shutdown none may resume: automated restart is never permitted, and re-activation requires the CRO or COO to authorise restoration once root-cause analysis is complete. This forces senior management to fully understand the nature of the event and the controls implemented to ensure it cannot recur before any validator returns to service.
7.5 Client Diversity — Consensus and Execution
Reliance on a single client implementation is a systemic risk to the Ethereum network and to Attestant clients specifically: a critical vulnerability in a client in use could cause mass slashing across affected validators. Attestant therefore runs an active client-diversity strategy across multiple consensus client implementations (currently Prysm, Teku, Lighthouse and Nimbus) and multiple execution client implementations (such as Geth, Nethermind, Besu, Erigon and Reth), configured through Vouch.
Attestant’s diversity strategy ensures that Vouch never attests to the chain on the strength of a single client’s view alone. Vouch is configured with a majority attestation-data strategy: it requests the attestation data from the four independent consensus clients and will only attest when at least two of them agree, so Attestant never lends its attestation weight to a single client’s unverified view. Block proposals likewise draw on all available clients, taking the best valid proposal. This protects both client rewards and the broader network against a single client’s consensus fault.
Threat-intelligence sourcing. Timely detection of a client vulnerability depends on intelligence. Attestant monitors client release and security channels, the Ethereum security disclosure lists, and relevant CVE feeds (A.5.7); the Lead Engineer owns this monitoring and initiates Trigger 4 where required.
On identification of a critical vulnerability in a client in active use, the BCP trigger requires: immediate suspension of the affected client in the Vouch configuration across all validators (or, where appropriate and after UAT testing, immediate application of a vendor fix); emergency migration of affected validators to a pre-tested alternative implementation by updating the Vouch configuration across all pods; and post-migration verification of slashing-protection data, validated in UAT, before attestations resume.
7.6 Validator Key Protection and Key-Shard Lifecycle
Validator signing keys are secured exclusively through DIRK’s threshold-signing architecture. Keys are never stored in plaintext backups, never written to disk unencrypted, and never held in a centralised location. Continuity is achieved through quorum resilience: while a sufficient number of DIRK nodes remain operational, signing continues.
Validator keys cannot move funds. A validator (signing) key can only attest and propose; it has no power to move staked ETH. The withdrawal keys that control the movement of funds are held by clients, not by Attestant. Consequently, even a total compromise of Attestant's signing infrastructure could cause slashing or downtime, but could never transfer or steal client funds.
-
Validator keys are generated by a distributed key-generation (DKG) ceremony, initiated by the ethdo tool from an operations server — which contacts the signers to start the process but never holds the key or any shard. The five signers then run the DKG among themselves, each independently deriving and keeping its own shard; the full key is never built on one machine and divided, and never exists in any single place — including the initiating tool — even at creation. The signers communicate only during generation (and any later re-share); in normal signing operation they do not communicate with one another, each responding independently to Vouch. DKG is run in bulk and in advance, and has been performed only twice in Attestant’s history, to minimise opportunities for key compromise. This deliberately avoids the model used by Shamir secret sharing — in which the full private key must be present so that a trusted party can split it — and the rationale is recorded in Attestant’s 2022 R&D submission, which states that distributed key generation was adopted specifically to gain threshold resilience “without the drawback of relying on a trusted party to create the shares.”
-
Each pod's validator key exists only as the threshold shards produced by that DKG ceremony — one per signer (stripe) — distributed across the stripe owners; the key is never held whole on any machine. Every stripe has a primary and a backup owner, and no single person holds enough shards to reach the 3-of-5 signing threshold.
-
Shard custody. Validator-key shards must never reside on a person's laptop/MacBook. Each shard is held offline on an externally-encrypted SSD, with the passwords needed to mount and decrypt the device kept in the holder's Apple Keychain. Each holder keeps two copies of their shard SSD — a primary and a backup — stored at separate physical locations.
-
Hardware keys. Each key-holder has a primary and a backup FIDO2 hardware key; the two hold different private keys, and both corresponding public keys are registered on the signer, so either key can authenticate the holder.
-
Separation of stripe ownership. No individual may have access to more than two of a pod's five stripes. Because a backup owner holds the same access to a signer as the primary owner, what matters is the number of stripes a person can reach — not the primary/backup label: capping each individual at two stripes keeps everyone below the three-stripe count that would reach the 3-of-5 signing quorum, so no single person can ever assemble enough access to sign alone. This segregation has applied since the system was formed. Adherence to the two-stripe limit is verified through the quarterly access review (Section 11.3), which cross-matches the SSH public keys deployed on each signer against the authorised stripe-ownership matrix held in the change-controlled Ansible configuration, together with the Key Shard Custody Register — maintained by the Information Security Committee, with a working copy derived from it in the operational Server Info register used by the operations team — which records each stripe’s primary and backup SSH-key and validator-shard holders. Access to the register is on a need-to-know basis; knowing a holder’s identity confers no access to a signer, which additionally requires that holder’s SSH key and FIDO2 device.
-
Operational access (“bringing in keys”). When work is required on one or more signers, the relevant stripe owners physically bring in their encrypted shard SSDs together with their FIDO2 hardware keys; signer access is otherwise not possible.
-
No single employee holds or can access the threshold number of DIRK nodes within a pod required to cause an internal slashing event.
-
Access to the DIRK signer nodes requires multi-factor authentication with FIDO2 hardware security keys, and is restricted to the signer key-holders.
-
Signer provisioning and lock-down. New signer hardware is provisioned and built by the operations / SA team using root credentials supplied by the hosting provider, including any low-level configuration (for example BIOS or RAID settings) that the build scripts cannot yet fully generalise. The final build step runs Attestant’s Ansible scripts, which install the DIRK and internal monitoring software, remove all root passwords, and install only the authorised SSH public keys. A signer key-holder then logs on and runs a supplied verification script that confirms all root access has been removed and that the installed public-key list exactly matches the Ansible vault — the formal hand-over to locked-down operation.
-
Live-signer access and changes. From that hand-over the signer is accessible only to key-holders (an authorised SSH private key together with a FIDO2 hardware key) — the operations / SA team can no longer log on. Changes to a live signer are rare and are carried out by a key-holder running a pre-tested, reviewed script under SA supervision (four-eyes); the SA directs the change but has no access to the box.
Rebuilding a DIRK signer — slashing-protection handling. When a replacement DIRK signer is created for an existing validator key, it does not start from a blank history. Its slashing-protection state is re-established and its integrity verified before the signer is permitted to sign. Because the 3-of-5 distribution tolerates the loss of one or two signers with no loss of history, in the usual case the authoritative EIP-3076 record retained within the surviving pod is imported; the import is performed only while the signer is stopped, and the slashing-protection store never regresses — an imported record older than the existing protection is rejected, so the state can only tighten, never weaken. As a further safeguard — and the sole safeguard in the rare event that an entire pod is lost and no prior record survives — the replacement node observes the chain for a minimum of five epochs (~32 minutes) so that any signature not present in its record is seen on-chain before the node is added to DNS and made visible to the Vouch instances in the pod. Together these steps prevent a rebuilt signer from signing a slot for which a conflicting signature may already exist, and they rely on the surviving quorum’s durable on-disk state and on-chain reconciliation rather than any off-box backup of the signing store. Rebuilding requires the 3-of-5 senior-manager shards and follows the same provisioning and lock-down sequence: the operations / SA team provision and lock down the replacement hardware, and the senior-manager shard-holders then complete the DIRK re-initialisation and key-holder verification, after which the SA team has no access to the live signer.
Shard-holder lifecycle. The custody of key shards is managed across its lifecycle: shards are issued on appointment of an authorised senior manager and securely revoked or rotated on departure, role change, suspected compromise or loss of a shard. Any such event triggers a documented assessment of whether a re-share or fresh DKG ceremony is required to maintain the 3-of-5 threshold. Each shard is held under defined secure storage, and a tested recovery path exists for the loss of any single shard. The leaver/joiner process is cross-referenced to the HR and access-control procedures (A.6.5).
7.7 Secure Development and Build Integrity
Because the authorised Attestant build and the in-house DIRK and Vouch software are the trust anchors of the entire architecture, their integrity is governed as a continuity control. DIRK and Vouch are developed under a secure development lifecycle (A.8.25, A.8.28): peer code review, dependency and supply-chain management, and testing with promotion gated through UAT. Build images are produced by a controlled, reproducible pipeline and are signed; only signed, provenance-verified images may be deployed, and provenance is verified before any server joins a pod (A.8.9, A.8.19). Changes to the build follow the ISMS change-management process. This prevents a defective or tampered build becoming a single point of correlated failure across pods. Third-party client binaries (execution and consensus clients) are obtained only from official sources, pinned to a specific version and SHA-256 checksum in the change-controlled deployment configuration, and verified against that checksum on download; a mismatch aborts the deployment.
7.8 Planned Maintenance and Rolling Upgrades
The 3-of-5 threshold architecture also lets Attestant maintain and upgrade its infrastructure without downtime or slashing risk. DIRK signers are patched and upgraded one at a time: a signer is stopped, upgraded and restarted while the remaining signers continue to meet the quorum, and the restarted signer is observed for two epochs (~13 minutes) — long enough to confirm its keys are signing correctly — before the next signer is taken out. Beacon nodes are upgraded the same way: because Vouch draws on multiple beacon nodes, any one can be taken offline and upgraded while Vouch continues uninterrupted on the others. Routine maintenance and, importantly, the prompt application of security patches (A.8.8) are therefore carried out as planned changes, with no interruption to signing and no exposure to slashing.
8. Recovery Objectives
| System Domain | Recovery Time Objective (RTO) | Recovery Point Objective (RPO) |
|---|---|---|
| Validator Infrastructure | < 30 minutes to resume where signing has not ceased (quorum maintained, no slashing risk). Where signing has ceased, recovery is by rebuild and the time depends on the type of rebuild (see the notes below): single-signer and Vouch rebuilds are quick, whereas a full-pod rebuild is a rare, people-paced operation on the order of 12 hours or more (see the notes) — there is no fixed sub-hour target for it. | Near-zero in steady state (quorum maintained) — the surviving signers retain the full slashing-protection record on durable storage, so losing one or two signers loses no state. Under total-pod loss the rebuilt signer reconciles against the chain (observing 5 epochs, ~32 minutes, before it signs; Section 7.6) rather than restoring from an off-box backup — there is none for the signing store, and none is required. |
| DIRK Signing Cluster | Immediate (while quorum ≥ 3-of-5 is maintained) | Zero while quorum is maintained — the threshold architecture removes single-node data dependency. Under correlated or total-pod loss the recovery point is the surviving quorum’s on-disk record, or on-chain reconciliation where no record survives (see Validator Infrastructure). |
| Quorum Restoration | Two distinct cases. Topping a still-maintained quorum back up to full strength does not interrupt signing and is routine. A full-pod rebuild after total quorum loss — when signing has already ceased — is rare and is paced by physically assembling the required stripe key-holders with their offline shards and hardware keys; it is therefore on the order of 12 hours or more — paced by the Vouch build (execution-client re-synchronisation, the bulk of the time) and by assembling the stripe holders — not a sub-hour target. Restoring signing requires at least the 3-of-5 shards. | Zero — new nodes re-join the quorum; slashing-protection data is imported and verified before signing. |
| Corporate Systems | 4 hours | Independent third-party backup (Afi) of Workspace data to a separate store (not Google’s native retention alone); recovery point per that backup’s schedule, recorded in the ISMS. |
Notes on recovery objectives:
-
Not all rebuilds are equal, and only the rarest needs the full team. Losing one or two signers does not stop signing — the 3-of-5 quorum continues — and the affected signer is rebuilt by its stripe key-holder without time pressure. A Vouch rebuild involves no key material: failing over to a pre-authorised standby Vouch is an operations task, while standing up a new Vouch identity needs a key-holder-supervised change to the signers’ allow-list. Only a full-pod rebuild — all signers lost, signing already ceased — requires several stripe key-holders to be physically assembled with their offline shards and hardware keys; it is rare and paced by that assembly, not by a technical target. On the build times recently observed, a Vouch server takes on the order of 12 hours — most of it the execution clients re-synchronising to the chain — and a DIRK signer about 6 hours, including the lock-down sequence even with the stripe key-holder already online. A full-pod rebuild is paced by the slowest element (a Vouch server) and by assembling the stripe holders, so it is on the order of 12 hours or more.
-
Crucially, these rebuild times sit on the critical path only in an extreme, correlated loss. A Vouch server can be lost with no interruption to signing: the pod’s standby Vouch — and, if needed, the dedicated out-of-pod BCP Vouch — carries signing while the failed server is rebuilt in the background, and the Vouch rebuilds performed to date have been completed with no impact to validator operations. For the 12-hour Vouch build to delay recovery at all, a pod would have to lose its primary, its in-pod standby and its out-of-pod BCP Vouch at the same time — a correlated, cross-location failure the redundancy exists to prevent (and, for a full-pod outage, the 3-of-5 DIRK quorum on top of that). In normal operation a Vouch or single-signer rebuild therefore causes no downtime; the measured build times bear on recovery only in a near-total simultaneous loss.
-
The near-zero RPO in steady state is a structural property of the DIRK threshold architecture: the slashing-protection state is held on durable storage across the quorum, so no single-node loss costs state. In a total-pod loss the authoritative recovery point is the chain itself — the rebuilt signer reconciles against it before signing — rather than an off-box backup of the signing store, which Attestant deliberately does not keep.
-
The 30-minute RTO is contingent on there being no ambiguity about signing state. Where ambiguity exists, the wait period (minimum 2 epochs, ~13 minutes) must be observed before restoration is permitted.
-
Maximum Tolerable Downtime for validator operations is 24 hours. This reflects the point at which foregone client rewards, and contractual and reputational impact, become material — it is not driven by the protocol inactivity leak, which applies only during network-wide non-finality and is outside Attestant’s control. It is set with margin over the measured worst case: a full-pod rebuild is paced by the Vouch build (on the order of 12 hours) and by assembling the stripe holders, and so sits comfortably within this window. That window is only ever reached in an extremely rare event — a pod losing both of its Vouch servers and the dedicated off-site BCP Vouch at the same time (and, for a full-pod outage, the 3-of-5 DIRK quorum as well). Resilience is a first-class design goal alongside security: two Vouch servers per pod plus an off-site BCP instance exist precisely to keep effective operational downtime far below this boundary. Where a client agreement cites a downtime figure, it is understood as expressing tolerance for effective operational downtime — an inability to validate — rather than the time to rebuild any single component, which the redundancy renders an extremely improbable cause of actual downtime. The basis for this figure is maintained with the Business Impact Analysis (Section 10).
-
Quorum restoration provisions new bare-metal instances from hardened, provenance-verified builds, following the internal DIRK re-initialisation protocol; no key material is exposed during this process and the 3-of-5 senior-manager shards are required.
9. BCP Trigger Criteria
The following conditions are formal triggers for BCP invocation. Detection of any trigger must be reported to the CRO or COO immediately, regardless of time of day; the CRO or COO declares a BCP event and initiates the appropriate response.
| # | Trigger Condition | Classification | Initial Action |
|---|---|---|---|
| 1 | DIRK quorum falls below 3-of-5 nodes | Critical — Signing Failure | Vouch auto-shutdown; CRO/COO notified immediately |
| 2 | Validator inactivity exceeds one epoch without a confirmed infrastructure cause | High — Inactivity Risk | Lead Engineer investigates; CRO/COO alerted if unresolved within 15 minutes |
| 3 | Confirmed or suspected double-signing event | Critical — Slashing Risk | Immediate isolation of affected infrastructure; CRO/COO invokes BCP |
| 4 | Critical bug identified in a consensus or execution client in active use | Critical — Client Vulnerability | CRO/COO authorises emergency client migration to a diverse implementation |
| 5 | Hosting-provider outage affecting one or more jurisdictions | High — Infrastructure Outage | DevOps assesses quorum impact; redundant providers assumed active |
| 6 | Attempted or confirmed unauthorised access to signing infrastructure | Critical — Security Breach | Immediate isolation; Lead Engineer and CRO/COO convene; law enforcement considered |
| 7 | Loss of monitoring visibility across a material portion of the fleet | Medium — Detection Impairment | Lead Engineer restores monitoring; escalate to CRO/COO if not resolved within 30 minutes |
| 8 | Network partition isolating a region containing signing nodes — i.e. a loss of connectivity between regions such that signing nodes cannot communicate with the rest of the quorum, creating a risk of ambiguous signing state | High — Quorum Integrity Risk | Assess quorum availability; if state is ambiguous, enforce the wait period before any restoration |
| 9 | Suspected compromise or loss of a senior-manager key shard, or compromise of the build pipeline | Critical — Trust-Anchor Risk | Isolate; CRO/COO convene; assess need for re-share/DKG (7.6) or build re-issue (7.7) |
| 10 | Total or material corporate-systems outage (e.g. Google Workspace) impairing incident coordination or client communication | Medium — Corporate Outage | Switch to the out-of-band WireGuard document server and contact register (Section 10.4); restore corporate services. Validator signing is unaffected. |
10. Business Impact Analysis
Impact severities below are derived from financial exposure (loss of client principal for slashing; foregone rewards for downtime), client contractual commitments and reputational impact; quantified figures are maintained alongside this analysis in the ISMS risk register and inform the recovery objectives in Section 8.
10.1 Slashing
Critical severity. Slashing causes direct, irreversible financial loss to clients (reduction of staked ETH principal), forced validator exit and significant reputational damage. The asymmetry — a brief operational error can cause a loss that dwarfs extended downtime penalties — is the primary driver of the Safety-First philosophy.
10.2 Inactivity / Downtime
High severity, but recoverable. While a validator is offline it incurs ordinary missed-attestation penalties that are broadly equal to the rewards foregone and are recovered over an equivalent period of uptime; downtime does not cause forced exit. This is distinct from the protocol inactivity leak, which applies only during network-wide non-finality. Because downtime is recoverable, it never justifies actions that introduce slashing risk.
10.3 Monitoring Degradation
Medium severity. Loss of monitoring does not directly cause financial loss but materially impairs Attestant’s ability to detect and respond to other failures. Monitoring is treated as essential support infrastructure and restored with high priority.
10.4 Corporate System Outage
Low severity from a staking-continuity perspective (4-hour RTO acceptable). Email, communications and documentation outages do not impair validator operations. Extended unavailability could affect incident coordination and client communication, but these have an out-of-band fallback — the incident contact register (Section 13.1) — so a corporate-systems outage does not block escalation or client notification. The incident contact register, this policy and the core recovery runbooks are additionally held out-of-band on Attestant’s WireGuard-protected internal documents server — bare-metal infrastructure independent of Google Workspace and reached without Google sign-in — so the documents needed to run an incident remain available even if Workspace is unavailable; the wider corporate document set resides in Workspace and is recoverable from the Afi backup. The 4-hour figure reflects the Google Workspace dependency, not Attestant’s only means of communicating.
11. Infrastructure Resilience
11.1 Multi-Vendor, Multi-Jurisdiction Model
Infrastructure is deployed across multiple independent hosting providers in multiple jurisdictions so that no single provider failure, regional outage or localised disaster can impair the signing quorum. No single provider hosts more than 40% of the validator fleet — a consequence of the per-pod rule (below) that no provider holds more than two of a pod's five signers. Provider selection and concentration are reviewed on an ongoing basis and at the annual BCM review (see Section 12).
Per-pod placement (signers and validators). Each pod’s five DIRK signers are placed so that no single hosting provider holds more than two of them and no single jurisdiction holds three or more, giving the 3-of-5 quorum tolerance to the loss of any single provider or jurisdiction. The same diversity principle applies to the rest of the pod: a pod’s Vouch validator servers (primary and standby) are placed on different hosting providers, in different data centres, and in different geographical regions — in Europe a different country/jurisdiction, and in the USA a different state — so that no single provider, facility or regional outage can disable both. Where a documented data-residency obligation requires a pod to remain within one jurisdiction, that pod is operated as a recorded exception: the limit of two signers per provider still applies and the five signers are distributed across several independent providers and physically separate facilities, so that no single provider, facility or localised outage can take the pod below quorum; the residual single-jurisdiction risk is assessed, accepted and recorded in the ISMS risk register, owned by the CRO. The per-pod distribution of all signing and validator servers across providers, locations and jurisdictions is maintained as evidence and reviewed at each BCM cycle.
11.2 Bare-Metal Control
All validator infrastructure runs on dedicated bare-metal servers using Attestant’s own hardened build. No third-party managed compute, containerised cloud services or shared infrastructure are used for any signing-related function, removing exposure to noisy-neighbour effects, hypervisor vulnerabilities and provider-side configuration changes affecting validator behaviour.
The only exception is DNS, for which Amazon Route 53 is used. Route 53 is isolated from the steady-state signing path; its unavailability does not impair ongoing DIRK threshold signing or Vouch attestation. DNS is, however, used during recovery to make replacement DIRK nodes visible to Vouch; this recovery-path dependency is mitigated by low record TTLs and a documented static-resolution fallback for Vouch-to-DIRK discovery, and the use of a single DNS provider is a recorded, risk-accepted item (see Section 11.6).
11.3 Access Control
Access to all servers requires multi-factor authentication including FIDO2 hardware security keys. No individual holds credentials to the entirety of the fleet; access is partitioned by function and reviewed quarterly. All access events are logged and monitored.
11.4 Backup and Durable State
Off-box backup supports recovery of operational and configuration state. The following are backed up to an independent, encrypted off-site store, with the last successful restore test recorded for audit. The validator signing / slashing-protection store is deliberately not among them — its resilience is structural (Sections 7.1, 7.6 and 8) and it requires no off-box backup:
-
Operational database & mappings: the operations database, including the validator-key-id→customer-id mapping. The customer-id→customer-record mapping is held separately, so validator data and client identity are never co-located in one store.
-
Configuration & images: DIRK and Vouch configuration, monitoring/alerting configuration, hardened build images, and the source repositories.
-
Incident records: Incident logs (retained for a minimum of three years per Section 13.3).
The full validator key is never assembled on any machine — not when it is first generated (it is created distributively across the five signers, never built whole and divided) and not in any backup. It exists only as encrypted threshold shards (Section 7.6); individual shards are kept offline by their owners, but no single shard is the key and no backup ever brings the shards together, so no backup can become a single point of compromise. This control maps to A.8.13.
11.5 Beacon and Execution Nodes
Vouch depends on beacon and execution nodes for attestation duties. Attestant maintains redundant beacon and execution nodes across providers and regions, with diversity across execution-client implementations as well as consensus clients (Section 7.5), so that the failure or defect of any single node or client implementation does not halt attestation (A.8.14).
11.6 Cloud Services
Although validator signing uses no managed cloud services, Attestant relies on Amazon Route 53 (DNS) and Google Workspace (corporate). These are governed as cloud services under A.5.23: access to the Route 53 zone is restricted to senior managers and changes are logged; Google Workspace is governed by tenant security configuration, enforced MFA and the provider’s assurance reporting, and an independent third-party backup (Afi) of Workspace data to a separate store so that recovery does not rely on Google’s native retention alone. Afi is itself accessed through Google single sign-on (it holds no separate password of its own), so access to the Afi backup depends on Google identity being available; this dependency is recorded as a risk-accepted item in the ISMS risk register and, for the documents needed during an incident, is mitigated by the out-of-band copy described in Section 10.4.
12. Third-Party Dependencies and Supplier Management
Attestant’s operations involve a deliberately limited set of third-party dependencies. The table identifies critical dependencies and their continuity controls, supporting compliance with A.5.19–A.5.22.
| Dependency | Role in Staking Operations | Continuity Control |
|---|---|---|
| Bare-metal hosting providers (multiple) | Dedicated physical servers across jurisdictions and vendors | No single provider hosts more than 40% of the fleet (a consequence of the per-pod two-per-provider rule); onboarding security assessment and right-to-audit where feasible; annual SLA review; documented exit/migration plan with target migration RTO; outage of one provider does not impair quorum. |
| DNS — Amazon Route 53 | External DNS resolution | Isolated from steady-state signing; used in recovery for node discovery, mitigated by low TTLs and a static-resolution fallback; single-provider DNS recorded as a risk-accepted item. |
| Ethereum Consensus Layer (public network) | Beacon-chain consensus and attestation duties | Consensus-client diversity (7.5); protocol-upgrade schedules monitored. |
| Ethereum Execution Layer (public network) | Transaction execution and state required for validation and block production | Execution-client diversity (7.5); protocol-upgrade schedules monitored. |
| Consensus & execution client developers (e.g. Lighthouse, Teku, Nimbus; Geth, Nethermind, Besu) | Third-party open-source software supply chain underpinning the diversity strategy | Diversity across implementations; release and security channels monitored (A.5.7, A.5.21); updates tested in UAT before rollout. |
| DIRK (Attestant-developed) | Threshold signing and key management | In-house; secure development and build integrity (7.7); source under version control. |
| Vouch (Attestant-developed) | Multi-node validator client coordination | In-house; standby and dedicated BCP instances per pod, held stopped until deliberately activated (only one active at a time). |
All hosting-provider agreements are subject to annual review and must contain Attestant’s required security terms (A.5.20). Attestant permits no single provider to hold a controlling share of validator nodes. Provider performance, incident history and any changes to their services are reviewed as part of the annual BCM cycle (A.5.22).
13. Communication and Escalation
13.1 Internal Escalation
Any staff member who identifies or suspects a trigger condition must notify the CRO/COO and Lead Engineer immediately via the primary communication channel. If that channel is unavailable, the designated out-of-band method in the Attestant incident contact register must be used. The CRO or COO declares a formal BCP event.
13.2 Client Notification
For a confirmed slashing event or any incident causing material validator downtime, the CRO (or COO) notifies affected clients, in line with contractual commitments (Section 2):
-
Confirmed slashing event: notification within 4 hours of confirmation.
-
Validator downtime exceeding RTO: notification within 24 hours of the RTO breach.
-
Extended outage or major incident: interim updates as appropriate until resolution.
Client notifications are recorded in the incident log alongside all technical actions; notification content is reviewed by the CRO before transmission.
13.3 Incident Logging and Evidence
All BCP events are logged in Attestant’s incident-management system from detection through closure, capturing: time of detection; trigger condition; actions taken; personnel involved; CRO/COO decisions and authorisations; client notifications; and post-incident findings. This procedure operates under the ISMS incident-management controls (A.5.24–A.5.27). For security incidents, evidence is preserved with appropriate chain-of-custody (A.5.28). Incident logs are retained for a minimum of three years and form the primary evidence base for BCM testing reviews and external audits.
14. Emergency Action Process
The CRO or COO, with senior management, manages responses to all critical incidents. The following applies to every BCP activation:
- Detection: evaluate validator state, signing activity, quorum integrity and monitoring outputs to confirm the trigger and assess severity.
-
Isolation: if double-signing risk exists or cannot be excluded, immediately isolate affected infrastructure from the signing path. Vouch shutdown may be automatic or manual.
-
Client mitigation: if the trigger is client-specific, initiate emergency migration to a diverse implementation per Section 7.5.
-
Wait period: if signing state is ambiguous, enforce a minimum wait of 2 epochs (~13 minutes) before any restoration; may be extended at CRO/COO discretion.
-
Restoration: resume signing only after (a) original-instance termination is confirmed; (b) EIP-3076 slashing-protection data has been imported and verified; (c) quorum integrity is confirmed; and (d) the CRO or COO (or the Section 5 deputy authorisers, if both are unavailable) has given written authorisation.
-
Post-incident review: within 5 business days of closure, document root cause, response effectiveness and recommended changes, and raise any corrective actions in the ISMS register (Section 15.4).
15. Testing and Review
15.1 Annual Testing
Attestant conducts annual BCM drills covering at least the following scenarios:
-
DIRK safe cessation: simulate loss of 3 of 5 signing nodes and verify auto-shutdown and recovery.
-
DIRK resilience: simulate loss of 2 of 5 signing nodes and verify signing continues uninterrupted.
-
Validator-client migration: execute an emergency migration from one consensus or execution client to another.
-
Client-vulnerability response: tabletop exercise simulating discovery of a critical client bug and execution of the diversity trigger.
-
Hosting-provider outage: simulate loss of all nodes at one provider and verify quorum is maintained.
-
ESD path: trigger the ESD daemon and verify the primary, standby and BCP Vouch instances are inhibited and that controlled restoration requires CRO/COO authorisation.
-
Signer rebuild: rebuild a signer and verify its slashing-protection state is re-established (imported from the surviving pod and reconciled against the chain) before signing.
-
Key-personnel unavailability: verify recovery with alternative authorised engineers, and verify the Section 5 deputy authorisation path when both CRO and COO are unavailable.
-
Key-shard availability: rebuild a pod with one shard-holder unavailable, confirming the 3-of-5 threshold still permits recovery.
-
Network partition (Trigger 8): simulate regional isolation that creates ambiguous signing state; verify controlled downtime, enforcement of the wait period, and no double-sign when the partition heals.
-
Intrusion response (Trigger 6): tabletop a suspected or confirmed unauthorised access to signing infrastructure, covering isolation, evidence preservation and escalation.
-
Trust-anchor compromise (Trigger 9): tabletop the loss of a senior-manager key shard (re-share / DKG) and a compromised build pipeline (signed-image re-issue and blocking unverified builds from joining a pod).
-
DNS fallback: rebuild a signer with Route 53 unavailable, exercising the static Vouch-to-DIRK resolution fallback.
-
Monitoring blindness (Trigger 7): drop monitoring and telemetry visibility across a pod (technical simulation) and verify that signing state can still be confirmed via the beacon API and on-box checks, that the team falls back to manual verification safely, and that monitoring is restored within target.
A trigger-to-test matrix is maintained that maps every trigger in Section 9 to its exercise type — live drill, technical simulation or tabletop — and the date last performed; not every trigger is exercised live each year.
15.2 Test Documentation
All tests are documented with: date; scenario; participants; observed response timelines; comparison against RTO/RPO targets; and identified gaps or improvements. Test reports are retained as part of the ISMS evidence record.
15.3 Policy Review
This policy is reviewed annually and following any of: a live BCP activation; a material change to the Ethereum consensus protocol or client landscape; a change in hosting-provider arrangements; a significant security incident; or any regulatory or contractual change affecting continuity obligations. The CRO initiates and completes each review cycle.
15.4 Continuity Objectives and Metrics
Attestant maintains measurable continuity objectives, reviewed at the BCM cycle (ISO 27001 clauses 6.2 and 9.1): mean time to detect a trigger condition; drill RTO/RPO pass rate against the Section 8 targets; number of double-sign attempts prevented by automated controls; and percentage of planned drills completed. Post-incident and drill findings are raised in the ISMS corrective-action register and tracked to closure under clause 10.2 (nonconformity and corrective action), feeding the continual-improvement loop (clause 10.1).
Appendix A. Anti-Slashing Failover Checklist
This checklist must be completed and signed off whenever validator instances are migrated, standby servers are promoted, or any change is made to active signing infrastructure. No step may be skipped without CRO written authorisation. The completed checklist must be attached to the relevant incident or change record. Where this checklist calls for CRO or CRO/COO authorisation or verification, the Section 5 deputy authorisers (the Lead Engineer together with a senior key-shard holder) may act in their place when both the CRO and COO are unavailable — applying the same Safety-First decision test, with the decision and rationale logged for CRO review.
ESD pre-condition (mandatory before any step below): if the restoration follows an Emergency Shut-Down (ESD) event, the completed root-cause analysis and explicit CRO/COO ESD-clearance must be attached, and the primary, standby and dedicated BCP Vouch instances confirmed inhibited and unable to auto-restart, before Step 1 begins. The anti-slashing gates in this checklist — isolation/termination (Step 1), the ambiguous-state wait (Step 3), the EIP-3076 import and integrity verification (Step 5) and the quorum check (Step 6) — are not waivable for uptime pressure.
Incident / Change Reference: ______________________
Date: ______________________ Lead Engineer: ______________________
| Step | Action Item | Responsibility | Verified By | Status |
|---|---|---|---|---|
| 1 | Primary-node termination: verify the original bare-metal instance is fully decommissioned or network-isolated and cannot produce signatures. | Lead Engineer | CRO | [ ] |
| 2 | Quorum verification: confirm remaining DIRK nodes show no conflicting signatures in their signing databases. | DevOps via monitoring; signer key-holder (SA-supervised) for any on-box check | Lead Engineer | [ ] |
| 3 | Enforce wait period: if validator state is ambiguous, enforce a minimum downtime of 2 epochs (~13 min). This wait may be extended but is not waivable for uptime pressure; it may be recorded ‘not applicable’ only where the Lead Engineer confirms signing state is verifiably no longer ambiguous, countersigned by the CRO/COO. | CRO/COO | CRO/COO | [ ] |
| 4 | Standby promotion: initialise standby bare-metal server using only authorised, hardened, provenance-verified Attestant build images. | DevOps | Lead Engineer | [ ] |
| 5 | Import slashing protection: import the EIP-3076 slashing-protection record into the new instance and verify integrity before enabling signing. | Signer key-holder (FIDO2) | Supervising SA (four-eyes) | [ ] |
| 6 | Threshold audit: monitor the new instance’s participation in the 3-of-5 quorum; confirm correct signing and no anomalous output. | Lead Engineer | DevOps | [ ] |
| 7 | Client-diversity check: confirm the restored fleet creates no undue concentration in a single consensus or execution client. | Lead Engineer | CRO | [ ] |
| 8 | Final authorisation: review all logs for integrity errors, anomalous signing or quorum conflicts. CRO/COO provides written authorisation before full operation resumes. | CRO/COO | CRO/COO | [ ] |
CRO/COO Signature: ______________________ Date & Time of Authorisation: ______________________
Appendix B. ISO/IEC 27001:2022 Control Mapping
This document contributes to compliance with the following Annex A controls:
| Control | Title | Coverage in this Document |
|---|---|---|
| A.5.7 | Threat intelligence | 7.5 (client-vulnerability intelligence sourcing) |
| A.5.17 | Authentication information | 3, 11.3 (MFA, FIDO2) |
| A.5.19 | Information security in supplier relationships | 12 |
| A.5.20 | Addressing security within supplier agreements | 12 (required security terms in provider agreements) |
| A.5.21 | Managing ICT supply chain | 7.5, 12 (consensus/execution client developers) |
| A.5.22 | Monitoring, review and change management of supplier services | 11.1, 12 (annual provider review) |
| A.5.23 | Information security for use of cloud services | 11.6 (Route 53, Google Workspace) |
| A.5.24–A.5.27 | Information security incident management | 13.3, 14 |
| A.5.28 | Collection of evidence | 13.3 (evidence preservation / chain-of-custody) |
| A.5.29 | Information security during disruption | 6, 7, 14 |
| A.5.30 | ICT readiness for business continuity | 8, 11, 15 |
| A.5.31 | Legal, statutory, regulatory and contractual requirements | 2 (obligations register) |
| A.5.34 | Privacy and protection of PII | 2, 11.4 (UK GDPR/ICO; customer-data separation) |
| A.6.5 | Responsibilities after termination or change of employment | 7.6 (shard-holder leaver process) |
| A.8.8 | Management of technical vulnerabilities | 7.5 |
| A.8.9 | Configuration management | 7.7 (build/config control) |
| A.8.13 | Information backup | 11.4 |
| A.8.14 | Redundancy of information processing facilities | 7.2, 11.1, 11.5 |
| A.8.15 | Logging | 11.3, 13.3 |
| A.8.16 | Monitoring activities | 5 (24/7 monitoring), 10.3 |
| A.8.19 | Installation of software on operational systems | 3, 7.7 (authorised build only) |
| A.8.24 | Use of cryptography | 7.1, 7.6 (threshold signing, key shards) |
| A.8.25 | Secure development life cycle | 7.7 |
| A.8.28 | Secure coding | 7.7 |
END OF DOCUMENT — BC.PR.01 Rev 7 (Working Baseline) · Attestant Ltd · 29 June 2026
Common tasks
Public Website
Deploy to Production via workflow
The Attestant website uses GitHub workflows to control the build and deployment of the website to AWS. To deploy the website do the following:
-
Create a GitHub issue to cover the work using the templates.
-
Work locally against a new branch until the website is ready for deployment to the staging environment.
-
Create a Pull Request against the issue to enable the staging environment to be utilised by the standard workflows.
-
Correct any build issues (linting etc) and note that if Lint Commit fails the build, you will need to amend the git commit messages as follows (see the GitHub documentation for more details) :
git rebase -i HEAD~4 # Amend the 4 most recent messages
Within the interactive session either delete the pick line with the offending message (assuming another commit exists containing the changes) or replace the word pick with reword and make the change. As an example:
pick f7f3f6d Change my name
reword f7f3f6d fix: change my name for #123
When rewording you will need to save and exit the editor (e.g. ESC:wq in vim). In each resulting commit file, type the new commit message, save the file, and close it.
Finally, force push the changes to the upstream repository:
git push --force origin EXAMPLE-BRANCH
-
Once the build is complete it will deploy to the staging environment for examination by non-technical reviewers. The appropriate link will be provided in the PR comment section.
-
After successful review and approval, the issue PR can be merged into the master branch.
-
Once merged the "Pull Request Closed" workflow will automatically remove the changes from the staging site.
-
Multiple issue PRs can be associated with a release so a build artefact will not be created until a "chore" release PR has been approved and merged. This "chore" release is created from the "Master Push" workflow by selecting a new version number from the drop down menu. Typically this marks the end of the current batch of PRs but isn't strictly enforced. If a "chore" release PR is not created automatically, you should verify that the commit messages adhere to the Conventional Commit standards (see earlier steps).
-
Once the "chore" release PR is merged the "Master Push" workflow will automatically generate the final build artefact for deployment. This may take some time and deployment cannot proceed until it is completed (reviewers will receive an email indicating the location of the release).
-
Once the release is complete, the "Production Deployment" workflow can be initiated, entering the required version when prompted. A temporary "deploy" issue will be generated automatically.
-
Part of the process is the manual approval of the deployment of the release via email (or in the linked GitHub comment thread). Accepted words to enable deployment are detailed in the email, but examples include Approve, Approved, LGTM or Yes. This is handled by the "deploy" issue.
-
Once approved, the "Production Deployment" workflow will continue to remove the existing website and replace it with the new version.
-
Reviewers should verify that the replacement website has the correct version as follows:
- Navigate to https://www.attestant.io
- Open a developer window (CMD+SHIFT+I) and select Console tab
- Verify the correct version is listed
-
A collection of verification tests such as exploring the new content, AOR behaviour and so forth should be performed.
-
Finally, a message should be sent to [Internal] Frontend Engineering to alert the business that the website has been updated.
Hi all. This release covers [quick summary].
As always, I've checked over the site for any obvious breakages, but if you spot anything please let me know.
Uploading release binaries to S3
Our production tools require access to binaries that do not have official public distributions. We build and store those binaries in our own S3 buckets so we can deploy software quickly to our hosts.
In order to build and upload the binaries you simply need to get the release version and run:
prd-ansible-playbook -i inventories/operations/hosts --limit build-eu01.attestant.io build.yml --extra-vars "app_name_version=v1.2.3"
Where app_name_version is the ansible variable name for the app version you are trying to deploy.
The ansible tasks should print out a checksum of the built binary or distribution. This will need to be used to update the download variables for that software in the relevant ansible.
Recreate tables in chaind
- Ensure that you run
psqlaschainuser, e.g.
psql -U chain -h localhost
If not you will have to change the owner of the table like so:
ALTER TABLE t_validator_balances_2025_12_11 OWNER to chain;
- You need to establish the start and end epoch for each table. This can be found using:
ethdo chain time --timestamp="2025-12-11T00:00:00-0000"
This will return the epoch number for the FROM parameter for the 11th of December 2025. The TO parameter will be the epoch number for the 12th of December 2025, i.e. the end of one day is the start of the next as they are not inclusive.
- Recreate the tables using the epoch numbers from the previous step.
CREATE TABLE IF NOT EXISTS t_validator_epoch_summaries_2025_12_11
PARTITION OF t_validator_epoch_summaries
FOR VALUES FROM (412987) TO (413212);


CREATE TABLE IF NOT EXISTS t_validator_balances_2025_12_07
PARTITION OF t_validator_balances
FOR VALUES FROM (412087) TO (412312);
Postgres Replication - client (ops) and internal ops (int) DBs
Both ops and int DBs run on the std Postgres port (5432) and are replicated from the Primary (active) host to one or more Remote hosts using Postgres Streaming.
This documentation covers both the initial set-up of the Replica, the fail-over process and the steps required to re-initialise a replica after fail-over.
To set up the Remote instance as a streaming read-only replica of the Primary server, you will configure replication settings on the remote host, take a fresh streaming basebackup, and start the Replica in standby mode.
1. Initial configuration - only required if replication never previously run
Configure PG Server Permissions. These configuration steps should be in ansible and part of initial set-up but for visibility.
Ensure the primary server allows replication connections and has WAL archiving/streaming enabled.
Set the following in /etc/postgresql/16/main/postgresql.conf on the Primary server:
wal_level = logical
max_wal_senders = 10
max_replication_slots = 10
hot_standby = on
Ensure the remote server's pg_hba.conf allows replication connections from your Replica server.
Add this line to /etc/postgresql/16/main/pg_hba.conf:
# TYPE  DATABASE        USER            ADDRESS                 METHOD
host    replication     repuser      CLIENT_IP/32            md5
Create the replication user and apply configuration changes:
-- Run in psql as superuser on the primary server
CREATE ROLE repuser WITH REPLICATION LOGIN PASSWORD 'repuser password';
Bash (root):
# Restart PostgreSQL to apply postgresql.conf and pg_hba.conf changes
systemctl restart postgresql@16-main.service
Ensure port 5432/tcp is open to the remote host in the firewall.
2. Take the base backup
To be performed on initial set-up or after fail-over on the new replica.
Typically we copy the BaseBackup files straight into the empty data directory on the Replica, all configuration and data is therefore identical to the Primary from which it originates. Although this could be directed to a backup dir and copied-over later if desirable. Note the "-R" flag which makes it a read-only replica on start-up.
Bash (root) — Shutdown the existing database on the Replica:
systemctl stop postgresql postgresql@16-main.service
Remove the default initialised data directories created by the install or from the existing out of date DB.
# Clean out default cluster directories
rm -rf /var/lib/postgresql/16/main/*

# Ensure strict ownership and permissions
chown postgres:postgres /var/lib/postgresql/16/main
chmod 700 /var/lib/postgresql/16/main
Run pg_basebackup (use tmux or similar). The flags stream Write-Ahead Logs (WAL) in real-time, show progress, and generate plain format output. It will require entry of repuser PW.
Bash (postgres):
pg_basebackup \
  -h REMOTE_HOST \
  -U repuser \
  -D /var/lib/postgresql/16/main \
  -Fp \
  -Xs \
  -P \
  -R \
  -v
Key Flags:
-Fp: Generates plain text layout (same format as the remote data directory). Use-Ftfor tar archives.-Xs: Streams WAL files while taking the backup to ensure point-in-time consistency.-P: Enables progress reporting.-R: Automatically creates astandby.signalfile and writes connection settings intopostgresql.auto.conf(useful if configuring a replica).
Verify Standby Connection Details on Replica
Verify that pg_basebackup generated standby.signal and added primary_conninfo to postgresql.auto.conf.
# Check that standby.signal exists
ls -la /var/lib/postgresql/16/main/standby.signal

# Verify connection parameters
cat /var/lib/postgresql/16/main/postgresql.auto.conf
Example output in postgresql.auto.conf:
primary_conninfo = 'user=repuser password=your_secure_password host=REMOTE_PRIMARY_IP port=5432 sslmode=prefer sslcompression=0 gssencmode=prefer krbsrvname=postgres target_session_attrs=any'
Check /var/lib/postgresql/16/main/postgresql.auto.conf for correct ssl hostname and correct if necessary.
Start Replica DB and Check Status
Start the local main cluster and confirm it is streaming WAL logs from the primary.
Bash (root):
# Start Replica
systemctl start postgresql@16-main.service

# Check standby status via SQL
sudo -u postgres psql -p 5432 -c "SELECT pg_is_in_recovery();"
# Output should return t (true).
Check replication lag and streaming status:
sudo -u postgres psql -p 5432 -c "SELECT * FROM pg_stat_wal_receiver;"
3. Fail-over procedure
This is simply a restart of Postgres on the Replica after removing the flag file which will result in a read-write copy of the old Primary as of the point the last replication ran.
Bash (root):
# Stop Replica
systemctl stop postgresql@16-main.service
# Remove standby.signal
rm /var/lib/postgresql/16/main/standby.signal
# Start as Primary
systemctl start postgresql@16-main.service
# Check standby status via SQL
sudo -u postgres psql -p 5432 -c "SELECT pg_is_in_recovery();"
# Output should return f (false).
Once the old Primary has been recovered we re-establish our Replica on it by following the steps in section 2.
Then run prometheus.yml against the operations hosts to update the alerting to reflect the new Primary/Replica hostnames.
C1 Infrastructure documentation
EigenDA
Maintenance
Access boxes
- Get token:
vault login -method=oidc -address=https://vault-a.ts.chorus1.net
- Setup token:
$ cd chorus-infrastructure # This is the github repo with IaC.
$ ./tools/ssh/gen-cert.py --root # This is the command to get a root key.
- SSH to the appropriate box:
$ ssh root@eigenlayer-mainnet02
Eigen operations
Nodeplugin
Operations likely involve the nodeplugin. Here is how to access it (it's in the docker container):
- Exec into the EigenDA container:
root@eigenlayer-mainnet02:~# docker exec -it eigenda-node bash
groups: cannot find name for group ID 50022
- Should be on the path:
I have no name!@574005cb3a98:/$ which nodeplugin
/usr/local/bin/nodeplugin
Opting in and out of quorums
This is performed using nodeplugin (see above if not sure how to access the binary).
Opt-in can be seen below. There is are also list-quorums and opt-out commands.
$ nodeplugin --operation opt-in --socket "35.198.64.104:32005;32004" --quorum-id-list=1
SlashDB_Testnet
Highly available PostgreSQL deployment slashdb-testnet0* nodes are in patroni cluster
Maintenance
Access boxes
- Get token:
vault login -method=oidc -address=https://vault-a.ts.chorus1.net
- Setup token:
$ cd chorus-infrastructure # This is the github repo with IaC.
$ ./tools/ssh/gen-cert.py --root # This is the command to get a root key.
- SSH to the appropriate box:
ssh root@slashdb-testnet01
Patroni cluster operations
We are free to do maintenance on replica's, but failover first before starting any maintenance on Leader
Check current master and replica
/venv/bin/patronictl -c /etc/postgresql/patroni.yml list
root@slashdb-testnet02:~# /venv/bin/patronictl -c /etc/postgresql/patroni.yml list
+ Cluster: slashdb_testnet (7540664946901117766) ----------+----+-----------+------------------+
| Member            | Host           | Role    | State     | TL | Lag in MB | Tags             |
+-------------------+----------------+---------+-----------+----+-----------+------------------+
| slashdb-testnet01 | 100.72.19.24   | Replica | streaming | 37 |         0 | nofailover: true |
| slashdb-testnet02 | 100.84.152.120 | Leader  | running   | 37 |           |                  |
| slashdb-testnet03 | 100.95.73.120  | Replica | streaming | 37 |         0 | nofailover: true |
+-------------------+----------------+---------+-----------+----+-----------+------------------+
Failover procedure(example to failover from slashdb-testnet02 to slashdb-testnet03)
-
Login as root to both servers slashdb-testnet03 and slashdb-testnet02 Check current status of the cluster from any host and ensure Lag in MB is 0
/venv/bin/patronictl -c /etc/postgresql/patroni.yml listyou will see the Tag 'nofailover: true' for replica's
root@slashdb-testnet02:~# /venv/bin/patronictl -c /etc/postgresql/patroni.yml list + Cluster: slashdb_testnet (7540664946901117766) ----------+----+-----------+------------------+ | Member | Host | Role | State | TL | Lag in MB | Tags | +-------------------+----------------+---------+-----------+----+-----------+------------------+ | slashdb-testnet01 | 100.72.19.24 | Replica | streaming | 37 | 0 | nofailover: true | | slashdb-testnet02 | 100.84.152.120 | Leader | running | 37 | | | | slashdb-testnet03 | 100.95.73.120 | Replica | streaming | 37 | 0 | nofailover: true | +-------------------+----------------+---------+-----------+----+-----------+------------------+ -
Update config on slashdb-testnet03 to be able to to take on the "Leader" role.
2.1 Edit /etc/postgresql/patroni.yml and change the nofailover tag
nofailover: True
to
nofailover: false
2.2 In our example currently slashdb-testnet02 is Leader, so reload the config for slashdb-testnet03 from slashdb-testnet02, the leader.
patronictl -c /etc/postgresql/patroni.yml reload slashdb_testnet slashdb-testnet02Now you will see the Tag 'nofailover: true' is blank for slashdb-testnet03 too
root@slashdb-testnet02:~# /venv/bin/patronictl -c /etc/postgresql/patroni.yml list + Cluster: slashdb_testnet (7540664946901117766) ----------+----+-----------+------------------+ | Member | Host | Role | State | TL | Lag in MB | Tags | +-------------------+----------------+---------+-----------+----+-----------+------------------+ | slashdb-testnet01 | 100.72.19.24 | Replica | streaming | 37 | 0 | nofailover: true | | slashdb-testnet02 | 100.84.152.120 | Leader | running | 37 | | | | slashdb-testnet03 | 100.95.73.120 | Replica | streaming | 37 | 0 | | +-------------------+----------------+---------+-----------+----+-----------+------------------+ -
Ask the leader to evict the leadership role.
run on current Leader slashdb-testnet02:
patronictl -c /etc/postgresql/patroni.yml switchoverwait 10-15 seconds and check that slashdb-testnet02 is new leader now
you will see the Role column changed and
root@slashdb-testnet02:~# /venv/bin/patronictl -c /etc/postgresql/patroni.yml list + Cluster: slashdb_testnet (7540664946901117766) ----------+----+-----------+------------------+ | Member | Host | Role | State | TL | Lag in MB | Tags | +-------------------+----------------+---------+-----------+----+-----------+------------------+ | slashdb-testnet01 | 100.72.19.24 | Replica | streaming | 37 | 0 | nofailover: true | | slashdb-testnet02 | 100.84.152.120 | Replica | running | 37 | 0 | | | slashdb-testnet03 | 100.95.73.120 | Leader | streaming | 37 | | | +-------------------+----------------+---------+-----------+----+-----------+------------------+ -
Do the step 2 to make slashdb-testnet02 a replica. Ensure the output looks similar to how it was, ie 2 hosts with 'nofailover: true'
root@slashdb-testnet01:~# /venv/bin/patronictl -c /etc/postgresql/patroni.yml list + Cluster: slashdb_testnet (7540664946901117766) ----------+----+-----------+------------------+ | Member | Host | Role | State | TL | Lag in MB | Tags | +-------------------+----------------+---------+-----------+----+-----------+------------------+ | slashdb-testnet01 | 100.72.19.24 | Replica | streaming | 37 | 0 | nofailover: true | | slashdb-testnet02 | 100.84.152.120 | Replica | streaming | 37 | 0 | nofailover: true | | slashdb-testnet03 | 100.95.73.120 | Leader | running | 37 | | | +-------------------+----------------+---------+-----------+----+-----------+------------------+ -
Update the IP of the new leader
5.1. Find the current Patroni leader IP
/venv/bin/patronictl -c /etc/postgresql/patroni.yml list5.2. Update pgbouncer configmap in github(Example PR 28861)
vi kubernetes/components/evm/pgbouncer/hoodi/configmap.yaml
Change: * = host=<old_ip>
To:     * = host=<new_leader_ip>
5.3. Apply to cluster
kubectl --context ts-k8s-operator-prod01.atlas-pierce.ts.net \
  -n eth-hoodi-chorusone apply \
  -f kubernetes/components/evm/pgbouncer/hoodi/configmap.yaml
5.4. Restart pgbouncer across all hoodi namespaces
for ns in eth-hoodi-chorusone eth-hoodi-firi eth-hoodi-renzo eth-hoodi-hextrust; do
  kubectl --context ts-k8s-operator-prod01.atlas-pierce.ts.net \
    -n $ns rollout restart statefulset/pgbouncer-hoodi
done
5.5. Confirm pgbouncer pods are up
for ns in eth-hoodi-chorusone eth-hoodi-firi eth-hoodi-renzo eth-hoodi-hextrust; do
  echo "=== $ns ==="
  kubectl --context ts-k8s-operator-prod01.atlas-pierce.ts.net \
    -n $ns get pods -l app.kubernetes.io/name=pgbouncer
done
Connected services:
- pgbouncer
- web3signer
HashiCorp Vault at Chorus One
Who is this for? This document is written for anyone who works with infrastructure at Chorus One — whether you have never touched Vault before, or you are an engineer trying to onboard a new service. No prior Vault knowledge is assumed.
Table of Contents
- What is Vault and Why Do We Use It?
- Vault Cluster Architecture
- Initialization and Unseal
- What Lives in Vault
- Authentication Methods
- How Secrets Reach Services
- Policy System
- SSH Certificate Authority
- AWS Secrets Engine
- Registering a New Service
- Operational Procedures
- Real-World Example: KAPI Vault Auth Failure
- Troubleshooting
1. What is Vault and Why Do We Use It?
The Problem
Every service we run needs secrets to function: database passwords, API keys, validator signing keys, IPFS tokens, and so on. The naive approach is to store these in config files, environment files, or code repositories. This creates serious risks:
- Secrets leak into git history or logs.
- There is no audit trail (who read what, when).
- Rotating a leaked secret means manually updating every service that uses it.
- A single compromised server exposes all its hardcoded secrets.
The Solution: A Centralised Secret Store
HashiCorp Vault is a purpose-built secret management system. Think of it like a physical bank vault: you do not leave cash lying around your office — you put it in the vault and only authorised people with the right credentials can access the right compartments.
┌─────────────────────────────────────────────────────────┐
│                   WITHOUT VAULT                         │
│                                                         │
│  app1/config.env ──► DB_PASSWORD=abc123                 │
│  app2/docker-compose.yml ──► API_KEY=secret456          │
│  app3/k8s-secret.yaml ──► TOKEN=xyz789                  │
│                                                         │
│  Problems: secrets in git, no audit, hard to rotate     │
└─────────────────────────────────────────────────────────┘

┌─────────────────────────────────────────────────────────┐
│                    WITH VAULT                           │
│                                                         │
│  app1 ──► authenticates ──► Vault ──► gets DB_PASSWORD  │
│  app2 ──► authenticates ──► Vault ──► gets API_KEY      │
│  app3 ──► authenticates ──► Vault ──► gets TOKEN        │
│                                                         │
│  Benefits: central audit log, fine-grained access,      │
│  easy rotation, no secrets in git                       │
└─────────────────────────────────────────────────────────┘
What Vault Does for Us
| Capability | Description |
|---|---|
| Secret Storage | Encrypted KV store for passwords, API keys, certs |
| Dynamic Secrets | Generates short-lived AWS credentials on demand |
| Authentication | Kubernetes service accounts, AppRole, OIDC (Google/Okta) |
| Fine-grained Policies | Service A can only read its own secrets |
| Audit Logging | Every secret read/write is logged with who, when, what |
| SSH CA | Issues short-lived SSH certificates instead of static keys |
| Encryption-as-a-Service | Transit engine encrypts data without exposing keys |
2. Vault Cluster Architecture
High-Level Overview
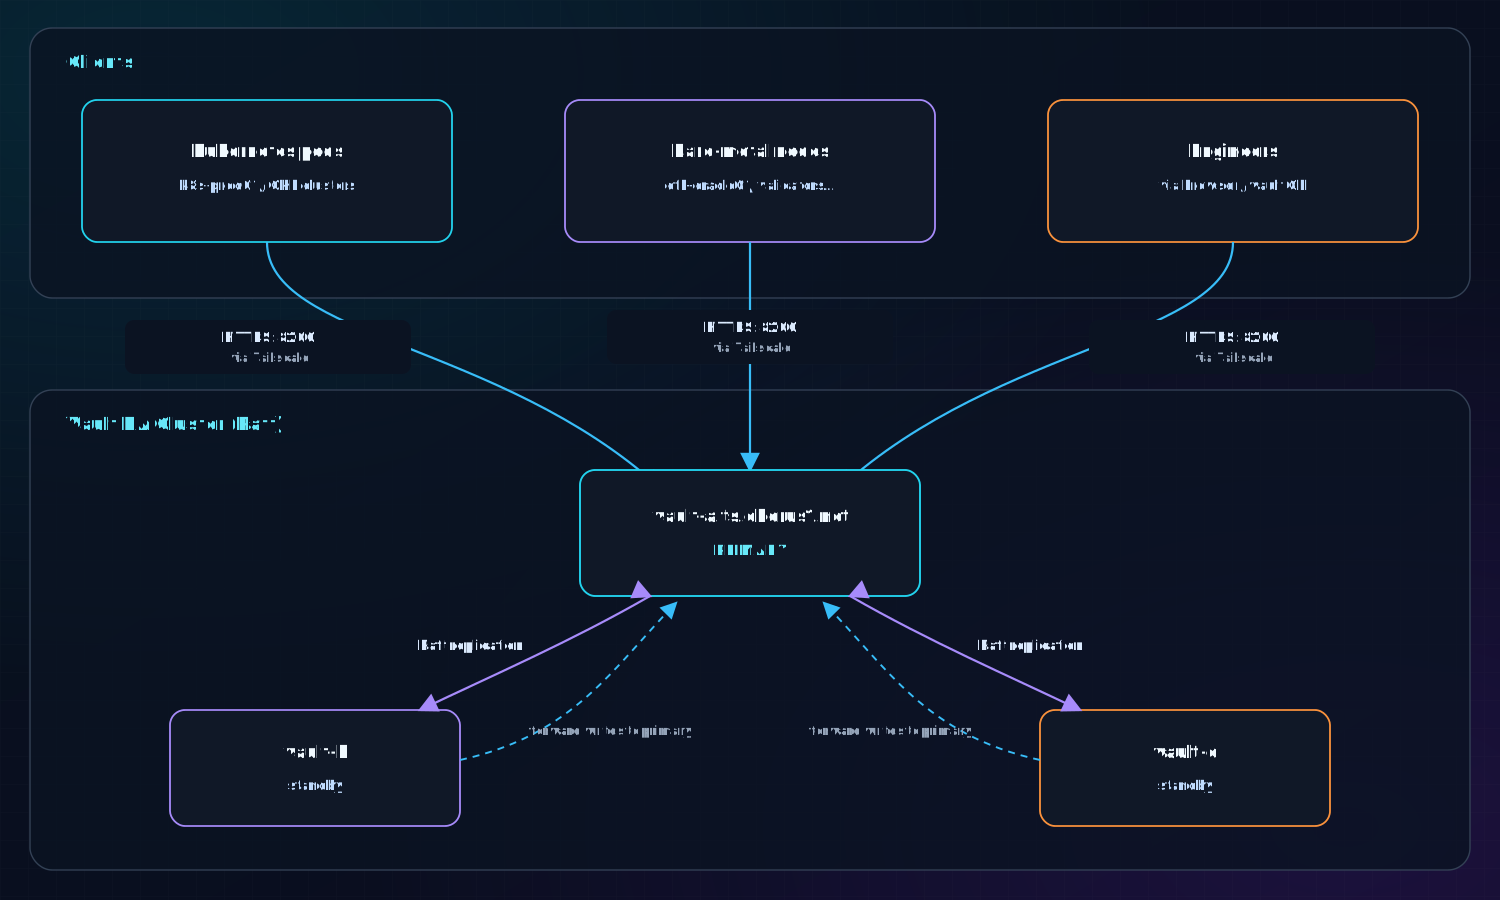
Key Design Decisions
Raft Storage Backend All three nodes form a Raft consensus cluster. Data is replicated across all nodes. If the primary goes down, one of the standbys is automatically promoted. No external database is needed.
Tailscale-Only Access
Vault's API port (8200) and cluster port (8201) are firewalled to Tailscale CIDR 100.64.0.0/10 only. Vault is not accessible from the public internet. Any service that needs Vault must be on the Tailscale network.
TLS Everywhere All communication uses TLS certificates issued by Let's Encrypt for each node's hostname.
Primary endpoint: https://vault-a.ts.chorus1.net:8200
3. Initialization and Unseal
The Seal: Vault's Physical Lock
When a Vault server starts (or restarts after a crash), it boots in a sealed state. A sealed Vault is completely locked — it cannot decrypt any stored data or serve any requests. This is by design: even if an attacker copies the storage files, they cannot read anything without the master encryption key.
┌────────────────────────────────────────────────────────┐
│                   VAULT STATES                         │
│                                                        │
│  SEALED ──► (unseal with key shares) ──► UNSEALED      │
│                                                        │
│  Sealed:   Vault is running but locked.                │
│            No secrets can be read or written.          │
│            Happens on: first start, server restart,    │
│            manual seal (security emergency)            │
│                                                        │
│  Unsealed: Vault is fully operational.                 │
│            Normal state during daily operations.       │
└────────────────────────────────────────────────────────┘
Shamir's Secret Sharing: Requiring Multiple People
Vault uses Shamir's Secret Sharing to split the master encryption key into multiple shares. Our configuration:
- 5 key shares — one for each named operator
- Threshold: 2 — any 2 shares are sufficient to unseal
This means no single person can unseal Vault alone. An attacker would need to compromise at least 2 key holders simultaneously.
┌─────────────────────────────────────────────────────────────┐
│              SHAMIR'S SECRET SHARING                        │
│                                                             │
│  Master Key ──► split into 5 shares                         │
│                                                             │
│  Share 1 ──► encrypted with joebowman's PGP key             │
│  Share 2 ──► encrypted with reisen's PGP key                │
│  Share 3 ──► encrypted with meherroy's PGP key              │
│  Share 4 ──► encrypted with crainbf's PGP key               │
│  Share 5 ──► encrypted with bonham000's PGP key             │
│                                                             │
│  To unseal: any 2 operators decrypt their share and         │
│  run `vault operator unseal` with their plaintext share.    │
└─────────────────────────────────────────────────────────────┘
Initialization (One-Time Setup)
This is done exactly once when a new Vault cluster is created:
vault operator init \
  -n 5 -t 2 \
  -pgp-keys=keybase:joebowman,keybase:reisen,keybase:meherroy,keybase:crainbf,keybase:bonham000 \
  -root-token-pgp-key=keybase:joebowman
This outputs 5 encrypted unseal key shares and an encrypted root token. Each key share is sent to its designated holder via Keybase.
The root token is used only for initial configuration and then revoked. A root token can be regenerated later but requires a quorum of at least 2 unseal key holders.
Auto-Unseal (Optional)
For the vault-signer cluster (which holds signing keys), the parent vault-a cluster acts as an auto-unseal backend via the Transit secrets engine. When vault-signer restarts, it calls vault-a's transit engine to decrypt its seal data automatically — no human intervention needed for routine restarts.
Rekeying
When personnel changes (someone leaves the company), unseal keys must be rotated:
vault operator rekey -init -n 5 -t 2 \
  -pgp-keys=keybase:user1,keybase:user2,...
Each current key holder runs vault operator rekey with their existing share until the threshold is met, then new encrypted shares are distributed to the new holders.
4. What Lives in Vault
Secret Mounts
Vault organises secrets into logical mounts — think of them as different departments in the vault building, each serving a different purpose.
vault-a.ts.chorus1.net
├── secret/     ← KV v2: Application & service secrets (most used)
├── aws/        ← Dynamic AWS STS credentials (ECR, S3)
├── pki/        ← PKI certificate authority
├── ssh/        ← SSH certificate authority
└── transit/    ← Encryption-as-a-service / auto-unseal
Secret Path Hierarchy (KV Mount)
The secret/ KV mount has two main subtrees:
secret/
│
├── app/                         ← Secrets for non-Kubernetes services
│   ├── ethereum/
│   │   ├── mainnet/
│   │   │   ├── lido/
│   │   │   │   ├── vc-lido-2/  ← Validator keys (scoped to pod)
│   │   │   │   └── vc-lido-3/
│   │   │   └── chorus-native/
│   │   └── gnosis/...
│   ├── cosmos/chorus/...
│   ├── solana/mainnet/chorusone/...
│   └── (100+ other services)
│
└── k8s/                         ← Secrets for Kubernetes services
    ├── default/
    │   ├── lido-keys-api-mainnet/  ← e.g. DB_PASSWORD
    │   └── argus/...
    └── monitoring/
        └── thanos/...
Naming rule for k8s secrets:
secret/k8s/{namespace}/{service-account-name}/Naming rule for app secrets:
secret/app/{network}/{chain}/{service-name}/
What Gets Stored
| Type | Example Path | Contents |
|---|---|---|
| DB passwords | secret/k8s/default/lido-keys-api-mainnet | DB_PASSWORD |
| IPFS tokens | secret/k8s/default/lido-oracle-v8-mainnet/env-v8 | PINATA_JWT, FILEBASE_IPFS_TOKEN |
| Validator keys | secret/app/ethereum/mainnet/lido/vc-lido-2/ | BLS signing keys |
| API keys | secret/app/solana/mainnet/chorusone/ | RPC keys |
| Infrastructure | secret/app/postgres/ | DB admin creds |
5. Authentication Methods
Before a service can read a secret, Vault needs to verify its identity. There are three authentication methods in use:
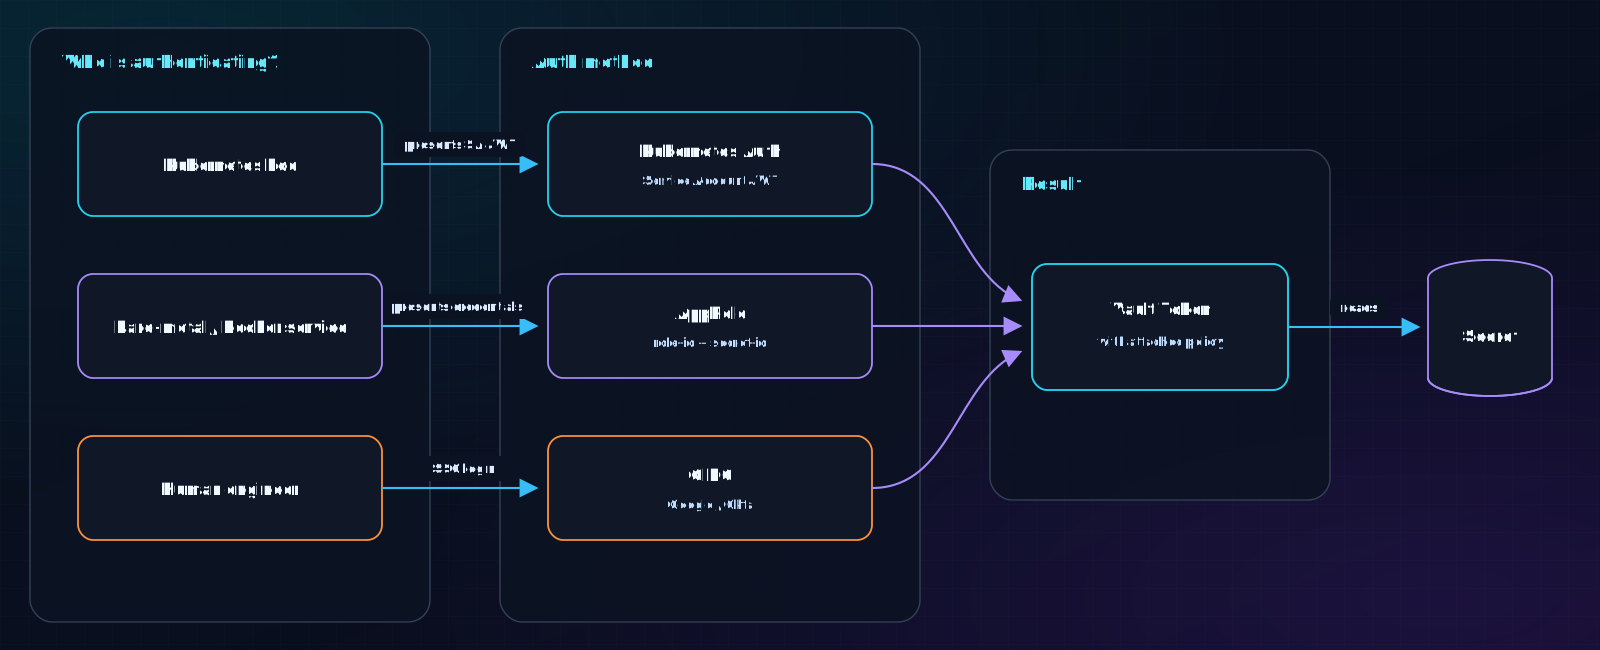
5.1 Kubernetes Auth — For Pods
This is the primary method for services running in Kubernetes. Every Kubernetes pod has a Service Account with a JWT token automatically mounted at /var/run/secrets/kubernetes.io/serviceaccount/token.
How it works:
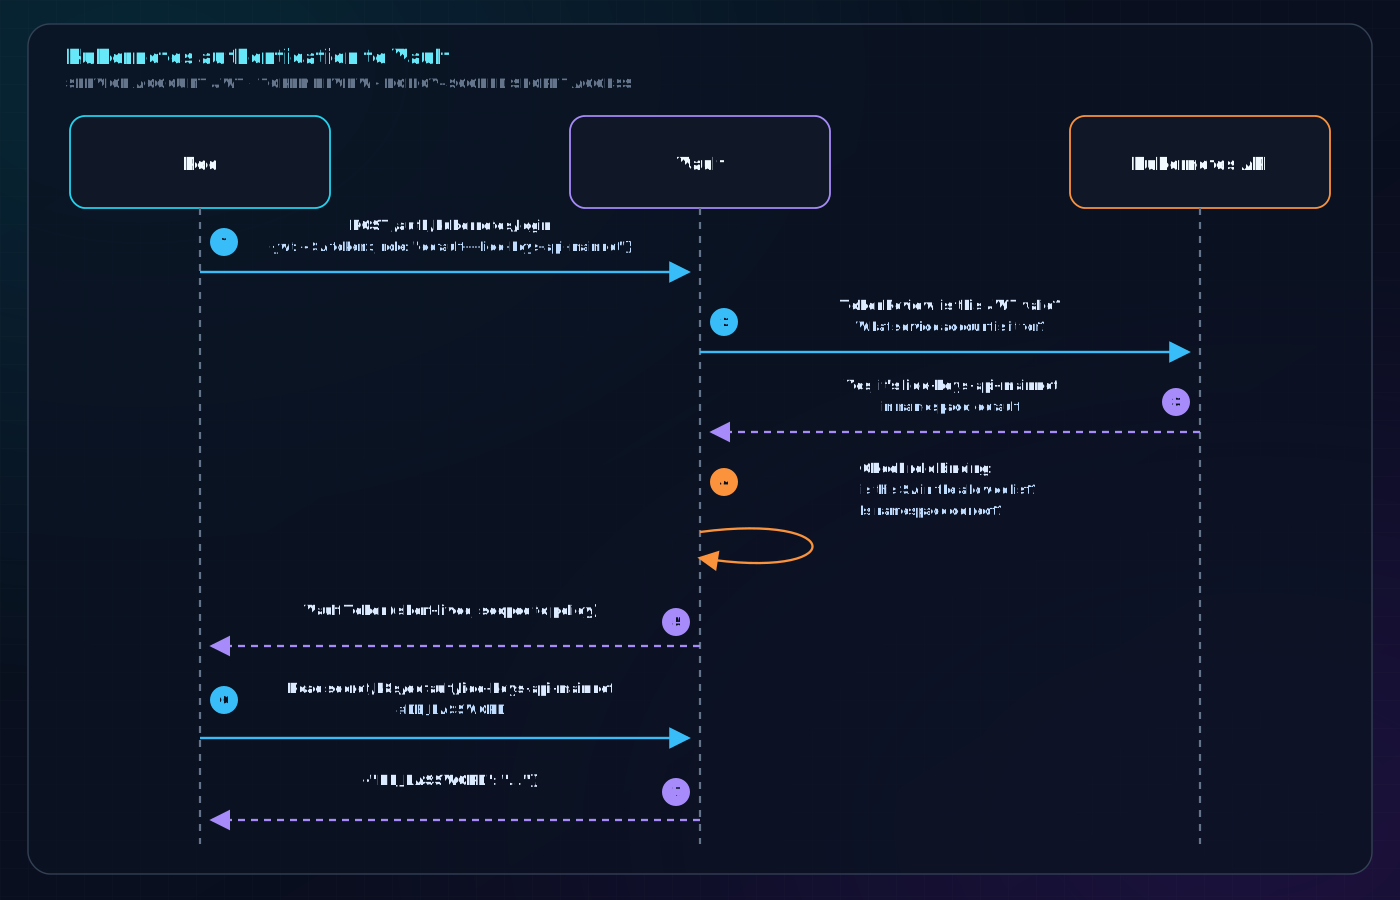
Three Kubernetes auth backends are registered:
| Backend path | Cluster | Used for |
|---|---|---|
kubernetes | Legacy OVH cluster | Older services (argus, pastry, etc.) |
kubernetes-prod01 | k8s-prod01.atlas-pierce.ts.net | Most production EVM services |
kubernetes-ethereum-prod01/02/03 | GKE clusters (europe-west4/3/9) | Ethereum/Gnosis validator pods |
Role naming convention: {namespace}---{service-account-name} (double dashes replace slashes)
Examples:
default---lido-keys-api-mainneteth-mainnet-lido---validator-ejectormonitoring---thanos
Vault registration (Terraform):
# In provision/terraform/modules/vault/k8s_evm.tf
evm_kuberoles = {
  for val in [
    {
      account        = "lido-keys-api-mainnet",
      namespace      = "default",
      extra_policies = [],
    },
    ...
  ]
}
Pod configuration (Kubernetes deployment):
# The pod specifies which Vault role to use
env:
  - name: VAULT_ROLE
    value: "default---lido-keys-api-mainnet"
  - name: KUBERNETES_BACKEND
    value: "kubernetes-prod01"   # which auth backend to use
  - name: VAULT_ADDR
    value: "https://vault-a.ts.chorus1.net"
  - name: VAULT_PORT
    value: "443"
5.2 AppRole — For Bare-Metal and Docker Services
Services running directly on bare-metal hosts (Docker containers on eth-oracle01, validators, etc.) cannot use Kubernetes service account JWTs. They use AppRole authentication instead.
AppRole works like a username/password pair:
role-id— a stable identifier for the service (like a username), not secretsecret-id— a one-time, short-lived credential (like a password), very sensitive
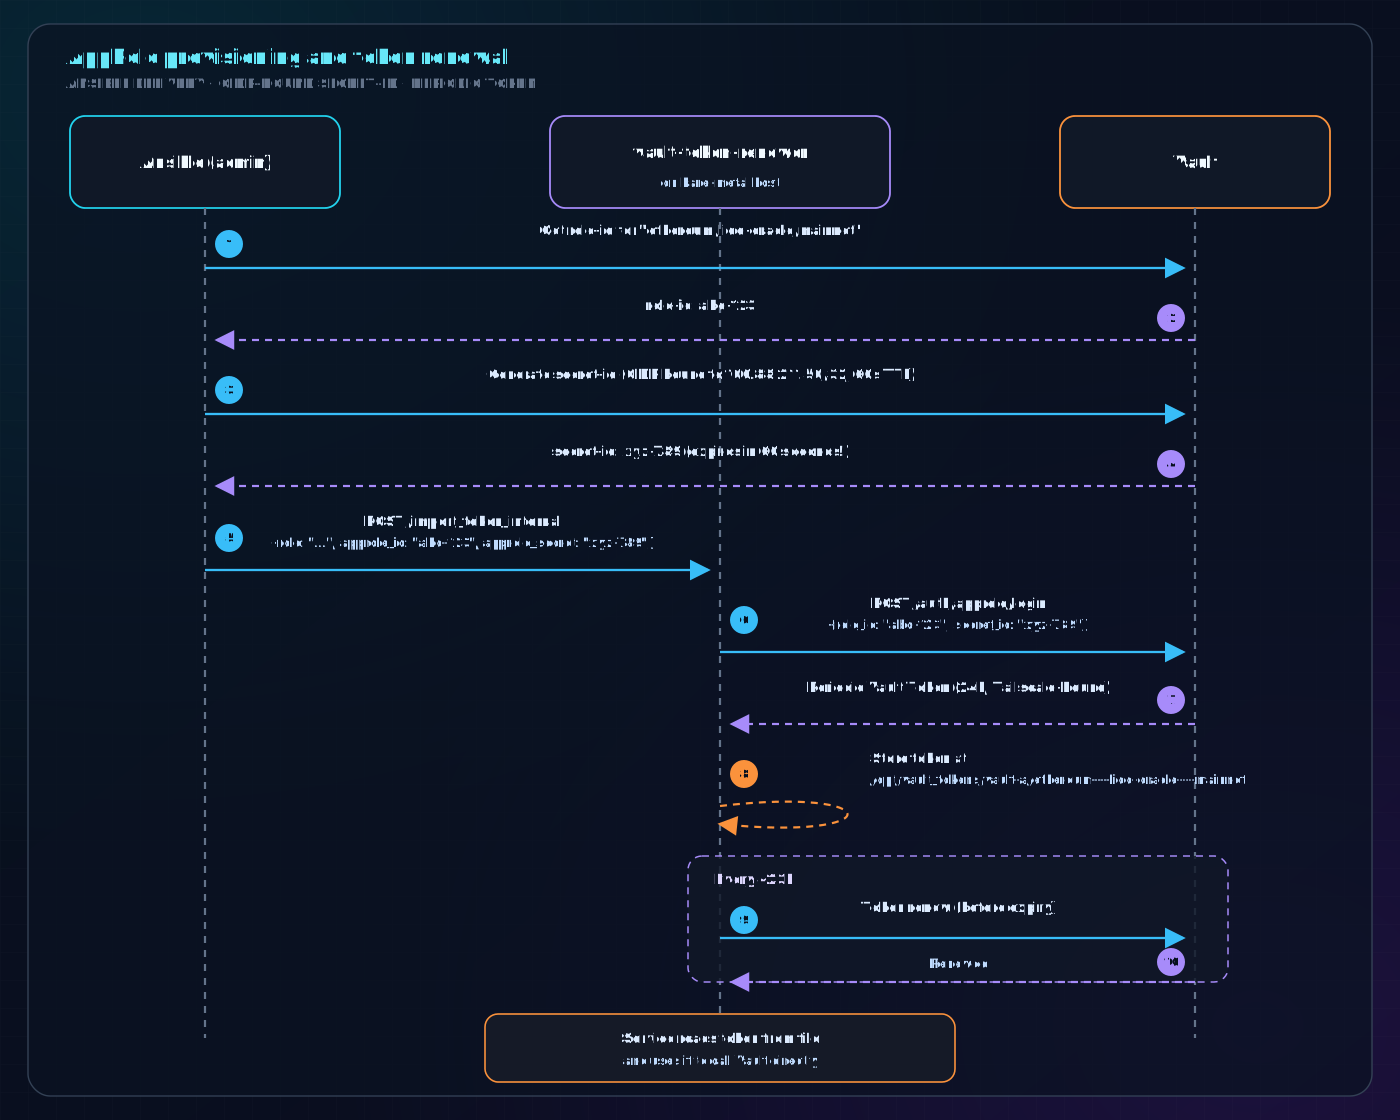
Security properties of AppRole:
secret_id_num_uses = 1: the secret ID is burned after a single login — cannot be reused even if interceptedsecret_id_ttl = "60": secret ID expires in 60 seconds — tight window for Ansible deliverytoken_bound_cidrs = ["100.64.0.0/10"]: the resulting token can only be used from Tailscale IPs- Secret IDs are further bound to the exact Tailscale IP of the target host (
/32)
Naming convention: slashes replaced by ---
- Service path
ethereum/lido-oracle/mainnet→ role nameethereum---lido-oracle---mainnet
Token storage on the host:
/opt/vault_tokens/
└── vault-a/
    ├── ethereum---lido-oracle---mainnet    ← Vault token (read by oracle service)
    ├── ethereum---lido-oracle-v8---mainnet
    └── ...
Services read their token:
VAULT_TOKEN=$(cat /opt/vault_tokens/vault-a/ethereum---lido-oracle---mainnet)
5.3 OIDC — For Human Engineers
Engineers log in via Single Sign-On. Three OIDC providers are configured:
| Provider | Used by |
|---|---|
| GSuite (Google) | Chorus One engineers (@chorus.one) |
| GitHub OAuth | Alternative for some engineers |
| Okta | Bitwise Investment users |
Login command:
export VAULT_ADDR=https://vault-a.ts.chorus1.net
vault login -method=oidc
# Opens browser, prompts Google/Okta SSO login
# Returns a Vault token valid for the session
Engineers get access to:
- Their team's secrets (read-only)
- SSH certificate signing (for server access)
- Admin operations (for designated admins)
6. How Secrets Reach Services
There are two patterns depending on where the service runs.
6.1 vaultenv — The Kubernetes Pattern
vaultenv is a small binary baked into application container images. It acts as the container's entrypoint: it authenticates to Vault, fetches all required secrets, injects them as environment variables, then hands off execution to the real application.
The key insight: the application itself never calls Vault. It just sees environment variables as if they were always there.
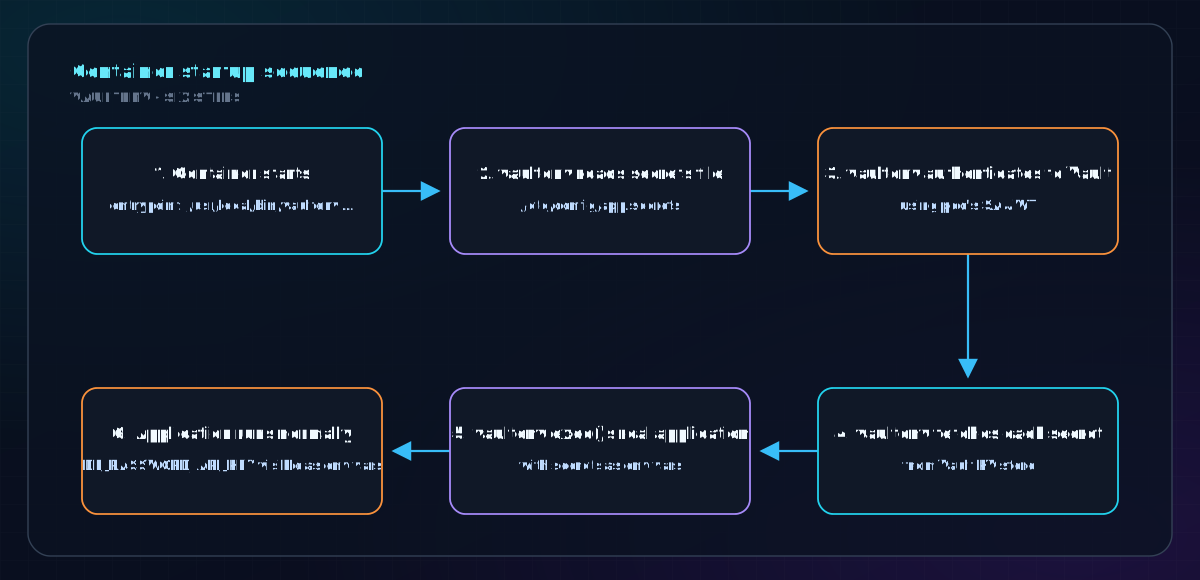
The secrets file format (stored in a ConfigMap — safe to commit, contains paths not values):
VERSION 2
MOUNT secret
DB_PASSWORD=k8s/default/lido-keys-api-mainnet#DB_PASSWORD
API_KEY=k8s/default/lido-keys-api-mainnet#API_KEY
Each line: ENV_VAR_NAME=vault/path/to/secret#FIELD_KEY
Full vaultenv invocation (from a Kubernetes deployment):
# In the Deployment spec
containers:
  - name: lido-keys-api
    command:
      - /usr/local/bin/vaultenv
      - --log-level info
      - --addr https://vault-a.ts.chorus1.net
      - --kubernetes-role default---lido-keys-api-mainnet
      - --auth-backend kubernetes-prod01
      - --secrets-file /etc/config/app.secrets
      - -- /usr/local/bin/lido-keys-api  # ← the real app
    env:
      - name: VAULT_ADDR
        value: "https://vault-a.ts.chorus1.net"
End-to-end flow for a Kubernetes pod:
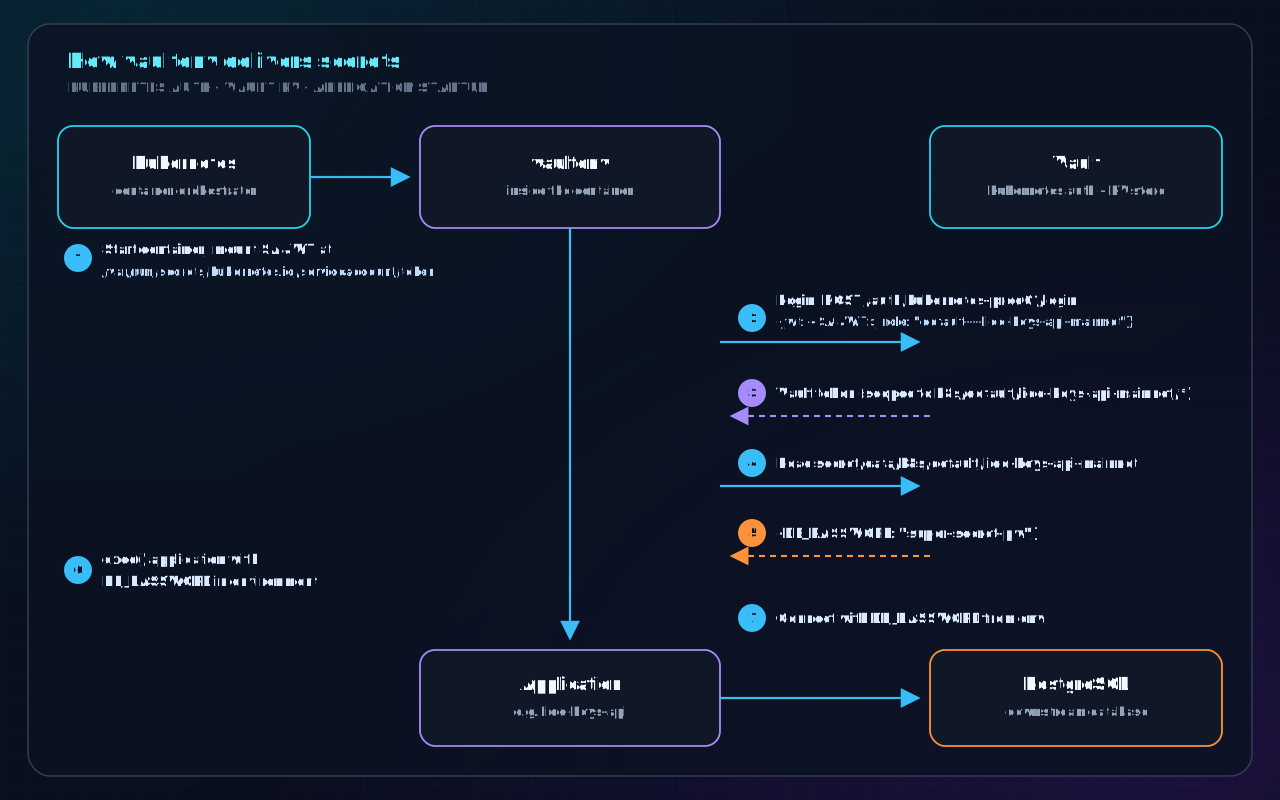
6.2 vault-token-renewer — The Bare-Metal Pattern
For services running on bare metal or in Docker (not Kubernetes), the vault-token-renewer daemon manages the Vault token lifecycle.
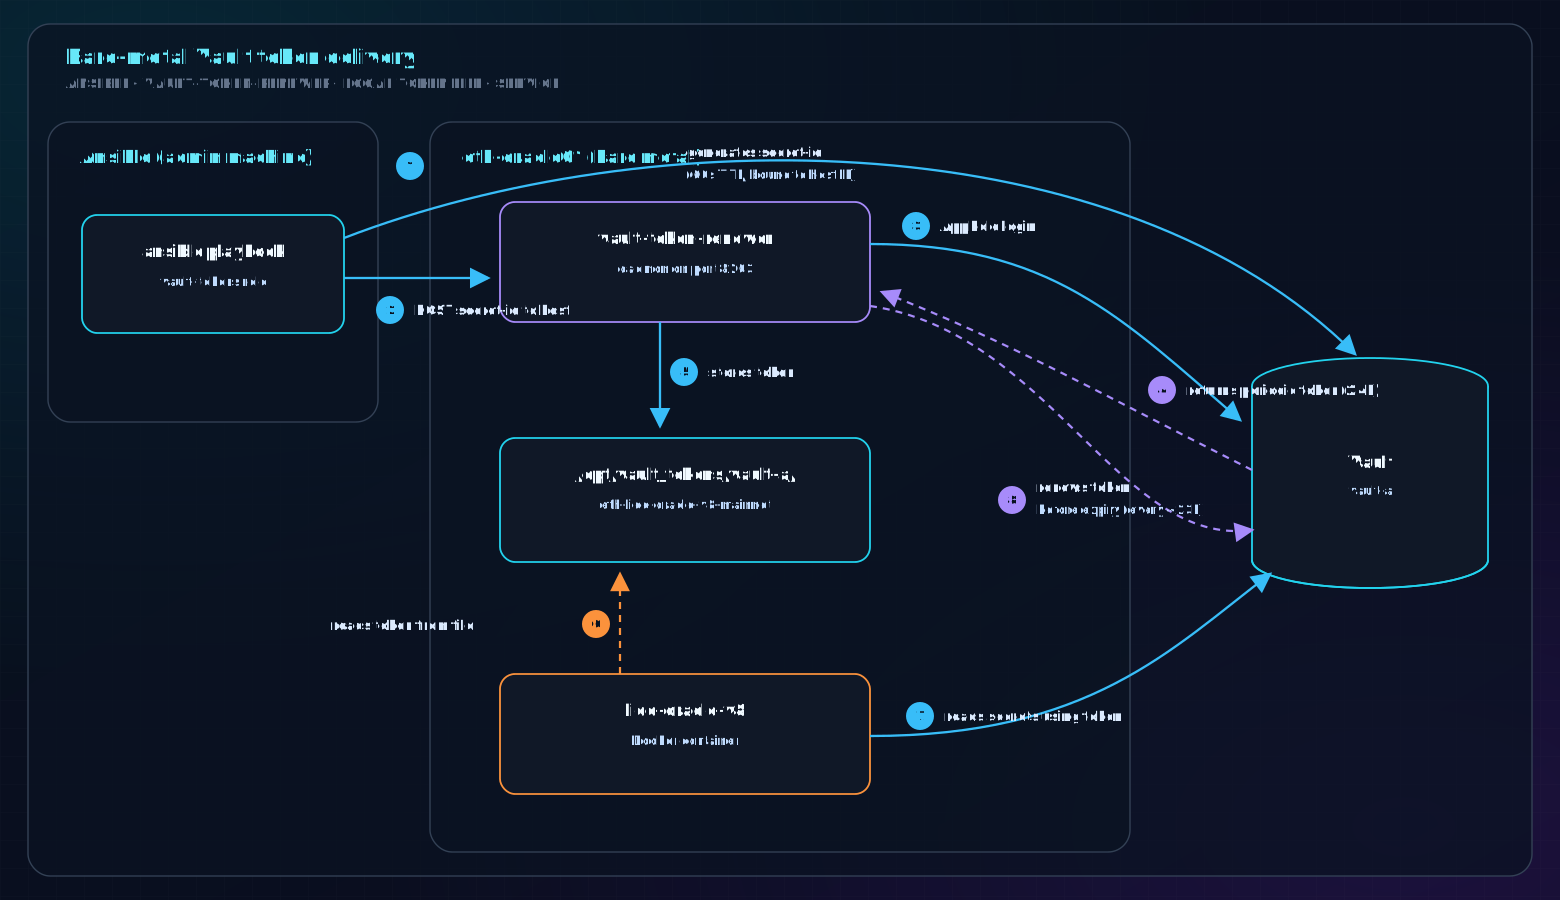
The oracle reads the Vault token from the file and uses it in its env file:
# /dev/shm/vault-secrets/ethereum-lido-oracle-v8/mainnet/env-v8
# (populated by vaultenv or the oracle itself using VAULT_TOKEN)
MEMBER_PRIV_KEY=...
PINATA_JWT=...
FILEBASE_IPFS_TOKEN=...
7. Policy System
How Policies Work
A policy in Vault is a set of rules that defines exactly which secrets a token can access and what operations it can perform. Every token has one or more policies attached. If a path is not explicitly allowed, access is denied.
┌──────────────────────────────────────────────────────────────┐
│                      POLICY EXAMPLE                          │
│                                                              │
│  # Policy: k8s/default/lido-keys-api-mainnet                 │
│                                                              │
│  path "secret/data/k8s/default/lido-keys-api-mainnet/*" {    │
│    capabilities = ["read", "list"]                           │
│  }                                                           │
│  path "secret/metadata/k8s/default/lido-keys-api-mainnet/*" {│
│    capabilities = ["read", "list"]                           │
│  }                                                           │
│                                                              │
│  This token can ONLY read secrets under this exact path.     │
│  It cannot read any other service's secrets.                 │
└──────────────────────────────────────────────────────────────┘
Policy Hierarchy
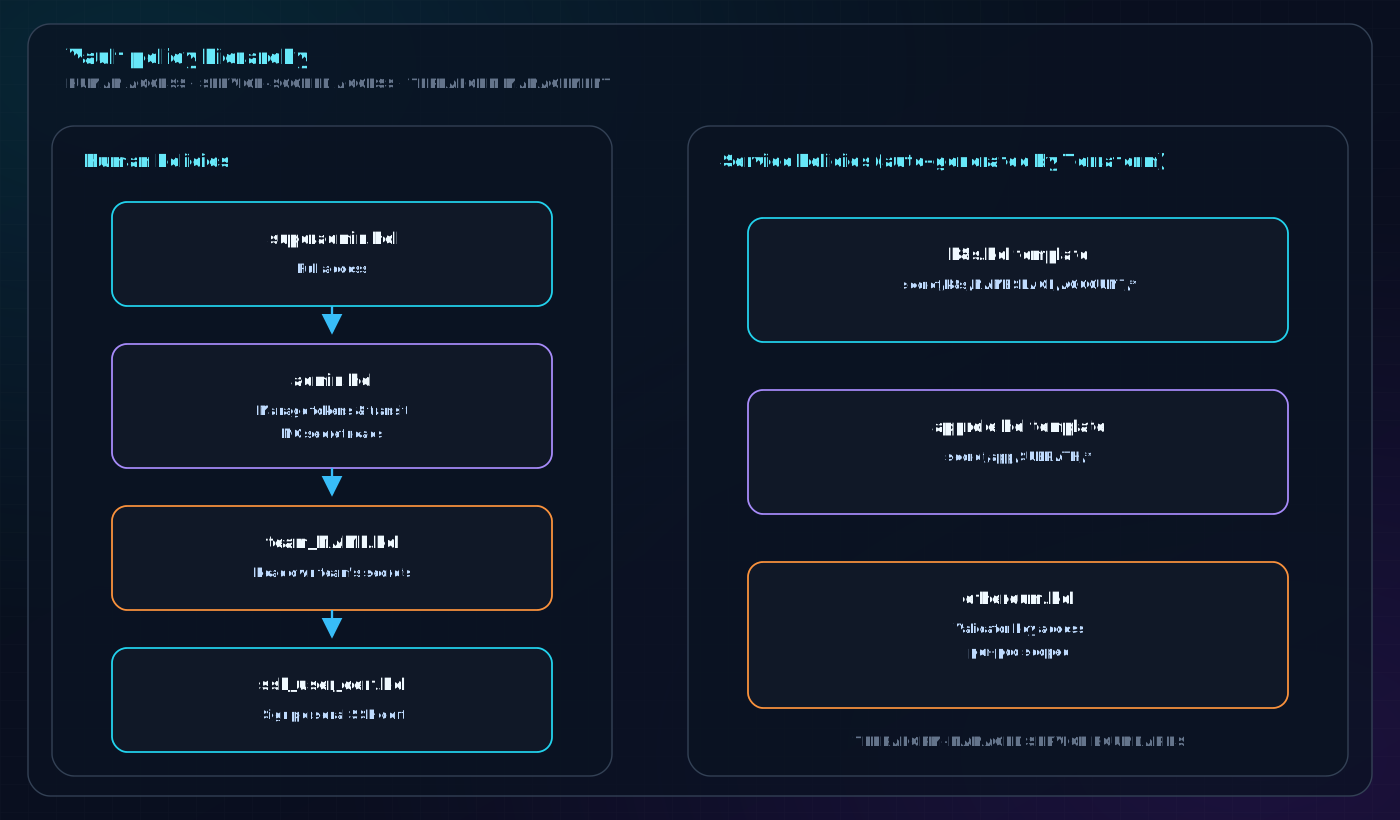
Key Policies
k8s.hcl (Kubernetes services)
Applied to every Kubernetes service account. The template substitutes {NAMESPACE} and {ACCOUNT}:
path "secret/data/k8s/${NAMESPACE}/${ACCOUNT}/*" {
  capabilities = ["read", "list"]
}
approle.hcl (Bare-metal services)
Applied to every AppRole. The template substitutes {SUBPATH}:
path "secret/data/app/${SUBPATH}/*" {
  capabilities = ["read", "list"]
}
ethereum.hcl (Validator pods — the sophisticated one)
This policy uses Vault's identity templating to scope access down to the individual pod level. A vc-validator-0 pod can only read its own keys, not vc-validator-1's keys — a critical slashing protection mechanism:
path "secret/data/app/ethereum/${network}/${tenant}/{{ identity.entity.aliases.${accessor}.metadata.service_account_name }}/*" {
  capabilities = ["read"]
}
At runtime, {{ identity.entity.aliases.${accessor}.metadata.service_account_name }} resolves to the actual pod's service account name (e.g., vc-lido-2), so each pod can only read its own path.
admin.hcl
Admins can manage Vault configuration (create tokens, manage transit keys) but cannot read application secrets. This is intentional: infrastructure admins should not have access to validator signing keys or production credentials.
# Admins can write secrets for others, but NOT read them
path "secret/data/app/*" {
  capabilities = ["create", "update"]  # NO "read"!
}
All Policies are Terraform-Managed
Policies live in provision/terraform/modules/vault/policies/*.hcl and are applied via Terraform. This means:
- All policy changes go through code review (PR process)
- Policy history is in git
- No manual
vault policy writecommands needed
8. SSH Certificate Authority
Instead of distributing static SSH public keys and managing ~/.ssh/authorized_keys on every server, Vault acts as an SSH Certificate Authority (CA). Engineers receive short-lived certificates that automatically expire.
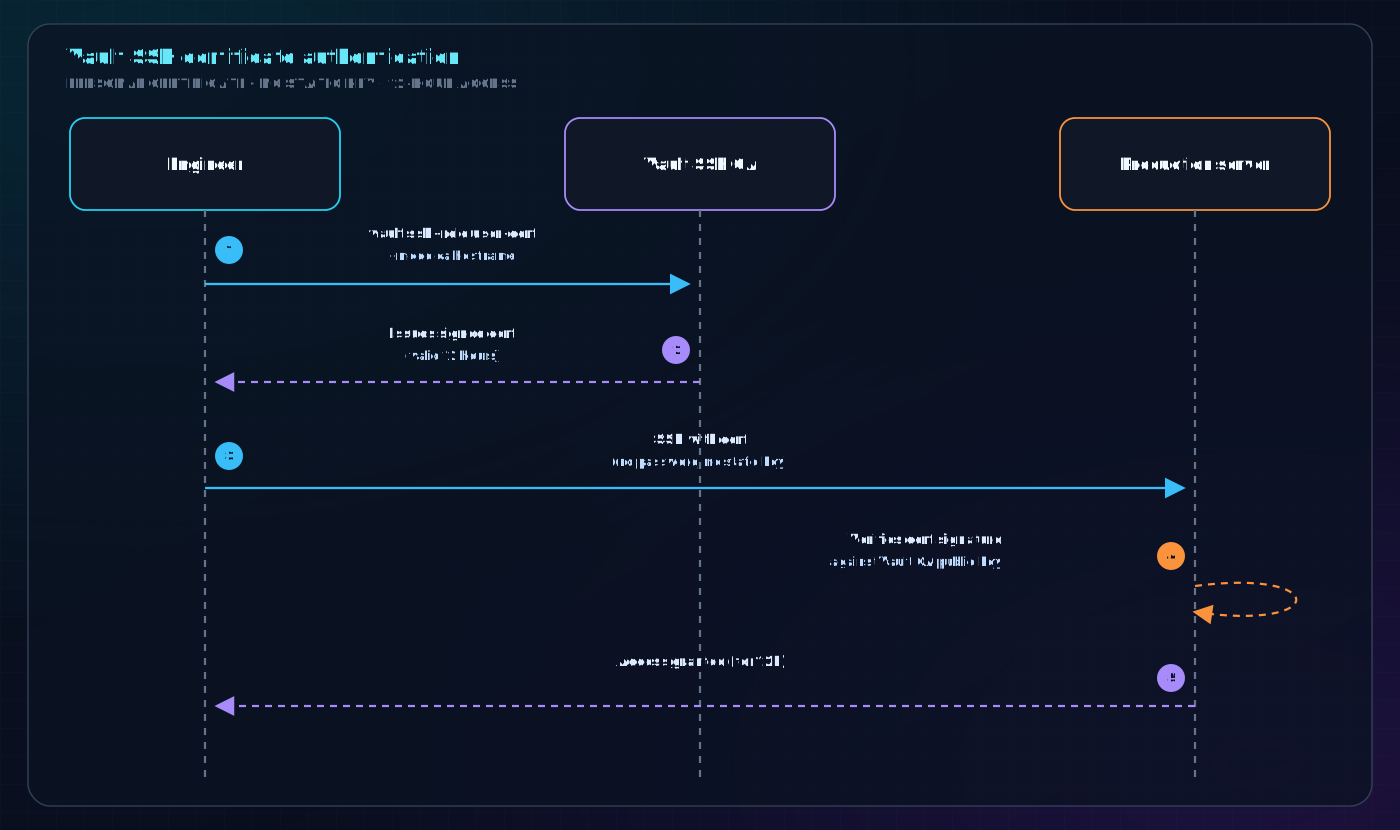
Certificate Roles
| Role | Principal | Max TTL | Purpose |
|---|---|---|---|
user-cert | your username | 18h | Normal daily access |
pe-user-cert | pe | 18h | Protocol Engineering shared user |
superuser-cert | root | 1h | Emergency root access |
{group}-superuser-cert | root@{group} | 1h | Root limited to a server group |
provisioner-superuser-cert | root@provisioner | 2h | Automated provisioning |
host-cert | all domains | ~6 years | Server host certificates |
Why certificates instead of keys?
- Expired certificates cannot be used, even if stolen
- Revocation is instant (update the CA)
- Full audit trail: Vault logs every cert issuance with user identity and serial number
- No need to distribute
authorized_keysto every server
Login to get SSH access:
export VAULT_ADDR=https://vault-a.ts.chorus1.net
vault login -method=oidc          # authenticate to Vault via Google SSO
vault ssh -role user-cert -mode ca eth-oracle01   # issue cert + SSH in one step
9. AWS Secrets Engine
Rather than storing long-lived AWS access keys, Vault generates short-lived STS credentials on demand.
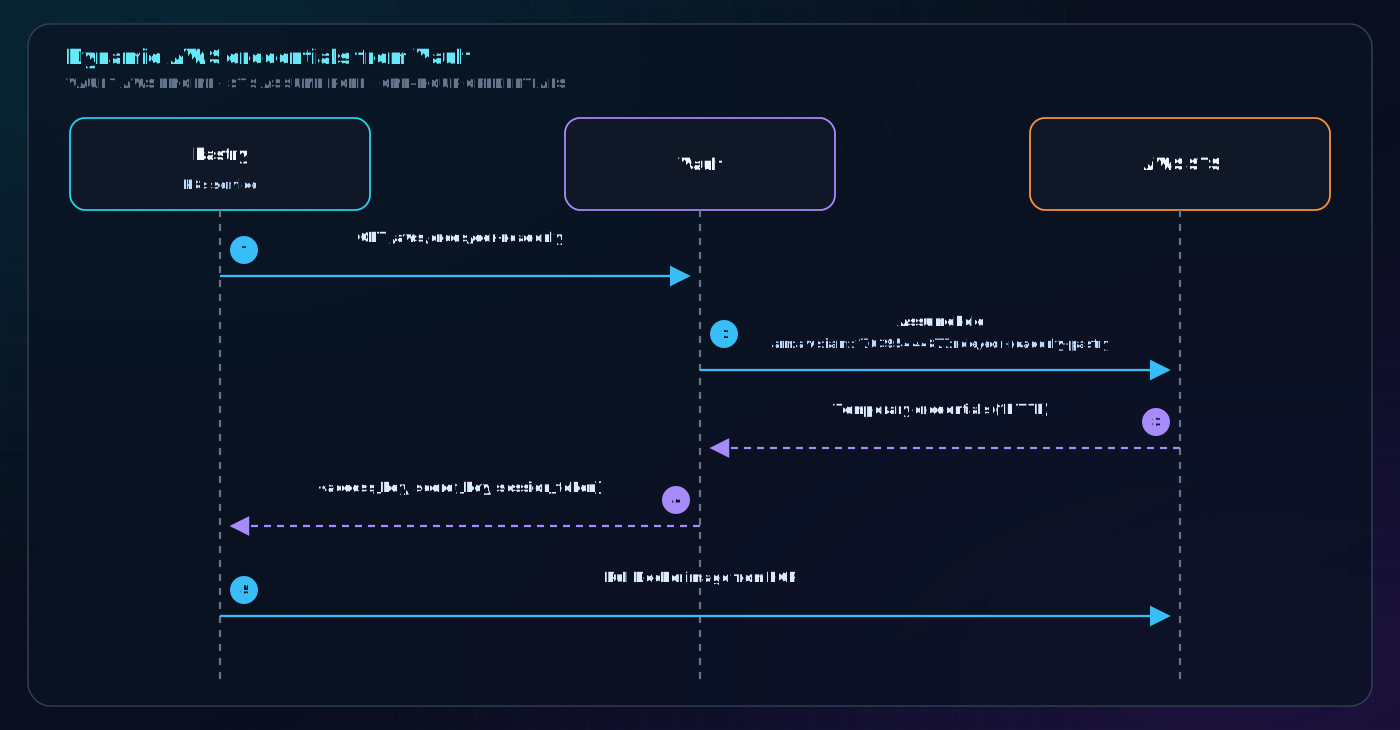
Configured roles:
| Role | AWS IAM Role | Used by |
|---|---|---|
ecr-readonly | ecr-readonly-pastry | Pastry (k8s): pull images from ECR |
s3-influxdb-snapshot-rw | S3 snapshot role | InfluxDB backups |
10. Registering a New Service
10.1 New Kubernetes Service
Step 1: Store the secret in Vault
vault kv put secret/k8s/{namespace}/{service-account-name} \
  MY_SECRET=value1 \
  ANOTHER_SECRET=value2
Step 2: Register the Vault role in Terraform
Add an entry to the appropriate k8s*.tf file in provision/terraform/modules/vault/:
# In k8s_evm.tf (or k8s_prod01.tf etc.)
{
  account        = "my-new-service",   # service account name in k8s
  namespace      = "default",
  extra_policies = [],                  # add extra policies if needed
},
Run terraform apply to create the Vault role and policy.
Step 3: Create the secrets file ConfigMap
apiVersion: v1
kind: ConfigMap
metadata:
  name: my-new-service-secrets
data:
  adapter.secrets: |
    VERSION 2
    MOUNT secret
    MY_SECRET=k8s/default/my-new-service#MY_SECRET
    ANOTHER_SECRET=k8s/default/my-new-service#ANOTHER_SECRET
Step 4: Configure the Deployment to use vaultenv
spec:
  serviceAccountName: my-new-service   # must match Vault role
  containers:
    - name: my-new-service
      command:
        - /usr/local/bin/vaultenv
        - --addr https://vault-a.ts.chorus1.net
        - --kubernetes-role default---my-new-service
        - --auth-backend kubernetes-prod01
        - --secrets-file /etc/config/adapter.secrets
        - -- /usr/local/bin/my-app
      env:
        - name: VAULT_ADDR
          value: "https://vault-a.ts.chorus1.net"
        - name: VAULT_ROLE
          value: "default---my-new-service"
        - name: KUBERNETES_BACKEND
          value: "kubernetes-prod01"
      volumeMounts:
        - name: secrets-config
          mountPath: /etc/config
  volumes:
    - name: secrets-config
      configMap:
        name: my-new-service-secrets
10.2 New Bare-Metal / Docker Service
Step 1: Store the secret in Vault
vault kv put secret/app/my-network/my-service MY_SECRET=value1
Step 2: Register the AppRole in Terraform
In provision/terraform/modules/vault/approle.tf:
resource "vault_approle_auth_backend_role" "my_service" {
  backend        = vault_auth_backend.approle.path
  role_name      = "my-network---my-service"
  token_policies = ["approle/my-network/my-service"]
  ...
}
Step 3: Add to vault-tokens configuration
In provision/ansible/environments/cs/group_vars/all/vault-tokens.yml:
vault_tokens:
  - ansible_group: my_host_group
    name: my-network---my-service
    prefix: ""
    cluster: "vault-a"
    user: myapp
    group: myapp
Step 4: Deploy the token
ansible-playbook --inventory environments/cs playbooks/base.yaml \
  --tags vault-tokens --limit my-host
11. Operational Procedures
Logging In as an Engineer
export VAULT_ADDR=https://vault-a.ts.chorus1.net

# Login via Google SSO (opens browser)
vault login -method=oidc

# Verify your token
vault token lookup
Reading a Secret (as admin)
vault kv get secret/k8s/default/lido-keys-api-mainnet
vault kv get -field=DB_PASSWORD secret/k8s/default/lido-keys-api-mainnet
Writing / Rotating a Secret
# Write (creates or overwrites)
vault kv put secret/k8s/default/lido-keys-api-mainnet \
  DB_PASSWORD="new-password"

# The service will pick up the new value on next restart
# (or on next vaultenv token renewal if dynamic)
Generating an Admin Token for Terraform
cd provision/vault/tools/tf
./with_tfapply.sh   # creates ephemeral 5-min token for terraform apply
Checking Vault Health
vault status
vault operator raft list-peers   # list Raft cluster members
Emergency: Vault is Sealed
If Vault reboots and needs unsealing, two key holders must each run:
export VAULT_ADDR=https://vault-a.ts.chorus1.net
# Decrypt your PGP-encrypted share
echo "wcFMA..." | base64 -D | keybase pgp decrypt
# Provide share
vault operator unseal
12. Real-World Example: KAPI Vault Auth Failure
This incident occurred on July 25–26, 2026 and illustrates what happens when Vault auth configuration is disrupted.
What Happened
The vault role for lido-keys-api-mainnet was migrated between two Terraform formats:
# OLD format (in evm_kuberoles list)
{
  account        = "lido-keys-api-mainnet",
  namespace      = "default",
  extra_policies = [],
},

# NEW format (direct object in separate section)
lido-keys-api-mainnet = {
  service_account_name = "lido-keys-api-mainnet",
  namespace            = "default",
  extra_policies       = [],
}
These two formats register the Vault role against different Kubernetes auth backends — the old format used kubernetes, the new format would use kubernetes-prod01. During the migration/revert cycle, the running pod may have been trying to authenticate via the wrong backend, or the terraform state was left inconsistent.
Lessons Learned
-
Vault auth failures are silent. The pod just crashes — there is no Vault-specific error alert. The alert gap was 23 hours.
-
Always add an
upalert alongside application-level alerts. Both existing KAPI alerts required the pod to be running:# These do NOTHING when the pod is completely absent expr: (time() - process_start_time_seconds{k8s_app="lido-keys-api-mainnet"}) >= 15 * 60 expr: (time() - lido_keys_api_last_update_timestamp{...}) >= 10 * 60The fix was to add:
# This fires within 5 minutes of the pod disappearing expr: absent(up{k8s_app="lido-keys-api-mainnet"}) or up{k8s_app="lido-keys-api-mainnet"} == 0 for: 5m -
Be explicit about
VAULT_ROLEandKUBERNETES_BACKEND. The original deployment relied on defaults. After the incident, these env vars were made explicit in the deployment manifest so the auth path is unambiguous. -
Vault role changes via Terraform are destructive. Moving a role between two Terraform formats deletes and recreates it. The interim state (deleted old role, not yet created new) breaks the service. Use caution and coordinate deploys.
13. Troubleshooting
Service Cannot Authenticate to Vault
Symptoms: Pod crashes on startup, logs show 403 Forbidden or permission denied
Checklist:
# 1. Does the Vault role exist?
vault read auth/kubernetes-prod01/role/default---my-service

# 2. Is the service account name correct? (must match exactly)
kubectl get serviceaccount -n default my-service

# 3. Is the policy attached?
vault policy read k8s/default/my-service

# 4. Does the secret path exist?
vault kv get secret/k8s/default/my-service

# 5. Is the Kubernetes backend configured correctly?
vault auth list
Common mistakes:
- Wrong
--auth-backendvalue (kubernetesvskubernetes-prod01) - Service account name mismatch (case sensitive, must be exact)
- Vault role not registered in Terraform (or Terraform not applied)
- Secret path doesn't match policy path
Secret Not Found
# Check what paths the token can access
vault token lookup  # shows attached policies
vault policy read k8s/default/my-service  # check path rules

# Check the secret exists
vault kv list secret/k8s/default/
vault kv get secret/k8s/default/my-service
Vault Token Expired (Bare Metal)
# On the host, check the token renewer status
systemctl status vault-token-renewer

# Check token validity
VAULT_TOKEN=$(cat /opt/vault_tokens/vault-a/my-service)
VAULT_ADDR=https://vault-a.ts.chorus1.net vault token lookup

# If expired, re-run the vault-tokens ansible playbook
ansible-playbook --inventory environments/cs playbooks/base.yaml \
  --tags vault-tokens --limit eth-oracle01
Vault Itself is Down / Sealed
# Check status
vault status

# If sealed, two key holders must unseal
vault operator unseal

# Check Raft peers
vault operator raft list-peers
Quick Reference
| Task | Command |
|---|---|
| Login | vault login -method=oidc |
| Read a secret | vault kv get secret/k8s/default/my-service |
| Write a secret | vault kv put secret/k8s/default/my-service KEY=value |
| List secrets | vault kv list secret/k8s/default/ |
| Check token | vault token lookup |
| SSH to server | vault ssh -role user-cert -mode ca hostname |
| Check Vault health | vault status |
| Check Raft peers | vault operator raft list-peers |
| List auth backends | vault auth list |
| List policies | vault policy list |
| Read a policy | vault policy read k8s/default/my-service |
| List Kubernetes roles | vault list auth/kubernetes-prod01/role |
Last updated: July 2026 — based on provision/terraform/modules/vault/ and provision/ansible/roles/chorusone.vault/
Lido Oracle — Chorus One Knowledge Base
Audience: New Chorus One team members with basic Kubernetes/DevOps familiarity.
Last updated: July 2026 · Oracle v8.0.5 · KAPI 4.0.1
Table of Contents
- 1. What Is the Lido Oracle?
- 2. Full Stack Architecture
- 3. Component Deep Dive
- 4. Networks
- 5. Ethereum Node Dependencies
- 6. Configuration Files
- 7. Secrets Architecture
- 8. Deployment
- 9. Monitoring & Health Checks
- 10. Common Issues & Runbook
- 11. Repo Layout
- 12. Key Addresses & IDs
1. What Is the Lido Oracle?
Lido is the largest Ethereum liquid staking protocol. Users deposit ETH and receive stETH (a rebasing token representing their staked ETH + rewards). Lido uses a decentralized oracle committee — a set of trusted node operators — to report on-chain data that the protocol needs to function.
Chorus One is one of those oracle committee members. Our oracle member address is:
0x8dB977C13CAA938BC58464bFD622DF0570564b78
Why does this matter? If our oracle goes offline, we miss reporting windows. Lido monitors this and will page us. Missing too many frames can result in slashing or removal from the committee.
What does the oracle report?
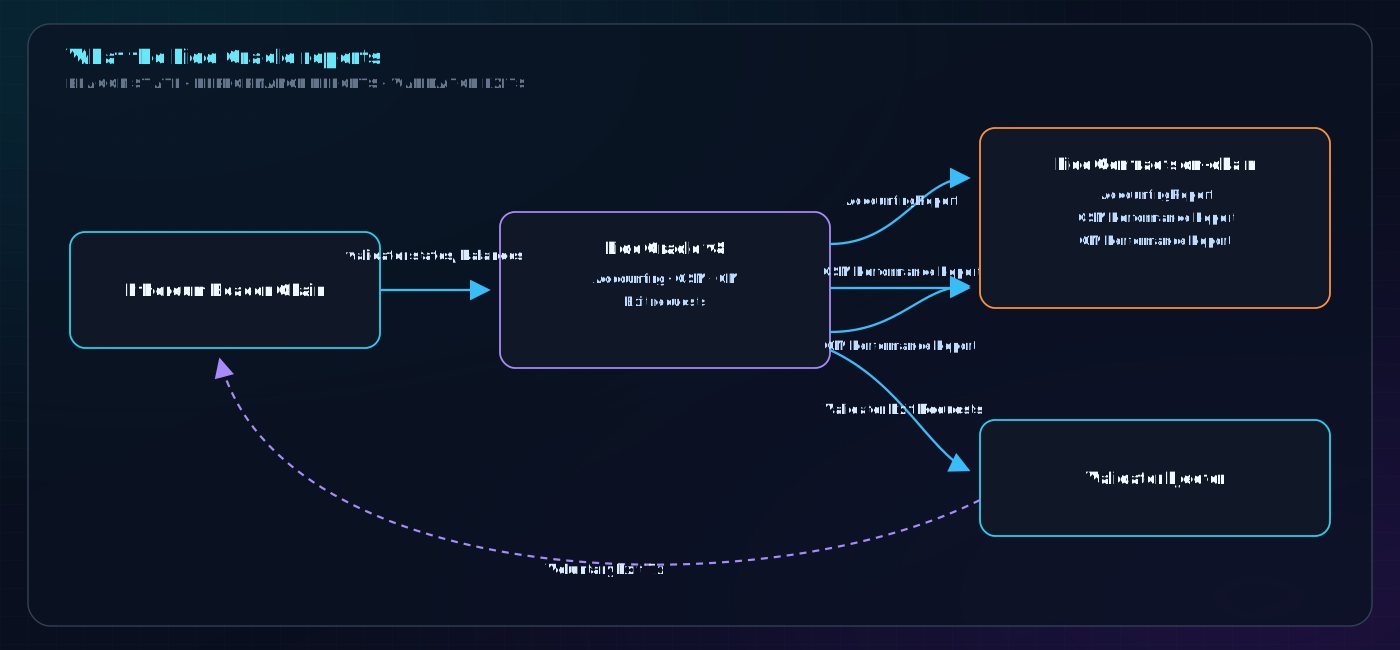
There are four oracle sub-processes, each running as a separate container:
| Container | What it does |
|---|---|
accounting | Reports total ETH staked, validator count, rewards, and exit requests each frame (~24h) |
csm | Reports performance for Community Staking Module validators |
cm | Reports performance for Curated Module (traditional) validators |
ejector | Monitors exit queue; submits voluntary exits when Lido requests them |
performance-collector | Collects attestation data into PostgreSQL (feeds csm/cm) |
performance-web | HTTP server that exposes collected performance data to csm/cm oracle containers |
2. Full Stack Architecture

3. Component Deep Dive
3.1 Oracle v8 (6 Docker containers)
Runs on a bare-metal host managed by Ansible. All 6 containers use the same Docker image — the entrypoint command switches behavior.
Image: 176395444877.dkr.ecr.us-east-1.amazonaws.com/chorusone/lido-oracle:<version_tag>
ECR repo: chorusone/lido-oracle (us-east-1, Chorus One AWS account)
Config files on the host:
/etc/docker/compose/ethereum-lido-oracle-v8-mainnet/
├── docker-compose.yml       ← generated by Ansible
└── keys.toml                ← tells fetch_keys.py where to get Vault secrets
Secrets are fetched from Vault at boot and written to ramdisk:
/dev/shm/vault-secrets/ethereum-lido-oracle-v8/mainnet/env-v8
This file contains MEMBER_PRIV_KEY, IPFS tokens, DB password, etc.
Vault path for oracle secrets:
ethereum/lido-oracle/mainnet
3.2 KAPI — Lido Keys API
KAPI is a REST API that indexes all validator keys registered with Lido. The oracle queries it to know which validators belong to each module. Without KAPI, the oracle cannot report.
Runs in Kubernetes (k8s-prod01, default namespace).

Key files:
| File | Purpose |
|---|---|
kubernetes/clusters/prod01/evm/lido-keys-api/mainnet/kustomization.yaml | Kustomize entry point |
kubernetes/clusters/prod01/evm/lido-keys-api/mainnet/deployment.yaml | Patch: image, env vars, imagePullSecrets |
kubernetes/clusters/prod01/evm/lido-keys-api/mainnet/configmap-secrets.yaml | Vault adapter config — maps DB_PASSWORD from Vault |
kubernetes/base/evm/lido-keys-api/deployment.yaml | Base: ports, probes, resources, DB_HOST |
Vault secret for KAPI:
secret/k8s/default/lido-keys-api-mainnet → field: DB_PASSWORD
Vault auth backend: kubernetes (note: Hoodi uses kubernetes-prod01 — different!)
KAPI health check:
kubectl exec -n default deploy/lido-keys-api-mainnet -- curl -s http://127.0.0.1:3000/v1/status
# Should return: {"appVersion":"4.0.1","chainId":1,...}
3.3 Validator Exit Stack
When Lido decides a validator needs to exit (e.g. withdrawal requests exceed buffer), it posts an on-chain exit request. We must respond by submitting a signed voluntary exit to the beacon chain. This is handled by a three-component stack, all running in Kubernetes:
⚠️ Name collision warning: There is also a
lido-oracle-v8-ejectorDocker container on the oracle host (part of the oracle suite). That is a different thing — it's an oracle process that detects and reports exit requests on-chain. The components below are what actually perform the exits.

Component roles
| Component | What it does |
|---|---|
| validator-ejector | Polls execution layer for Lido exit events. When it finds one, calls the webhook (validator-ejector-listener) |
| validator-ejector-listener | HTTP webhook server. Receives exit request, looks up key metadata via key-reporter, fetches private key from Vault, signs and submits the voluntary exit to beacon chain |
| ethereum-key-reporter | Metadata service that maps validator pubkeys → Vault paths. Cached and refreshed every 30 min |
Full exit flow step by step
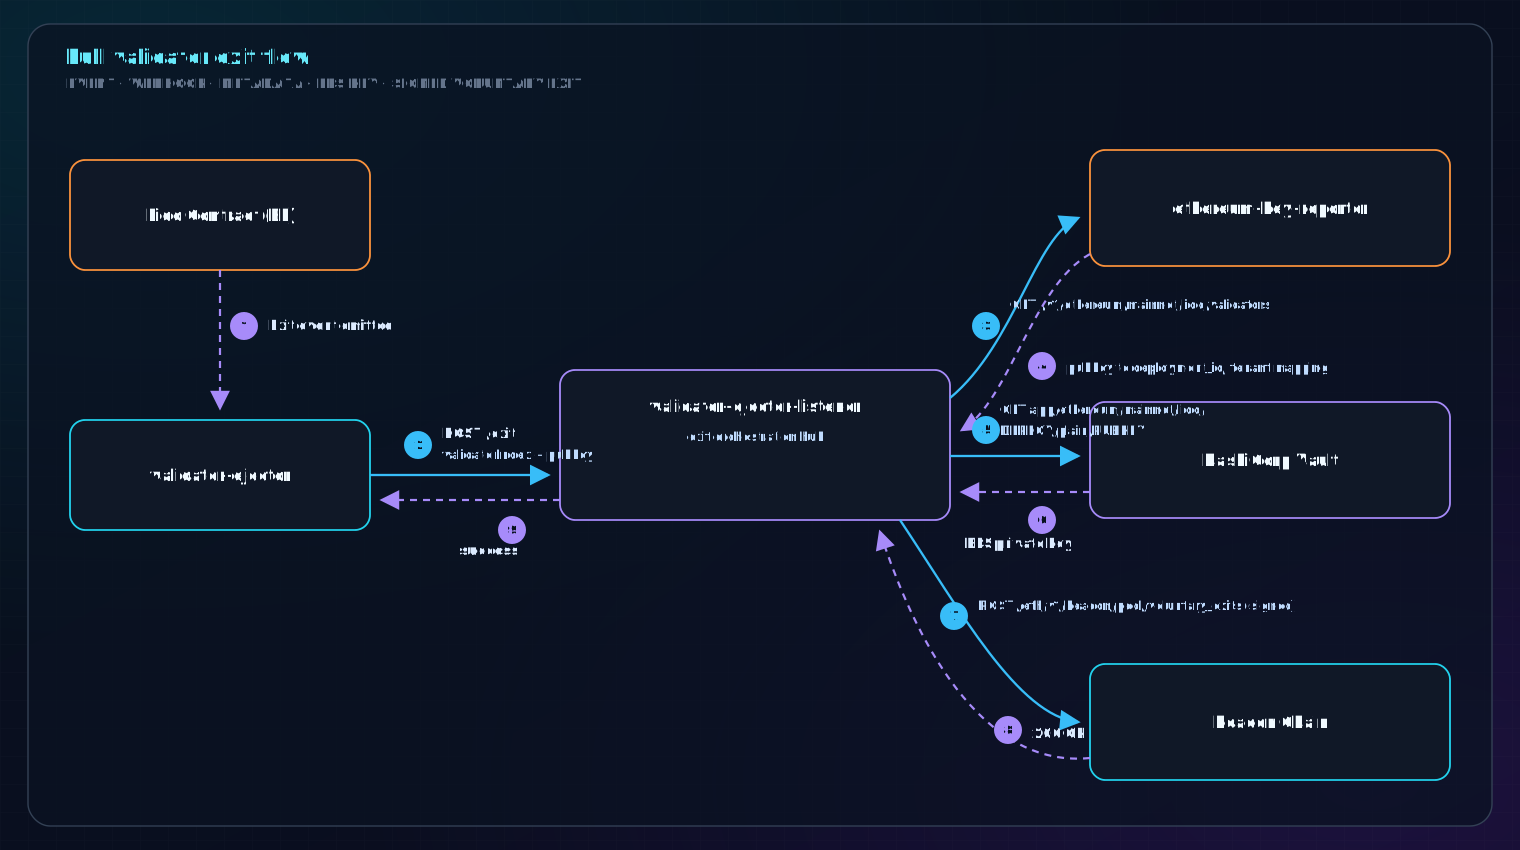
Note: Submitting a voluntary exit multiple times is idempotent and carries no penalty. If unsure whether an exit was submitted, it's safe to restart the ejector and let it reprocess.
Key config values (mainnet statefulset patch)
EXECUTION_NODE: http://100.114.206.5:18545   # eth-archive03 (ARCHIVE required)
CONSENSUS_NODE: http://100.114.206.5:15052
LOCATOR_ADDRESS: 0xC1d0b3DE6792Bf6b4b37EccdcC24e45978Cfd2Eb
STAKING_MODULE_ID: "1"                        # Curated module
OPERATOR_ID: "3"                              # Chorus One
VALIDATOR_EXIT_WEBHOOK: http://validator-ejector-listener:8080/exit
DRY_RUN: "false"
BLOCKS_PRELOAD: "40000"                       # How many blocks back to scan on startup
BLOCKS_LOOP: "64"                             # Blocks per polling cycle
Archive node required:
validator-ejectorneeds an archive execution node because it scans historical blocks. Do not point it at a pruned node.
Config file locations
kubernetes/base/evm/validator-ejector/
├── statefulset.yaml          ← base: probes, resources, common env vars
├── serviceaccount.yaml
└── kustomization.yaml

kubernetes/clusters/prod01/evm/validator-ejector/mainnet/
├── kustomization.yaml        ← namespace: eth-mainnet-lido
└── statefulset.yaml          ← patch: EL/CL endpoints, operator config, oracle allowlist
4. Networks
We run on both mainnet and Hoodi (testnet). Configuration differences:
| Mainnet | Hoodi | |
|---|---|---|
| Oracle version | 8.0.5 | 8.0.3 |
| EL node | 100.114.206.5:18545 (Besu, eth-archive03) | eth-testnet05-execution... (k8s service) |
| CL node | 100.114.206.5:15052 (Besu, eth-archive03) | eth-testnet05-consensus... (k8s service) |
| KAPI namespace | default | eth-hoodi-lido |
| KAPI service name | lido-keys-api-mainnet | lido-keys-api |
| Vault k8s backend | kubernetes | kubernetes-prod01 |
| Chain ID | 1 | 560048 |
| Lido Locator | 0xC1d0b3DE6792... | 0xe2EF9536DAAA... |
Gotcha: Hoodi KAPI uses
KUBERNETES_BACKEND=kubernetes-prod01. If you copy the mainnet config, this will be wrong and Vault auth will fail silently.
5. Ethereum Node Dependencies
All oracle components need an execution layer (EL) and consensus layer (CL) node. We use eth-archive03 (Besu v26.7) for mainnet.
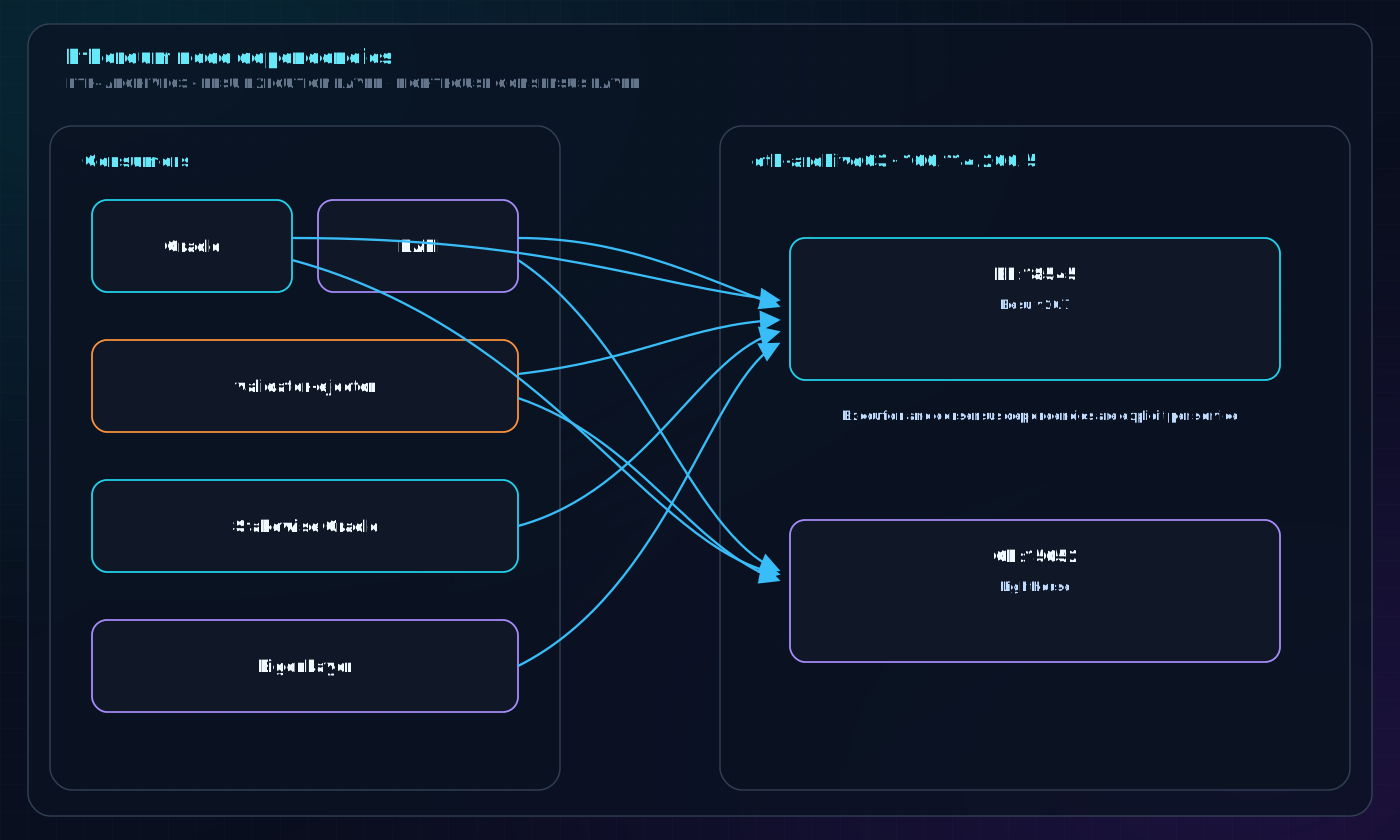
Why Besu and not Reth? Reth v2.4.1 has a timing issue where a newly-finalized block is available in the engine API before it is queryable via
eth_getBlockByHash. The oracle queries by exact block hash immediately after finalization, hitting this window and receiving-32001: block not found. Besu makes blocks available immediately. We switched in July 2026 when Lido flagged our oracle offline.
6. Configuration Files
Oracle (Ansible group_vars)
provision/ansible/environments/cs/group_vars/
├── ethereum_lido_oracle_v8_mainnet.yaml   ← mainnet config
└── ethereum_lido_oracle_v8_hoodi.yaml     ← hoodi config
Key fields in mainnet:
ethereum_lido_oracle_v8:
  version_tag: "8.0.5"                           # Docker image tag
  execution_endpoint: http://100.114.206.5:18545  # Besu EL
  consensus_endpoint: http://100.114.206.5:15052  # Besu CL
  keys_api_endpoint: http://lido-keys-api-mainnet.default.svc.k8s.prod.chorus1.net:8080
  lido_locator_address: "0xC1d0b3DE6792Bf6b4b37EccdcC24e45978Cfd2Eb"
  performance_db_host: "postgres-proxy.default.svc.k8s.prod.chorus1.net"
KAPI (Kustomize overlay)
kubernetes/clusters/prod01/evm/lido-keys-api/mainnet/
├── kustomization.yaml       ← entry point
├── deployment.yaml          ← patch: image + env
└── configmap-secrets.yaml   ← Vault DB_PASSWORD mapping

kubernetes/base/evm/lido-keys-api/
└── deployment.yaml          ← base: DB_HOST, ports, probes, resources
7. Secrets Architecture
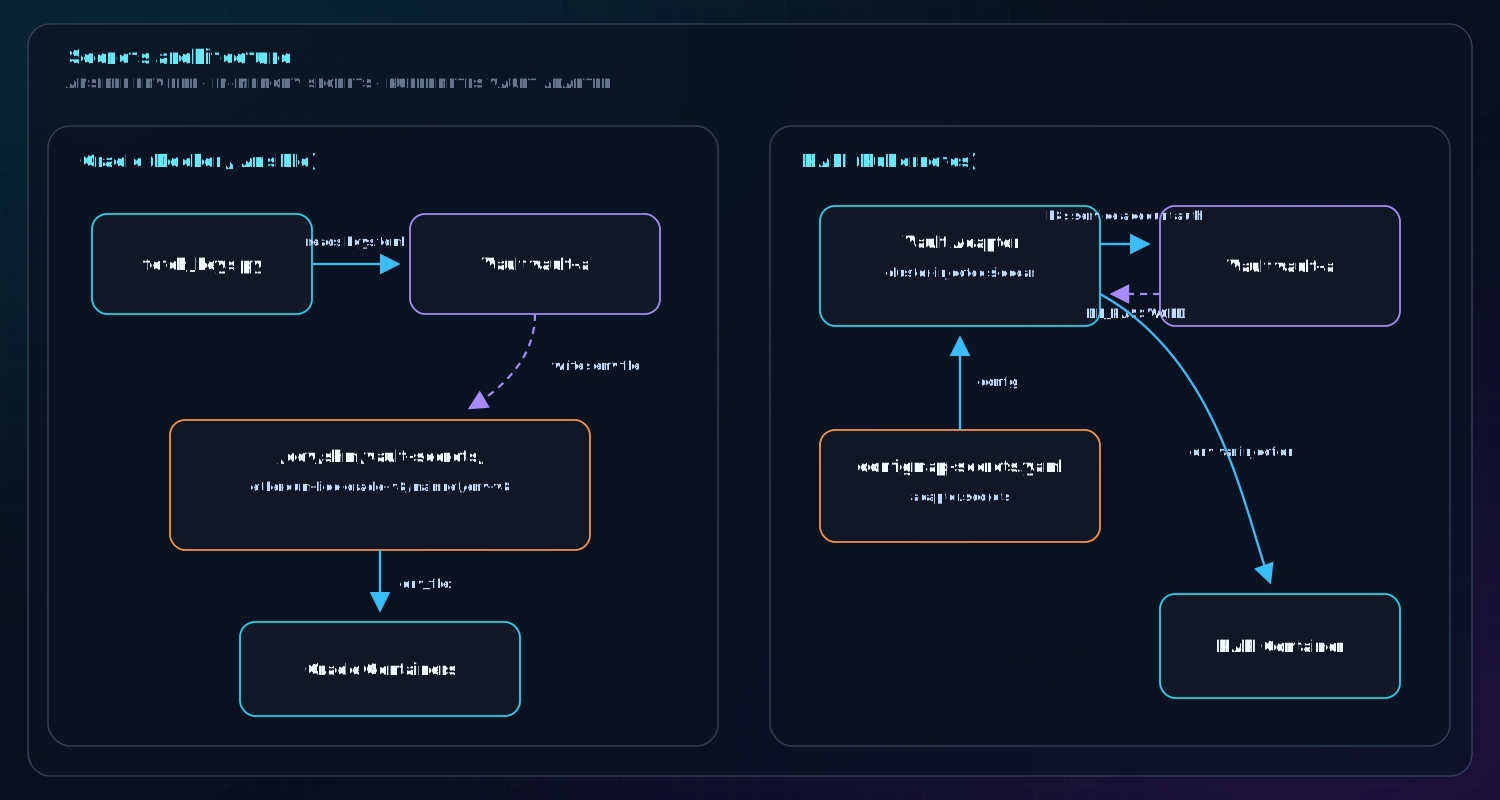
Oracle secrets Vault path: ethereum/lido-oracle/mainnet (contains MEMBER_PRIV_KEY, IPFS tokens, DB password)
KAPI secret Vault path: secret/k8s/default/lido-keys-api-mainnet → field DB_PASSWORD
How to read KAPI's DB password manually (for debugging):
vault kv get -field=DB_PASSWORD secret/k8s/default/lido-keys-api-mainnet
8. Deployment
8.1 Deploy / Upgrade Oracle
The oracle runs on a bare-metal host managed by Ansible. To upgrade or restart:
# 1. Update the version_tag in group_vars
vim provision/ansible/environments/cs/group_vars/ethereum_lido_oracle_v8_mainnet.yaml
# Change: version_tag: "8.0.5"

# 2. Build and push the image to ECR (if a custom image is needed)
#    For official lidofinance/oracle images, skip this step

# 3. Run the Ansible playbook
cd provision/ansible
ansible-playbook -i environments/cs base.yaml --tags ethereum_lido_oracle_v8 -l <host>
ECR tags are immutable — you cannot overwrite an existing tag. Always use a new tag.
8.2 Deploy / Upgrade KAPI
KAPI runs in Kubernetes and is managed by kubectl apply -k.
# Edit the image version in the overlay patch
vim kubernetes/clusters/prod01/evm/lido-keys-api/mainnet/deployment.yaml
# Change: image: 176395444877.dkr.ecr.us-east-1.amazonaws.com/chorusone/lido-keys-api:<new-version>

# Apply via kustomize
kubectl apply -k kubernetes/clusters/prod01/evm/lido-keys-api/mainnet/

# Watch rollout
kubectl rollout status deployment/lido-keys-api-mainnet -n default
Preview changes before applying:
kubectl diff -k kubernetes/clusters/prod01/evm/lido-keys-api/mainnet/
⚠️ If you see
selector is immutableerrors, the deployment must be deleted and recreated:kubectl delete deployment lido-keys-api-mainnet -n default kubectl apply -k kubernetes/clusters/prod01/evm/lido-keys-api/mainnet/
8.3 Deploy / Upgrade Validator Ejector
The ejector runs in Kubernetes and is managed by kubectl apply -k, the same as KAPI.
# Edit image version in the base statefulset (or overlay if overridden)
vim kubernetes/base/evm/validator-ejector/statefulset.yaml
# Change: image: 176395444877.dkr.ecr.us-east-1.amazonaws.com/chorusone/lido-validator-ejector:<new-tag>

# Preview changes
kubectl diff -k kubernetes/clusters/prod01/evm/validator-ejector/mainnet/

# Apply
kubectl apply -k kubernetes/clusters/prod01/evm/validator-ejector/mainnet/

# Watch rollout
kubectl rollout status statefulset/validator-ejector -n eth-mainnet-lido
StatefulSet note: Unlike Deployments, StatefulSets do not get an error on selector changes — but they do require
kubectl rollout restartto pick up new env var changes if the pod spec hash didn't change:kubectl rollout restart statefulset/validator-ejector -n eth-mainnet-lido
9. Monitoring & Health Checks
Quick status checks
# Oracle containers (on the oracle host)
docker ps | grep lido-oracle-v8

# Oracle logs (accounting is the most important)
docker logs lido-oracle-v8-accounting-mainnet --tail=50

# KAPI pod
kubectl get pods -n default | grep lido-keys-api-mainnet

# KAPI API status
kubectl exec -n default deploy/lido-keys-api-mainnet -- \
  curl -s http://127.0.0.1:3000/v1/status | jq .

# Validator ejector pods (namespace: eth-mainnet-lido)
kubectl get pods -n eth-mainnet-lido

# Validator ejector logs
kubectl logs -n eth-mainnet-lido statefulset/validator-ejector --tail=50

# Validator ejector listener logs
kubectl logs -n eth-mainnet-lido deploy/validator-ejector-listener --tail=50

# Ethereum key reporter (namespace: default)
kubectl logs -n default deploy/ethereum-key-reporter --tail=50

# Check validator exit status on beacon chain (by pubkey or index)
curl -s https://ethereum-beacon-api.publicnode.com/eth/v1/beacon/states/head/validators/<pubkey_or_index> | jq .
What healthy oracle logs look like
[INFO] Current frame: ref_slot=14875199
[INFO] Waiting for the next finalized slot...
[INFO] Finalized slot: 14875200, block hash: 0x...
[INFO] Fetched data from KAPI
Healthy = cycling every ~12 seconds, ERRORS: 0.
Lido Oracle Dashboard
Lido maintains a public monitoring page. If you get a Telegram alert saying "Bitwise accounting oracle offline", check:
- Is the accounting container running?
docker ps | grep accounting - Are there errors in the log?
docker logs lido-oracle-v8-accounting-mainnet --tail=100 - Is KAPI healthy? (see above)
- Is the EL/CL node reachable?
curl http://100.114.206.5:18545
10. Common Issues & Runbook
KAPI CrashLoopBackOff
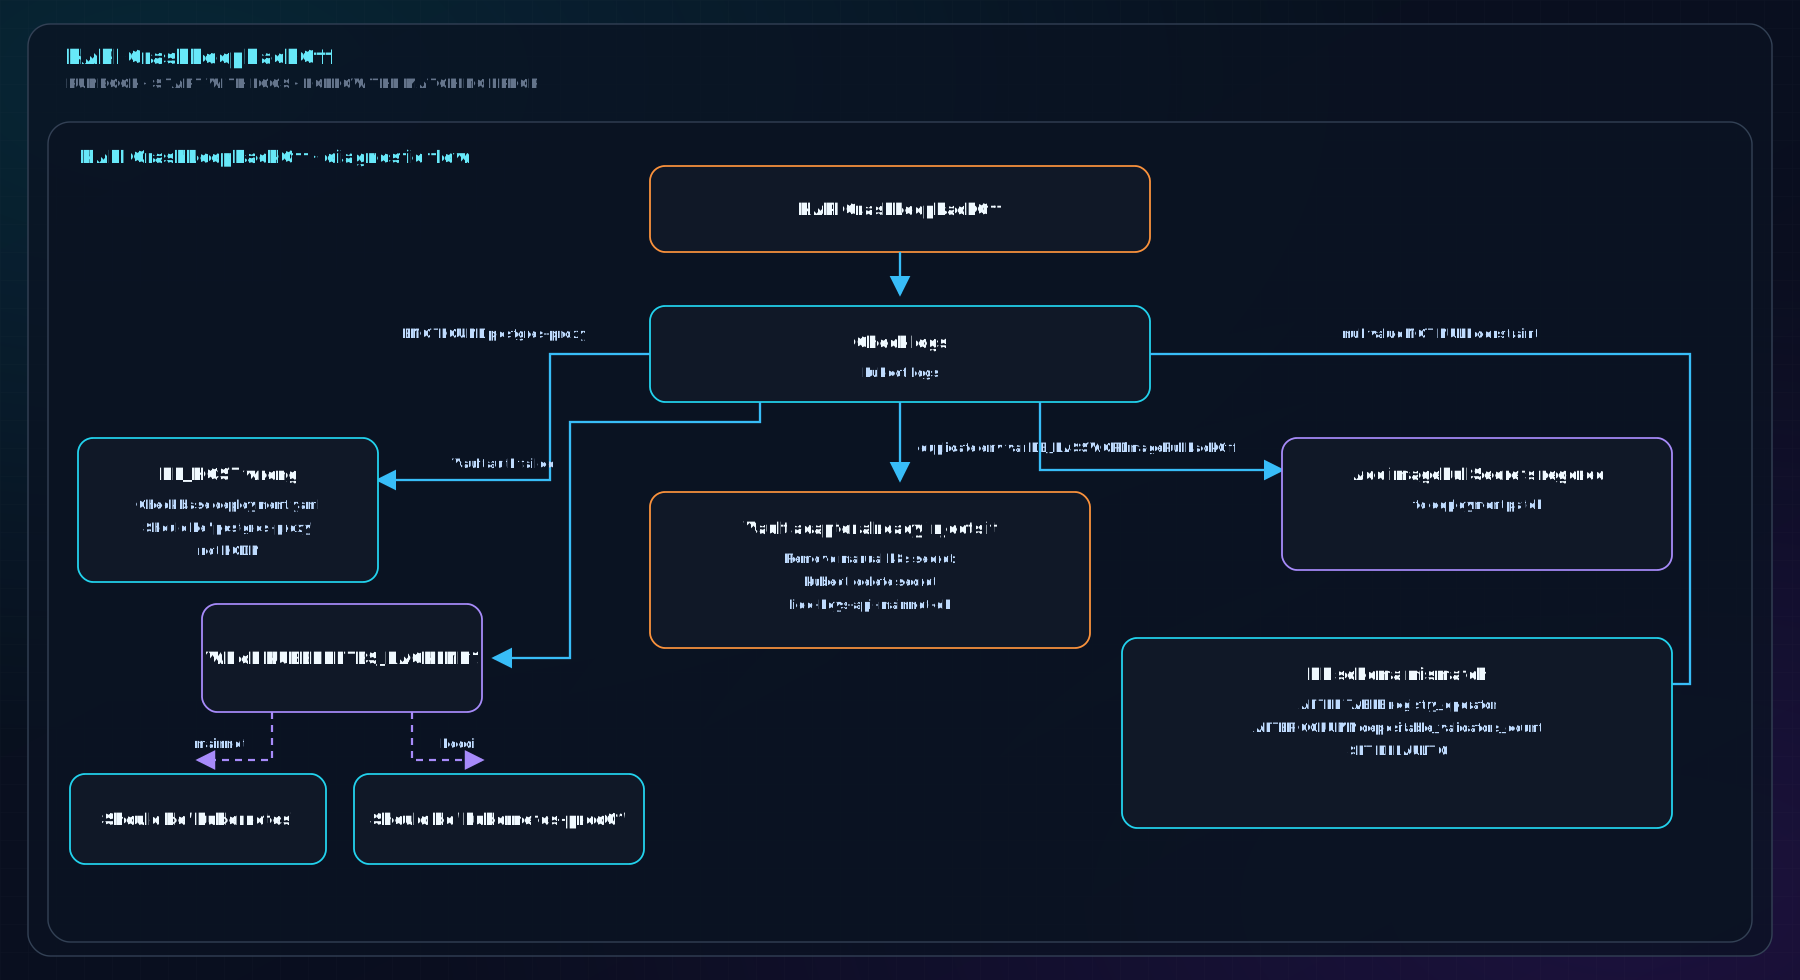
Oracle "block not found" errors
Symptom: Web3py exception: block not found: hash 0x... in accounting/csm/cm logs.
Cause: The execution node has a lag between the CL finalizing a block and that block being available via RPC (seen with Reth v2.4.1).
Fix: Switch execution_endpoint and consensus_endpoint to Besu (100.114.206.5) in the oracle group_vars, then re-run Ansible.
KAPI getSigningKeys CALL_EXCEPTION (background, non-fatal)
Symptom: CALL_EXCEPTION: getSigningKeys(uint256,uint256,uint256) in KAPI logs.
Cause: The old custom KAPI image (e5433ccdb4f7edc823a6c76e1aeff0cd86b9dc4f) has an ABI incompatible with the current Lido curated module v4 contracts. The official 4.0.1 image fixes this for most cases; some background sync jobs for curated-onchain-v1 may still log this but it does not crash the pod.
Fix: Ensure image is 4.0.1 or newer (official lidofinance/lido-keys-api or our ECR mirror).
Validator ejector not processing exits

First thing to try: Restart both pods. On startup, validator-ejector reloads historical messages and validator-ejector-listener refreshes its key cache.
kubectl rollout restart statefulset/validator-ejector -n eth-mainnet-lido
kubectl rollout restart deploy/validator-ejector-listener -n eth-mainnet-lido
Check if a validator has already exited (safe to resubmit if unsure — idempotent):
# By validator index or pubkey
curl -s https://ethereum-beacon-api.publicnode.com/eth/v1/beacon/states/head/validators/<index> | jq '.data.status'
# "active_exiting" or "exited_unslashed" = exit in progress or done
Check key-reporter cache (validates that the pubkey → Vault path mapping exists):
curl -s http://ethereum-key-reporter.default.svc.k8s.prod.chorus1.net:8000/v1/ethereum/mainnet/lido/validators | jq .
Useful external links:
- Mainnet validator explorer (search by pubkey): https://beaconcha.in/
- Hoodi testnet validator explorer: https://hoodi.beaconcha.in/
- Ethereum key Vault path structure: see Notion → Ethereum keys structure for New Vault
Oracle offline alert from Lido
- Check oracle containers:
docker ps | grep lido-oracle - Check logs for errors:
docker logs lido-oracle-v8-accounting-mainnet --tail=200 - Check KAPI is healthy (oracle cannot report without it)
- Check EL/CL node connectivity
- If stopped: re-run Ansible playbook to bring containers back
Lido-requested oracle stop (for upgrades)
Lido periodically asks all oracle committee members to stop, update, and restart. Process:
docker compose -f /etc/docker/compose/ethereum-lido-oracle-v8-mainnet/docker-compose.yml down- Update
version_tagin group_vars - Re-run Ansible playbook
- Confirm containers are back up
- Reply to Lido Telegram that you're online
11. Repo Layout
chorus-infrastructure/
│
├── provision/ansible/
│   ├── environments/cs/group_vars/
│   │   ├── ethereum_lido_oracle_v8_mainnet.yaml   ← oracle mainnet config
│   │   └── ethereum_lido_oracle_v8_hoodi.yaml     ← oracle hoodi config
│   └── roles/
│       └── chorusone.ethereum-lido-oracle-v8/
│           ├── defaults/main.yml                  ← default ports, dirs
│           ├── tasks/main.yml                     ← Ansible tasks
│           └── templates/
│               ├── docker-compose.yml.j2          ← generates compose file
│               └── keys.toml.j2                   ← Vault secret fetch config
│
└── kubernetes/
    ├── base/evm/lido-keys-api/
    │   ├── deployment.yaml                        ← base: DB_HOST, ports, probes
    │   ├── service.yaml
    │   ├── serviceaccount.yaml
    │   └── clusterrolebinding.yaml
    └── clusters/prod01/evm/
        ├── lido-keys-api/
        │   ├── mainnet/
        │   │   ├── kustomization.yaml
        │   │   ├── deployment.yaml                ← patch: image + env
        │   │   └── configmap-secrets.yaml         ← Vault DB_PASSWORD
        │   └── hoodi/
        │       ├── kustomization.yaml
        │       ├── deployment.yaml
        │       ├── configmap-secrets.yaml
        │       └── namespace.yaml
        └── validator-ejector/
            └── mainnet/
                ├── kustomization.yaml         ← namespace: eth-mainnet-lido
                └── statefulset.yaml           ← patch: EL/CL endpoints, operator config

kubernetes/base/evm/validator-ejector/
├── statefulset.yaml                           ← base: probes, resources, common env
├── serviceaccount.yaml
└── kustomization.yaml
12. Key Addresses & IDs
| Item | Value |
|---|---|
| Chorus One oracle member address | 0x8dB977C13CAA938BC58464bFD622DF0570564b78 |
| Chorus One operator ID (curated module) | 3 |
| Lido Locator (mainnet) | 0xC1d0b3DE6792Bf6b4b37EccdcC24e45978Cfd2Eb |
| CSM module address (mainnet) | 0xdA7dE2ECdDfccC6c3AF10108Db212ACBBf9EA83F |
| Curated module address (mainnet) | 0xDa5F930cE326EB5205085D66c72A4E79d60cB8C1 |
| eth-archive03 (Besu) | 100.114.206.5 |
| Performance DB name | lido_oracle_performance_mainnet |
| KAPI DB name | lido_keys_api_mainnet |
How to run TF
(chorus-infra) terraform/vault-a % pwd
/home/leo/code/chorus-infrastructure/provision/terraform/vault-a
(chorus-infra) terraform/vault-a % ./with_tfapply.sh terraform apply
Layer 1 Applications
This section of the runbook contains information specific to supporting Layer 1 applications we run internally.
NEAR
This contains information specific to running and supporting NEAR validators
- Pre-requisites
- Create keys and staking pool on mainnet
- Epoch Sync
- Build and Upgrade neard
- Monitoring and Alerting
- Updating Pool Details
- Governance Voting
- Rewards Withdrawal
NEAR Operations Prerequisites
This page outlines the common prerequisites for performing NEAR validator operations.
Required Access
- SSH Access: Access to the NEAR mainnet box
- NEAR CLI: Installed at
/home/neard/bin/near-cli - Signing Key: Access to the validator signing key at
/home/neard/.near-credentials/mainnet/bitwise_1.mainnet.json
Validator Account
Our mainnet validator account is: bitwise_1.poolv1.near
NEAR CLI Path
/home/neard/bin/near-cli
Key Permissions
Ensure the signing key file has appropriate permissions:
ls -la /home/neard/.near-credentials/mainnet/bitwise_1.mainnet.json
The file should be readable by the user executing the commands.
Common Command Structure
Most NEAR CLI commands follow this pattern:
Read Operations
/home/neard/bin/near-cli contract call-function as-read-only CONTRACT_NAME METHOD_NAME json-args 'JSON_ARGS' network-config mainnet now
Write Operations
/home/neard/bin/near-cli contract call-function as-transaction CONTRACT_NAME METHOD_NAME json-args 'JSON_ARGS' prepaid-gas 'GAS_AMOUNT' attached-deposit 'NEAR_AMOUNT' sign-as bitwise_1.poolv1.near network-config mainnet sign-with-access-key-file /home/neard/.near-credentials/mainnet/bitwise_1.mainnet.json
Create keys and staking pool on mainnet
There are 3 types of key pairs we manage
- Account key:
- You need this to manage the staking pool - creating the staking pool, and pinging a proposal every epoch (to renew proposals and update staking balance).
- On NEAR, accounts are human-readable, so you can claim your account ID e.g.
bitwise.near - There are two flavors of signer keys currently available,
FullAccesskeys andFunctionCallkeys. The first has unrestricted control to "act on behalf of an account" (as used by NEAR CLI and NEAR Wallet). The second is limited to contract storage and compute. We’re going to create aFullAccesskey vianear loginin this guide. - This wallet should be funded with a small balance to cover the costs of sending pings each epoch.
- Validator key: Used to sign and validate blocks and chunks.
- Node key: Used internally by a node to sign low-level communications with other nodes in the network like sending block headers or making other verifiable requests.
You can generate all of these keys independently from the node.
Create an account key with near login
Install CLI
npm install -g near-cli
Use mainnet
export NEAR_ENV=mainnet
near login
This command opens a web browser where you can authorize and copy a key to your local machine.
- Copy the link into your browser
- Grant access to NEAR CLI
- You'll see a "127.0.0.1 refused to connect" page—this is expected
- Return to your console and enter your wallet/account ID (e.g.,
bitwise.near)
Confirm that’s it in
ls -la .near-credentials/mainnet/
File content looks something like:
{
  "account_id": "bitwise.near",
  "public_key": "ed25519:***",
  "private_key": "ed25519:***"
}
Encrypt the content and store it under the inventory's host files directory under account_key.json - this is needed for the following Ansible task:
- name: "copy account_key.json to credentials directory"
  ansible.builtin.copy:
    src: "{{ inventory_dir }}/host_files/all/account_key.json"
    dest: "{{ neard_credentials_dir }}/{{ neard_account_id }}.json"
    owner: "{{ neard_user }}"
    mode: 0750
  notify:
    - restart neard
Create validator and node keys
near generate-key validator_key
This will saves the key to ~/.near-credentials/mainnet/validator_key.json.
This requires two important changes:
- Change
account_idto your desired pool name. Make sure to follow this format{pool_id}.{staking_pool_factory}. For example, ifbitwiseis thepool_idthen theaccount_idisbitwise.pool.nearbecausepool.nearis the pool factory. - Change
private_keytosecret_key
{
  "account_id": "bitwise.pool.near",
  "public_key": "ed25519:***",
  "secret_key": "ed25519:****"
}
Encrypt the content and store it under the inventory's host files directory under validator_key.json
Generate a node key following the same process. You can set any account_id because, unlike the validator key, it isn't used for external purposes. Then encrypt and store it under the inventory's host files directory under node_key.json
Deploy staking pool contract
near call pool.near create_staking_pool '{"staking_pool_id": "<poolId>", "owner_id": "<accountId>", "stake_public_key": "<public key>", "reward_fee_fraction": {"numerator": 5, "denominator": 100}}' --accountId="<accountId>" --amount=4 --gas=300000000000000
- pool_id: The staking pool name. The factory automatically adds its name to this parameter, creating
{pool_id}.{staking_pool_factory}. For example, if you usebitwise, it becomesbitwise.pool.nearon mainnet- VERY IMPORTANT: Make sure the final name matches the
account_idin yourvalidator_key.jsonfile above
- VERY IMPORTANT: Make sure the final name matches the
- owner_id: The account ID you created in the previous step
- stake_public_key: The public key from your
validator_key.jsonfile - reward_fee_fraction.numerator: The fee percentage your pool will charge (e.g., 5 over 100 means 5% fees)
- amount=4: You must have at least 4 NEAR available, as this is the minimum required for storage in the new pool contract
- Note that this say 4 https://near-nodes.io/validator/staking-pool-migration#deploy-a-new-staking-pool-contract
- This says 30 https://near-nodes.io/validator/deploy-on-mainnet
Everything should now be set up. Here are some helpful references:
- https://near-nodes.io/validator/compile-and-run-a-node#11-deploy-a-staking-pool
- https://near-nodes.io/validator/staking-pool-migration
Submit a proposal (optional)
In order to obtain a validator seat, you must submit a proposal by sending a ping. A ping creates a new proposal and updates the staking balances for your delegators. You should issue a ping each epoch to keep reported rewards current.
This step is optional for two reasons: 1) you don't have enough stake yet when starting out, and 2) this process is already automated through a cron job.
near call <staking_pool_id> ping '{}' --accountId <accountId> --gas=300000000000000
NEAR Epoch Sync
Overview
Epoch Sync allows a node to synchronize from genesis without depending on external snapshots. This process is automated via Ansible with all necessary configurations already in place.
Reference: NEAR Node Epoch Sync Documentation
When to Use Epoch Sync
Perform an epoch sync when encountering:
- Corrupted state data
- Logs showing "downloading blocks" but percentage not moving
- Need to quickly resync a node from scratch
Resync Process
The resync process is straightforward since all epoch sync configurations are already set up:
-
Stop the neard service
systemctl stop attestant-neard -
Remove all data files
rm -rf /home/neard/.near/data/* -
Start the service again
sudo systemctl start attestant-neard
The node will automatically begin epoch sync using the existing configuration and return to normal operation once synchronized.
To monitor the sync progress:
# Check service status
systemctl status attestant-neard

# Monitor logs
tail -f /var/log/neard/neard.log
Build and Upgrade
Run the Ansible build step for neard with the target version. It will check out the specified version, build it, and upload the binary to the corresponding S3 bucket under /bin/neard-<target_version>. For example, see the command below for the dev build server:
dev-ansible-playbook -i inventories/development-operations/hosts --limit build-d01.attestant.io build.yml --extra-vars "neard_version=2.6.3"
Update the version and checksum in ops/ansible/roles/neard/defaults/main.yml, then rerun the playbook. This will download the corresponding version, update the symlink, and restart the neard service.
neard_version: '2.6.3'
neard_checksum: 'sha256:16d93ec76fe5ed9887e935b405ca60d5514da6ac6e15ae667c58bbb030d53d82'
Monitoring and Alerting
Project Documentation
Monitoring
Maintenance
There are two key components running as part of the validator setup:
/home/neard/bin/neard: The validator client software, managed via a systemd service./home/neard/bin/ping.sh: A script that sends staking proposals; scheduled via a cron job to run every 8 hours.
Proposal Logic
To become a validator, a node must meet the minimum required stake, known as the seat price. To participate, it needs to submit a staking proposal every epoch with the required amount of stake.
Proposals target epoch +2, which means if you submit a proposal now and it’s approved, the validator will receive a seat 3 epochs later.
Each NEAR epoch has 43,200 blocks, and with an average block time of about 1 second, this results in an epoch duration of roughly 12 hours.
To ensure continuous participation, the script is designed to automatically submit a proposal every epoch.
For more details on how seat prices are calculated, check out this guide.
Logs
/var/log/neard/neard.log: Logs for the validator client/var/log/neard/ping.log: Logs for the staking proposal script
SLAs
Uptime is measured by how many chunks we produce or validate compared to how many we’re expected to at a given time (i.e., actual/expected rate). It depends on three roles: block production, chunk production, and chunk validation. At the moment, we only have 1 role which is chunk validation. To be able to get the other roles, we need to be in the top 100 validators weighted by the total number of stakes delegated.
We must maintain a chunk endorsement/validation rate above 90% (we've set an alert at 92% to allow some buffer). Missing blocks or chunks is the primary reason a validator is removed from the active pool. The second most common reason is not having enough stake in our staking pool. The action needed is to check the current seat price or minimum stake required for all active validators. Additionally, if we don’t propose a block every epoch, we could also lose our active status.
As a side note, for block and chunk producers, uptime is calculated differently because the system prioritizes chunk production over validation. For example, cosmose.poolv1.near has 100% uptime: 237/237 blocks, 1684/1684 chunks, but "only" 91378/92274 chunk validations. Another one, bisontrails.poolv1.near, shows 99.91% uptime with 243/243 blocks, 2165/2167 chunks, and 86747/87414 validations. So chunk validation isn’t the main factor in their uptime, especially if chunk production isn’t perfect.
Failover
We maintain a secondary node in a different location to handle potential hardware or network failures on the primary/active node. The failover node uses a different node key and does not have the validator key. It shares the same configs as the active node, with two key differences:
- The active node has the file
/home/neard/.near/validator_key.json - The
tracked_shadow_validatorfield is absent in the active node's/home/neard/.near/config.json
At a high level, the failover process involves:
- Copying validator key to the failover node
- Removing the validator key from the original node
- Deleting the
tracked_shadow_validatorfield in the config file - Swapping the node key
- Restarting both services
Instruction
- Check out a new branch from master inside ops.
- Set the desired host as active using the
neard_active_instancesflag. Make sure only one instance is listed — there should only be one active instance at any given time. If more than one is active, our chunk endorsement rate will suffer due to throttling. - SSH login to all hosts in the pod.
- Run the Ansible playbook targeting all hosts to trigger the failover process as described above and ensure to set the
neard_failover_enabledvar.
For example, in dev:
dev-ansible-playbook -i inventories/development-pod5-near/hosts neard.yml --extra-vars 'neard_failover_enabled=true'
And an example in prod:
prd-ansible-playbook -i inventories/pod10/hosts neard.yml --extra-vars 'neard_failover_enabled=true' | tee -a ~/ansible_logs/near-val-p10-xxxxxx.txt
- Create a PR with your changes and get it reviewed.
Alerts
| Alert Name | Description | Action |
|---|---|---|
| Not a Validator | The node is currently not an active validator. | Check if the validator is endorsing any chunks. Refer to the Grafana's "Chunk Endorsement/Validation" chart and check if the number is increasing overtime. |
| Incorrect number of validators | There should be only 1 "active" validator while others should be shadowing | Log into the related boxes. There are two ways to check if a box is running the active validator as mentioned in the failover section above. Make sure only one box meets these conditions. Also, ensure there’s only one instance listed in the neard_active_instances field in Ansible. You can rerun the Ansible script to resolve this. |
| Chunk Endorsement Rate Below 90% | The node is not endorsing enough chunks and risks removal from the validator pool. | Inspect the Grafana's "Chunk Endorsement/Validation" chart and confirm that both the expected and produced chunks numbers are increasing overtime and roughtly at the same rate, e.g. 15 chunks every 10s |
| Node Syncing is Out-of-Date | The node's block header is lagging behind the network. | Check the logs to identify syncing issues or verify if it is still downloading. |
| Insufficient Peer Connections | The node requires at least 3 peers to participate in consensus and begin validating. | Inspect the Grafana's "Peer" chart for the current peer count. |
Updating NEAR Pool Details
This guide explains how to update the pool details for bitwise_1.poolv1.near so that they appear on NEAR Blocks Node Explorer.
Overview
Pool details are stored in the pool-details.near contract on NEAR mainnet. These details can be viewed and updated using the NEAR CLI.
Prerequisites
See NEAR Operations Prerequisites for common requirements.
Checking Current Pool Details
To view the current pool details (if any exist):
/home/neard/bin/near-cli contract call-function as-read-only pool-details.near get_fields_by_pool json-args '{"pool_id": "bitwise_1.poolv1.near"}' network-config mainnet now
If no details have been set, this command will return null.
Updating Pool Details
Pool details must be updated one field at a time using the update_field method. The general command format is:
/home/neard/bin/near-cli contract call-function as-transaction pool-details.near update_field json-args '{"pool_id": "bitwise_1.poolv1.near", "name": "FIELD_NAME", "value": "FIELD_VALUE"}' prepaid-gas '200.0 Tgas' attached-deposit '0 NEAR' sign-as bitwise_1.near network-config mainnet sign-with-access-key-file /home/neard/.near-credentials/mainnet/bitwise_1.mainnet.json
Example: Updating Twitter Handle
/home/neard/bin/near-cli contract call-function as-transaction pool-details.near update_field json-args '{"pool_id": "bitwise_1.poolv1.near", "name": "twitter", "value": "bitwiseinvest"}' prepaid-gas '200.0 Tgas' attached-deposit '0 NEAR' sign-as bitwise_1.near network-config mainnet sign-with-access-key-file /home/neard/.near-credentials/mainnet/bitwise_1.mainnet.json
Available Fields to Update
Based on the pool-details contract documentation, we can update the following fields:
name- Pool namedescription- Pool descriptionurl- Website URLtwitter- Twitter handle (without @)telegram- Telegram handlediscord- Discord serveremail- Contact email
Verifying Updates
After updating fields, verify the changes by reading the pool details again:
/home/neard/bin/near-cli contract call-function as-read-only pool-details.near get_fields_by_pool json-args '{"pool_id": "bitwise_1.poolv1.near"}' network-config mainnet now
The updated information should appear on NEAR Blocks shortly after the transactions are confirmed.
References
NEAR Governance Voting
This guide explains how to participate in NEAR governance voting using the NEAR CLI.
Overview
NEAR governance proposals allow token holders and validators to vote on important protocol changes. Validators can vote on behalf of their pool using the NEAR CLI.
Prerequisites
See NEAR Operations Prerequisites for common requirements.
Current Proposal Example
The current proposal is hosted on https://vote.linearprotocol.org/. It is to lower NEAR’s maximum inflation from 5% to 2.5% now, with flexibility to adjust in the future.
To vote yes,
/home/neard/bin/near-cli contract call-function as-transaction reduce-inflation.near vote json-args '{"staking_pool_id": "bitwise_1.poolv1.near", "vote": "yes"}' prepaid-gas '200.0 Tgas' attached-deposit '0 NEAR' sign-as bitwise_1.near network-config mainnet sign-with-access-key-file /home/neard/.near-credentials/mainnet/bitwise_1.mainnet.json
NEAR Reward Withdrawals
Overview
There are 3 steps:
- Unstake the NEAR rewards (takes 2-3 days to complete)
- Withdraw the NEAR rewards
- Transfer the NEAR rewards to a business controlled account
Commands
Unstake
All commands are run from the NEAR host that you want to withdraw from.
First become neard user:
su neard
Then run this command to unstake the rewards:
REMEMBER TO REPLACE THE VALIDATOR NAME AND ACCOUNT ID WITH THE CORRECT VALUES FOR THE VALIDATOR.
near call "bitwise_1.poolv1.near" unstake_all --accountId "bitwise_1.near" --gas=300000000000000
This will take 2 to 3 days to complete.
Withdraw and transfer
First become neard user:
su neard
Then withdraw the rewards:
REMEMBER TO REPLACE THE VALIDATOR NAME AND ACCOUNT ID WITH THE CORRECT VALUES FOR THE VALIDATOR.
near call "bitwise_1.poolv1.near" withdraw_all --accountId "bitwise_1.near" --gas=300000000000000
You can check that the rewards have been withdrawn by running:
near state bitwise_1.near
Then transfer the rewards from the validator account to a business controlled account:
REMEMBER TO UPDATE THE FROM ACCOUNT ID TO BE THE VALIDATOR YOU WANT TO WITHDRAW FROM AND THE TO ACCOUNT ID TO BE THE ACCOUNT YOU WANT TO TRANSFER THE REWARDS TO.
near send-near "bitwise_1.near" "123456ReplaceMeWithAccountID" '1'
E.g. a business account we've used in the past is: 7c817f6ff3f605fef85fc4bed4813fbedb47e768da0ad36dc587459d44f6657c
Ethereum
This contains information specific to running and supporting Ethereum validators.
Missed Blocks
Overview
The process is as follows:
- Identify the slot.
- Investigate the Vouch logs.
- Verify if MEV and follow up with relay.
Identify the slot
This is done by logging on to the client box and running the missed blocks command:
su opsacli attestant missedblocks --start-range=2026-06-09T05:00:00 --end-range=2026-06-09T12:47:00
You need to set a suitable time range for the missed block. Check the KPI dashboard for the time of the missed block and set a time range about an hour each side. This is because it takes time to finalise so the time the KPI dashboard detects the missed block is a bit behind the actual time.
This should give an output similar to the following:
From: slot 14513000 (2026-06-09T00:00:00 UTC)
To:   slot 14514000 (2026-06-09T09:00:00 UTC)
1 missed block(s):
Timestamp            Slot      Pod    Customer             Validator  Fee recipient
2026-06-09T00:40:00  14513000  pod-2  1234567891234578912  1778151    0x2323232323232323232323232323232323232
Investigate the Vouch logs
Find the active host for the pod identified in step 1 and grep the logs for the slot identified in step 1. This will likely show a proposal log like so:
{
  "level": "info",
  "service": "blockrelay",
  "impl": "standard",
  "slot": 14513000,
  "provider": "https://bloxroute.max-profit.blxrbdn.com",
  "value": "3580000000000000",
  "value_delta": "0",
  "score": "3580000000000000",
  "score_delta": "0",
  "selected": true,
  "time": "2026-06-09T07:00:00.000Z",
  "message": "Auction participant"
}
NB: There may multiple Auction participant logs for the same slot - be careful to pick the one with selected: true
If the above is found then this was a relay slot - proceed to step 3.
If not a relay slot then there must have been an issue with local block production. For local block production we need to check for network issues, errors in the vouch logs and errors in the beacon nodes.
Verify if MEV and follow up with relay
If the above was a relay slot then we need to ensure we signed the block in time. To do this open jaeger, Set the Service to Vouch, set the Operation to Proposal and set the Tags to slot=14513000 (use the actual slot number found in step 1). This should give you the trace for the proposal.
Once you have this you can check how far into the slot we signed. We should sign within 2 seconds. You can see from this image that we signed around 1.75 seconds into the slot:
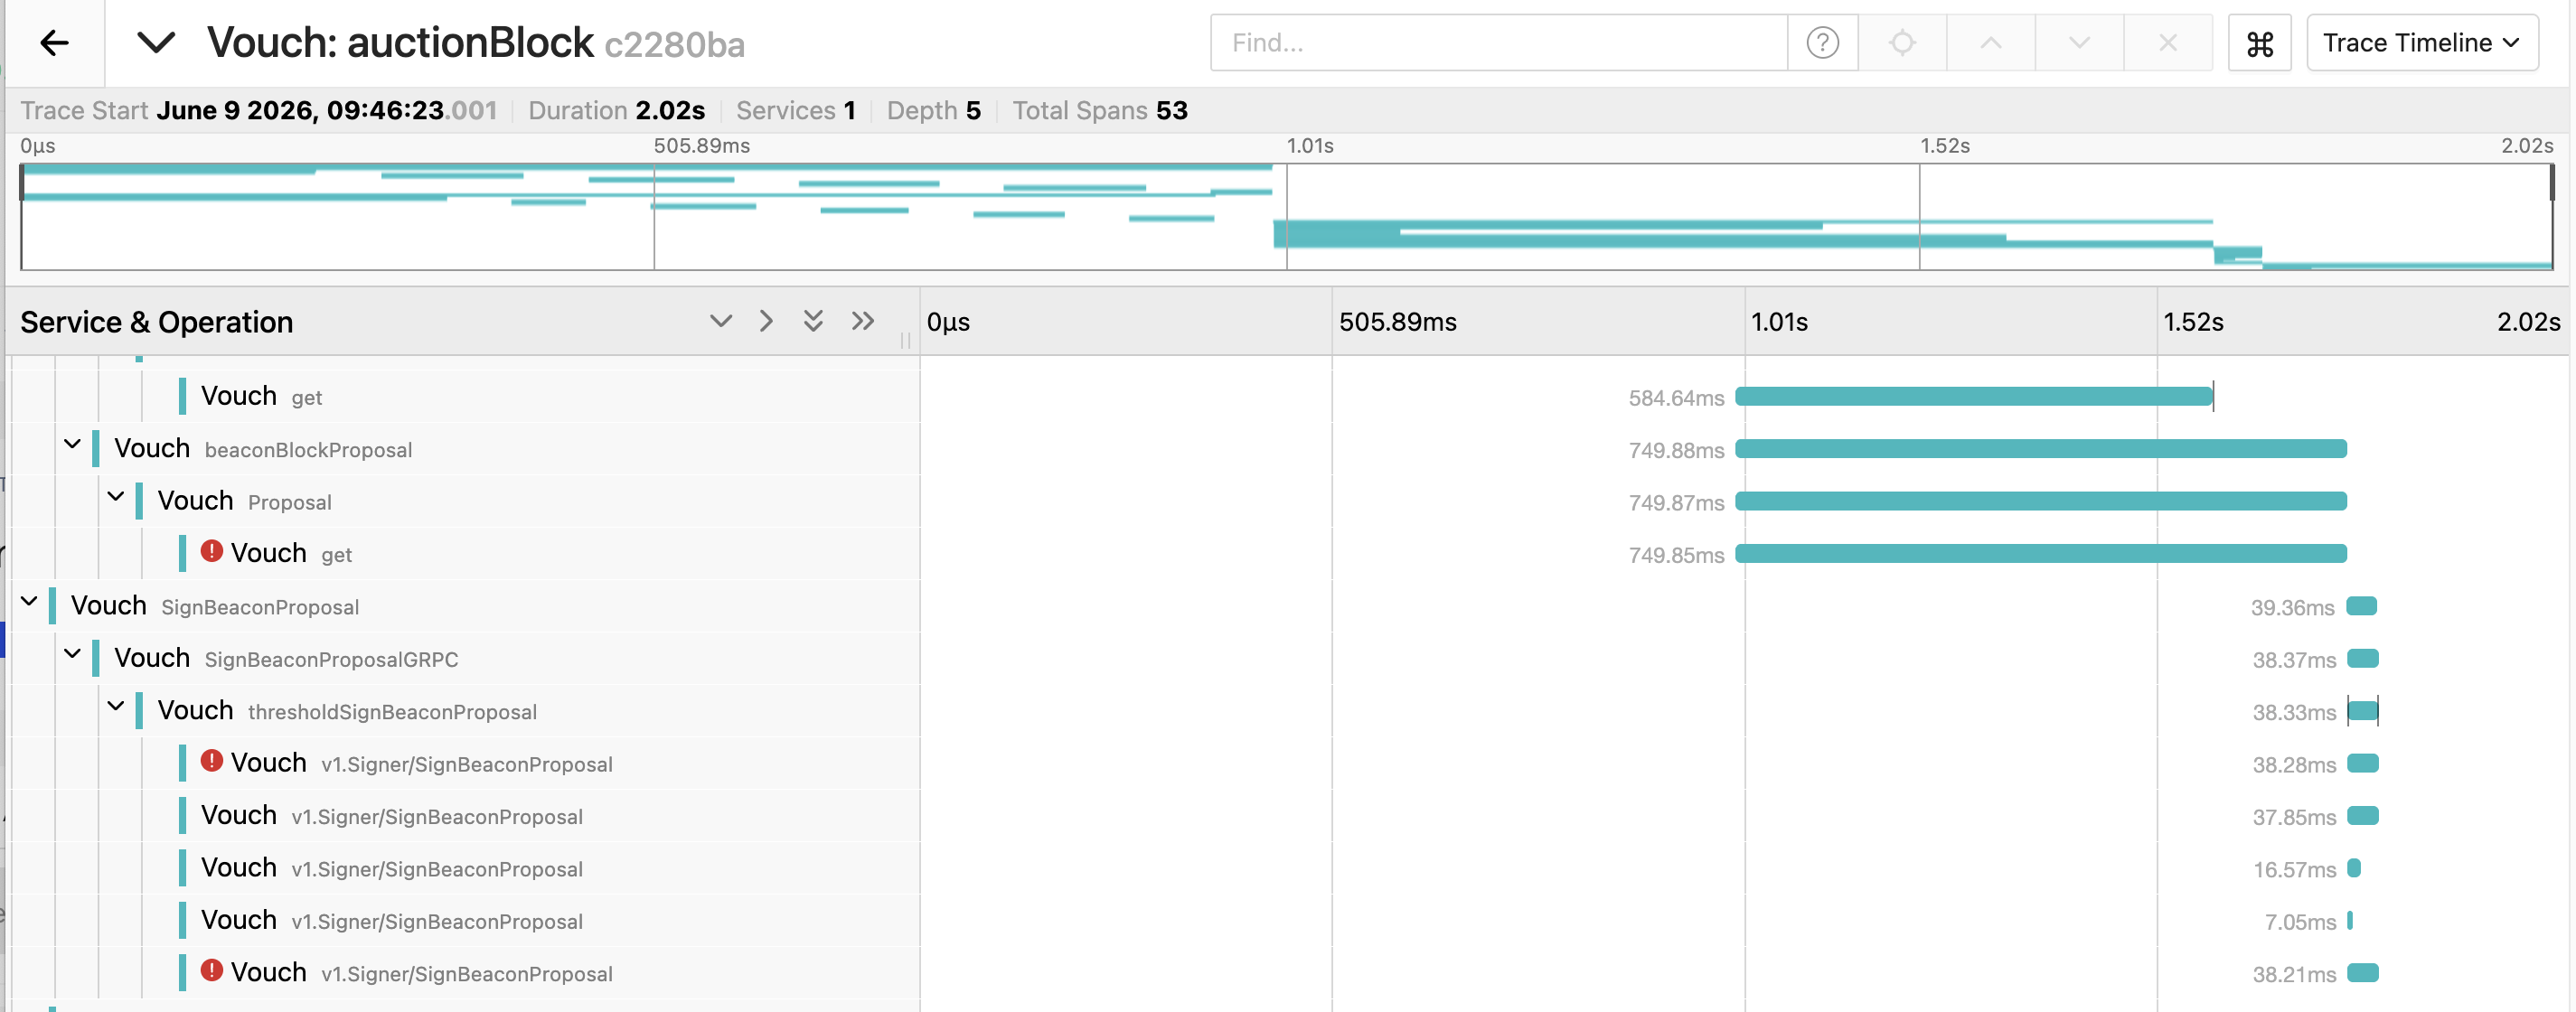
If we signed within 2 seconds we should follow up with the relay and ask for a refund.
Ethereum Validator Exit Mechanisms, Monitoring & Tooling — Research Report
1. Context: The Problem Statement
The transcript discusses a practical challenge facing institutional staking operators and portfolio managers: given a set of validators and a target amount of ETH to retrieve, what is the fastest path to liquidity? This question is now more complex than ever due to the Pectra upgrade (activated May 7, 2025), which introduced multiple exit and withdrawal pathways where previously there was essentially one queue in and one queue out. The discussion is specifically motivated by leverage staking strategies on Lido V3 stVaults, where the ability to exit and recover ETH quickly is critical for managing risk.
2. Historical and Current Exit Mechanisms
2.1 Pre-Pectra (Pre-May 2025): The Simple Model
Before Pectra, the validator lifecycle was straightforward:
- One entry queue, one exit queue. Validators entered with 32 ETH and exited with 32 ETH (plus accrued rewards).
- Exit trigger: Only the validator's active BLS key (the "hot" key used for signing attestations) could initiate an exit via a signed voluntary exit message on the consensus layer.
- Churn limit: The number of validators that could enter or exit per epoch was capped (scaled with total validator count). At the time of the Merge, this was around 8–13 validators per epoch.
- Withdrawal sweep: After a validator exited and passed the 256-epoch (~27.3 hour) withdrawability delay, a round-robin sweep mechanism cycled through all validators, processing up to 16 automatic withdrawals per block. The sweep cycle took approximately 4–8 days to complete a full rotation depending on the total validator count.
- Partial withdrawals (0x01 credentials): Any balance above 32 ETH was automatically swept to the withdrawal address during the sweep cycle. No action required from the validator operator.
The key limitation was that exit timing depended on three sequential delays: (1) the exit queue wait, (2) the 256-epoch withdrawability delay, and (3) the sweep delay before funds actually arrived at the withdrawal address.
2.2 Post-Pectra (May 2025 Onward): The Complex Model
Pectra introduced several EIPs that fundamentally changed withdrawal and exit mechanics:
EIP-7251: Increase MAX_EFFECTIVE_BALANCE to 2,048 ETH
- Validators can now hold between 32 and 2,048 ETH.
- 0x02 credential validators auto-compound rewards (no sweep until balance exceeds 2,048 ETH).
- The exit queue churn limit is now denominated in ETH rather than validator count: 256 ETH per epoch (~57,600 ETH/day).
- Validators can consolidate multiple 32 ETH validators into a single large validator.
EIP-7002: Execution Layer Triggerable Exits and Withdrawals
- Withdrawal credential holders (0x01 or 0x02 addresses) can now trigger exits and partial withdrawals directly from the execution layer, without needing the validator's active key.
- This is accomplished via a predeploy contract (
WithdrawalRequestPredeploy) on the execution layer. - Partial withdrawals from 0x02 validators use their own FIFO queue, processed up to 8 per block, and bypass the sweep delay entirely.
- Full exits triggered via the EL still enter the standard exit queue.
- An EIP-1559-style fee mechanism applies to EL-triggered withdrawal requests: the target is 2 requests per block, with fees scaling exponentially above that rate.
- MAX_WITHDRAWAL_REQUESTS_PER_BLOCK is capped at 16.
EIP-6110: Supply Validator Deposits On Chain
- Deposits now process through the execution layer directly, reducing activation delay from ~12 hours to ~13 minutes.
EIP-7685: General Purpose EL-to-CL Request Framework
- Provides the communication mechanism that enables EIP-7002 and EIP-7251 to function.
2.3 The Multiple Pathways to ETH Retrieval (Post-Pectra)
After Pectra, there are now several distinct pathways to retrieve ETH, each with different timing characteristics:
| Pathway | Mechanism | Queue | Speed |
|---|---|---|---|
| Full voluntary exit (CL) | Signed exit message via active key | Exit queue (256 ETH/epoch churn) + 256-epoch delay + sweep | Slowest (days to weeks+) |
| Full exit (EL trigger, EIP-7002) | Withdrawal credential calls predeploy contract with amount=0 | Same exit queue + same delays | Same as above, but doesn't require active key |
| Partial withdrawal (EL trigger, 0x02) | Withdrawal credential calls predeploy with specific amount | Own FIFO queue (up to 8/block) | Fast (bypasses sweep delay) |
| Automatic excess sweep (0x01) | Balance > 32 ETH swept automatically | Sweep cycle (~4-10 days per full rotation) | Moderate |
| Automatic excess sweep (0x02) | Balance > 2,048 ETH swept automatically | Sweep cycle | Moderate (but 2,048 threshold is very high) |
| Consolidation + skim | Consolidate to 0x02, top up above 2,048 ETH, auto-sweep excess | Consolidation queue + sweep | Variable |
2.4 The "Super Validator" / "Submarine" Concept
The transcript references "submarines" and "super validators" — this refers to a strategy discussed in the Ethereum community where operators create 0x02 compounding validators loaded with exactly 2,048 ETH. Any ETH deposited on top (via consolidation or top-ups) would exceed the 2,048 ETH maximum and be automatically swept on the next sweep cycle, bypassing the exit queue entirely.
The idea is that these validators act as "fast exit queues": you consolidate ETH into them, anything above 2,048 gets automatically swept, and the ETH arrives at the withdrawal address within one sweep cycle rather than waiting in the potentially weeks-long exit queue. They "come out of nowhere" (hence "submarines") because the sweep mechanism processes them regardless of exit queue length.
Status: This loophole is now formally recognized by core developers. EIP-8071 was proposed to directly close it but was dropped from Glamsterdam in favor of two broader solutions: EIP-8080 (which would democratize the loophole by letting all exits use the consolidation queue when it's shorter) and EIP-8061 (which would increase overall churn limits). As of April 2026, the choice between these two approaches is still pending. The loophole remains exploitable on mainnet today by validators holding ≥2,048 ETH.
3. Entry and Exit Queue Dynamics
3.1 Current Queue Parameters (Post-Pectra)
- Churn limit (deposits): 256 ETH per epoch (≈ 8 validators × 32 ETH). ~57,600 ETH/day.
- Churn limit (exits): 256 ETH per epoch. ~57,600 ETH/day.
- Churn limit (consolidations): Separate queue; approximately 287 ETH per epoch (varies).
- Partial withdrawal processing: Up to 8 EL-triggered partial withdrawals per block (separate from sweep).
- Automatic sweep: 16 withdrawals per block via the round-robin sweep.
- Withdrawability delay: 256 epochs (~27.3 hours), fixed.
- Sweep delay (full rotation): Variable; depends on total validator count. Currently in the range of 5–10 days.
3.2 Historical Queue Events
The exit queue has experienced several major congestion events:
- July 2025: The exit queue surged to ~743,000 ETH following a liquidity shock in the Aave lending protocol. This was triggered by a large entity (affiliated with Justin Sun/HTX) withdrawing approximately $518 million in ETH from Aave, which caused a temporary stETH depeg and highlighted vulnerabilities in leveraged liquid staking strategies.
- August–September 2025: Kiln, a major infrastructure provider, exited all of its validators (~1.6 million ETH) as a security precaution following the NPM supply-chain attack and SwissBorg breach. This pushed exit wait times to a record 46+ days by mid-September 2025, with approximately 2.5–2.65 million ETH in the queue.
- Late 2025: The exit queue gradually cleared while the entry queue reversed and surpassed the exit queue by late December 2025, signaling renewed staking demand.
3.3 Real-Time Queue Data (As of April 2026)
Based on Pectrified and beaconcha.in data:
- Pending deposits: ~449,201 ETH (9,924 queued requests); estimated wait ~7–8 days.
- Pending withdrawals: ~1,304,708 ETH (34,920 queued requests); estimated wait ~31 days.
- Pending consolidations: ~448 ETH (14 queued requests); estimated wait ~16 hours.
- Active validators: ~918,844 online.
4. Existing Monitoring Tools
4.1 Miga Labs (migalabs.io)
- Provides an Ethereum network metrics dashboard called eth-seer.
- Tracks validator queues, consolidations, withdrawals, deposits, relays, builders, rewards, slashed validators, and Lido CSM data.
- Published detailed analysis of the July 2025 exit queue surge.
- Open-source tools on GitHub (migalabs/eth-seer, migalabs/block-printer, migalabs/xatu-dashboard).
4.2 Pectrified (pectrified.com)
- A Pectra-specific dashboard showing post-upgrade fork statistics for validators.
- Displays execution request queues: pending deposits, pending withdrawals, pending consolidations with ETH amounts and estimated wait times.
- Shows churn limits for each queue type.
- Allows per-validator lookup and in-flight request verification.
- Provides functionality to verify partial and full withdrawal requests.
- Known issues: The transcript mentions that this tool (referred to as "Spectrified") broke in certain edge cases.
4.3 ValidatorQueue.com
- Open-source dashboard (GitHub: etheralpha/validatorqueue-com).
- Shows entry and exit queue lengths, estimated wait times, and sweep delay.
- Data fetched from the beaconcha.in API, updated every ~15 minutes.
- Historical daily snapshots recorded.
- Known issues: Post-Pectra bug where entry/exit queue data from May 7–21, 2025 was inaccurate (based on validator count rather than ETH balance). Data shifted from validator-based to ETH-based on May 7, 2025.
4.4 Beaconcha.in
https://beaconcha.in/validators/queues
- The most comprehensive Ethereum consensus layer explorer.
- Provides validator queue pages with deposit, exit, withdrawal, and consolidation ETH estimates and charts.
- Per-validator detail pages showing lifecycle epochs (activation eligibility, activation, exit, withdrawable).
- API (v2) supporting programmatic validator queries with status, balances, lifecycle data.
- Charts for historical validator counts, staked ETH, balances.
4.5 Blockdaemon Dashboard
https://docs.blockdaemon.com/docs/ethereum-dashboard?#9-queue-estimation
- Institutional-grade validator management dashboard.
- Supports 0x01 and 0x02 validator types, grouping and management.
- Queue estimation for both activation and exit queues.
- Reward reporting (CSV export, 90-day history).
- Validator actions: exit, convert (0x01→0x02), consolidate, top-up, withdraw.
4.6 The Block Data Dashboard
https://www.theblock.co/data/on-chain-metrics/ethereum
- Tracks daily Ethereum validator entry and exit queue data.
- Provides historical charts of queue activity.
4.7 Ethereum Validator Queue MCP Server (kukapay/ethereum-validator-queue-mcp)
- An MCP (Model Context Protocol) server for programmatic access to queue data.
- Functions:
get_activation_queue(),get_exit_queue(),get_validator_status(pubkey),analyze_queue(). - Provides estimated wait times and LLM analysis prompts.
5. Raw Data Sources (RPCs and APIs)
5.1 Ethereum Beacon Chain REST API
The official Beacon API (ethereum.github.io/beacon-APIs) is the primary raw data source. Key endpoints:
GET /eth/v1/beacon/states/{state_id}/validators— Returns validator data including status (pending_initialized,pending_queued,active_ongoing,active_exiting,active_slashed,exited_unslashed,exited_slashed,withdrawal_possible,withdrawal_done), balances (current and effective), withdrawal credentials, and lifecycle epochs.GET /eth/v1/beacon/states/{state_id}/validators/{validator_id}— Single validator lookup by index or pubkey.GET /eth/v1/beacon/states/{state_id}/validator_balances— Batch balance queries.GET /eth/v2/beacon/blocks/{block_id}— Block data including voluntary exits, execution requests, and the withdrawal list.GET /eth/v1/config/spec— Protocol configuration parameters (churn limits, delays, etc.).
5.2 Beacon Chain RPC Providers
- QuickNode — Ethereum Mainnet endpoints with Beacon REST API support.
- Infura — Consensus layer endpoints.
- Alchemy — Beacon chain access.
- Ankr — Beacon chain RPC with full API support.
- dRPC — Beacon chain RPC endpoints (free and paid).
- Google Cloud Blockchain Node Engine — Managed Ethereum nodes with consensus client endpoints.
5.3 Beaconcha.in API (v2)
- REST API with bearer token authentication.
- Validator queries by index, public key, or withdrawal address.
- Returns lifecycle epochs, balances, status, withdrawal credentials, finality state.
- Supports pagination for large validator sets.
5.4 Execution Layer APIs
- Standard JSON-RPC (Geth, Erigon, etc.) for execution layer data.
- Blockscout REST API — Provides dedicated endpoints for EIP-7002 withdrawal requests and EIP-6110 deposits since the Pectra upgrade.
- Etherscan/Beaconchain APIs — Historical validator data, deposit contract events.
5.5 On-Chain Contracts
- Deposit Contract (
0x00000000219ab540356cBB839Cbe05303d7705Fa) — Monitoring deposit events. - WithdrawalRequestPredeploy (EIP-7002) — The predeploy contract that handles EL-triggered exit and withdrawal requests. Can be queried for current fee levels and pending requests.
- ConsolidationRequestPredeploy (EIP-7251) — Handles consolidation requests between validators.
6. Lido V3 stVaults and Leverage Staking Context
6.1 What Are stVaults?
Lido V3 introduces stVaults — isolated, non-custodial smart contracts that allow institutions to:
- Stake ETH with their preferred node operator.
- Mint stETH against the staked position (using ETH on validators as collateral).
- Build structured products including leveraged staking strategies.
Each vault has a reserve ratio (buffer between staked ETH and minted stETH) and a health factor to protect stETH fungibility. The protocol can trigger force rebalancing if vault health deteriorates.
6.2 Leverage Staking (Looping) Risk
The typical strategy is:
- Stake ETH in a stVault.
- Mint stETH against the position.
- Borrow more ETH against stETH on a lending protocol (e.g., Aave, Morpho).
- Re-stake the borrowed ETH.
- Repeat (loop) for amplified yield.
The core risk: If the leveraged position needs to be unwound (due to slashing, stETH depeg, or market conditions), the operator must exit validators and retrieve ETH. The speed at which this can happen is directly bounded by the exit queue, partial withdrawal queue, and sweep delays.
6.3 Why Exit Time Monitoring Is Critical
- Exit queue can extend to 30–50+ days during periods of mass exits (as seen in September 2025).
- stETH depeg risk increases when large unstaking demands hit Lido simultaneously.
- Liquidation risk on leveraged positions if the time-to-exit exceeds the position's safety margin.
- Lido force rebalancing can trigger stake withdrawal from stVaults to cover protocol redemptions, creating an additional time pressure.
7. Key Challenges and Caveats
7.1 Estimating Time-to-Exit Is Non-Trivial
Calculating "how long to get X ETH back from Y validators" requires modeling multiple variables:
- Which validators to exit first? — Depends on sweep position (validator index relative to the current sweep cursor) and effective balance.
- Queue length at time of request — The exit queue is dynamic; other operators may submit exits that lengthen the queue between planning and execution.
- Sweep cursor position — After exiting, funds wait for the sweep to reach the validator's index. This depends on the validator's position in the registry relative to the current cursor.
- Partial vs. full withdrawal trade-offs — Partial withdrawals (0x02, EL-triggered) bypass the sweep but have their own queue and fee dynamics. For large amounts, full exits may be necessary.
- Network turbulence — Slashing events, mass exits by other operators (e.g., the Kiln incident), or DeFi cascade events can suddenly extend queue times.
- Consolidation dynamics — If using the consolidation-and-skim strategy, consolidation has its own queue and churn limit.
- Fee dynamics — EL-triggered withdrawal requests have exponentially increasing fees when the queue is congested.
7.2 Tool Reliability Issues
- Post-Pectra data bugs: ValidatorQueue.com had a known bug where data from May 7–21, 2025 was inaccurate (counting validators instead of ETH). Historical conversion data was also missing from May 21–June 3, 2025.
- Edge case failures: The transcript mentions that both Miga Labs and Pectrified tools broke in certain edge cases, which is why there is interest in building an internal tool.
- Model assumptions: Most tools estimate wait times based on current queue depth and churn rate, assuming no new entries to the queue — a simplistic model that breaks during stress events.
7.3 0x01 vs. 0x02 Credential Complexity
- 0x01 validators get free automatic partial withdrawals (excess above 32 ETH swept automatically) but cannot trigger EL partial withdrawals.
- 0x02 validators auto-compound to 2,048 ETH (no partial sweep) but can trigger EL partial withdrawals.
- The optimal strategy depends on whether the operator values automatic reward sweeping (0x01) vs. compounding + manual withdrawal control (0x02).
- EIP-8062 (sweep fee for 0x01): Was proposed for Glamsterdam but was removed during ACDC #170 (November 2025). Developers agreed that improving the UX of 0x02 validators must come before imposing economic penalties on 0x01 validators. The Ethereum Foundation's Robust Incentives Group (RIG) rated it S-tier (important for fast finality roadmap) but client teams like Sigma Prime and Lodestar opposed inclusion, citing insufficient proof it would force migration and the bad optics of adding CL fees. It may resurface in Hegotá or later with a higher fee if EIP-8068 is not included alongside it.
- EIP-8068 (neutral effective balance design): Also proposed for Glamsterdam but considered too complex. Rated D-tier by RIG. Lodestar flagged insufficient data proving the hysteresis gaming it addresses is actually occurring. Likely deferred to a future comprehensive consolidation redesign.
- EIP-8071 (prevent using consolidations as withdrawals): Directly targeted the "submarine" loophole where ≥2,048 ETH validators could use the consolidation queue to fast-exit. Was removed from Glamsterdam; its problem space was handed off to EIP-8061 and EIP-8080.
7.4 The Consolidation-as-Exit Loophole ("Submarines") — Current Status
The "submarine" / "super validator" strategy discussed in the transcript is now a well-recognized design flaw in the protocol. EIP-8080 explicitly describes it: validators with at least 2,048 ETH can exploit a loophole in the consolidation logic to use the (often shorter) consolidation queue for exits, bypassing the standard exit queue. This creates an unfair two-tier system where large validators have faster exit paths than smaller ones.
Two competing EIPs address this, and at least one must be included in Glamsterdam:
- EIP-8080 (let exits use the consolidation queue): Rather than closing the loophole, it democratizes it — all validators can route exits through the consolidation queue when it's shorter. This would increase maximum exit throughput from 256 ETH/epoch to approximately 688 ETH/epoch (~2.5x), a substantial improvement. Simple to implement.
- EIP-8061 (increase exit and consolidation churn): A broader change that doubles consolidation churn, quadruples exit churn, and restores exit churn proportionality to total stake. Would increase exit throughput by approximately 75%. More complex, touches weak subjectivity parameters, and several client teams (notably Lodestar) want more research before inclusion.
As of ACDE #234 (April 10, 2026), developers are still choosing between these two approaches. Both remain "Considered for Inclusion" in Glamsterdam (EIP-7773 meta-EIP).
7.5 Protocol-Level Changes: Fusaka (Shipped), Glamsterdam (In Dev), Hegotá (Planned)
Fusaka (Activated December 3, 2025)
Fusaka has already shipped on mainnet. It focused on L2 scaling and did not introduce direct changes to validator exit or withdrawal mechanics. Key features: PeerDAS (data availability sampling), BPO (Blob Parameter Only) mini-forks for gradual blob capacity increases, block gas limit increase to 60M, EVM Object Format (EOF). Two BPO forks followed: Dec 17, 2025 (blobs to 15 max) and Jan 7, 2026 (blobs to 21 max).
Glamsterdam (Targeting H1 2026, ~June)
Glamsterdam is Ethereum's next major hard fork, currently in active development with devnets (BAL-Devnet-3 and ePBS-Devnet-1 launched in early April 2026). The two confirmed headline EIPs are:
- EIP-7732 (Enshrined Proposer-Builder Separation / ePBS): Moves block building on-chain, removing dependence on external relays like MEV-Boost. Validators gain new duties around payload timeliness committee membership. Builders become staked protocol participants. This changes the operational landscape for validators significantly.
- EIP-7928 (Block-Level Access Lists / BALs): Enables parallel transaction execution by pre-declaring state access patterns. Combined with gas limit increases (targeting 100M initially, then 200M), this aims for ~10,000 TPS on L1.
Validator/exit-relevant EIPs under consideration for Glamsterdam:
| EIP | Description | Status (as of April 2026) |
|---|---|---|
| EIP-8061 | Increase exit and consolidation churn (up to ~2.5x exit throughput) | Considered for Inclusion |
| EIP-8080 | Let exits use the consolidation queue (democratize submarine loophole) | Considered for Inclusion |
| EIP-8045 | Exclude slashed validators from proposing (chain health improvement) | Considered for Inclusion |
| EIP-8062 | Sweep fee for 0x01 validators | Declined for Glamsterdam |
| EIP-8068 | Neutral effective balance design | Declined for Glamsterdam |
| EIP-8071 | Prevent consolidations as withdrawals | Declined (problem space → 8061/8080) |
| EIP-7805 (FOCIL) | Fork-choice inclusion lists (censorship resistance) | Deferred to Hegotá |
| EIP-7904 | Gas repricing (benchmark-based) | Scheduled for Inclusion |
| EIP-8011 | Multidimensional gas metering | Under consideration |
| EIP-8037 | State creation gas cost increase | Under testing (issues found on BAL-Devnet-3) |
Source: EIP-7773 Glamsterdam meta-EIP, ACDC #170 minutes, Ethereum Foundation Checkpoint #8 (Jan 2026), ACDE #234 (Apr 10, 2026).
Impact on exit monitoring: If EIP-8061 or EIP-8080 ships, the exit throughput model changes significantly. Any monitoring tool must be able to dynamically account for increased churn limits or cross-queue routing. Additionally, ePBS changes the block production model, which may affect sweep timing and withdrawal processing patterns.
Hegotá (Targeting H2 2026)
The upgrade following Glamsterdam. Key features under consideration:
- Verkle Trees — Could reduce node storage by ~90% and enable stateless clients. Major impact on validator operations and accessibility.
- FOCIL (EIP-7805) — Fork-choice enforced inclusion lists for censorship resistance. Was deferred from Glamsterdam to reduce fork scope.
- EIP-8141 (Frame Transactions) — Post-quantum security preparation. Considered for Inclusion as of ACDE #233–234.
- Native account abstraction — Multiple competing proposals being discussed (ACDE #234).
- Deferred staking EIPs — EIP-8062 (sweep fee), EIP-8068 (neutral EB), and comprehensive consolidation redesign may resurface here.
Headliner proposal deadline was February 4, 2026; non-headliner EIP proposals are open with 2–4 weeks' notice before closing.
7.6 Lido Dual Governance and EIP-7002 Support
Lido does not yet support EIP-7002 (EL-triggered exits) for its validators. Support is contingent on implementing the dual governance model, which allows stETH holders to timelock malicious DAO proposals and exit before they pass. Until dual governance is live, Lido validators still rely on the active key (held by node operators) for exit initiation. This means that for Lido-managed stVaults, the EL-triggered exit pathway (which would allow vault owners to directly exit validators via the withdrawal credential) is not yet available, adding an additional trust and latency layer to the exit process.
8. What a Custom Monitoring Tool Would Need
Based on the transcript's requirements and the research above, an internal monitoring tool for institutional staking risk management would need:
8.1 Core Data Ingestion
- Direct Beacon Chain API access (preferably self-hosted node for reliability).
- Execution layer RPC for EIP-7002 contract state, fee levels, and pending requests.
- Real-time tracking of: exit queue depth (ETH), activation queue depth, consolidation queue depth, partial withdrawal queue depth, sweep cursor position, churn rates.
8.2 Portfolio-Level Analytics
- Given a list of validator indices/pubkeys owned by a client, calculate:
- Time-to-exit for each validator (accounting for sweep cursor position).
- Optimal exit ordering (which validators exit first based on sweep position and effective balance).
- Time to retrieve X ETH via various pathways (full exit, partial withdrawal, consolidation+skim).
- Total portfolio exit time under current vs. stressed queue conditions.
8.3 Alerting
- Exit queue expansion alerts (e.g., queue grows by >10%, or time-to-exit exceeds threshold).
- Sweep cycle monitoring (predicted arrival time for pending withdrawals).
- Fee spike alerts for EL-triggered withdrawal requests.
- Network-level alerts: mass exit events by other operators, slashing incidents, queue congestion.
8.4 Scenario Modeling
- Stress-test exit timing under various queue congestion scenarios.
- Model the impact of other large operators entering the exit queue simultaneously.
- Estimate liquidation risk windows for leveraged positions based on exit timing distributions.
8.5 Protocol Upgrade Tracking
- The tool must be designed to accommodate protocol changes. If EIP-8061 or EIP-8080 ships in Glamsterdam (H1 2026), the churn limit model changes significantly (potentially 2.5x more exit throughput). The tool should be parameterized so that churn limits, queue routing logic, and fee models can be updated without a full rewrite.
- Track ACDE/ACDC call outcomes (Christine Kim's substack, Ethereum Foundation blog checkpoints) for early signals of upcoming changes.
9. Key Dates and Upcoming Milestones
| Date | Event | Relevance |
|---|---|---|
| May 7, 2025 | Pectra mainnet activation | Introduced current exit/withdrawal mechanics |
| Dec 3, 2025 | Fusaka mainnet activation | PeerDAS, BPO forks, gas limit increase (no direct exit changes) |
| Dec 17, 2025 / Jan 7, 2026 | BPO forks (blob increases) | Infrastructure scaling |
| April 2026 (now) | BAL-Devnet-3 + ePBS-Devnet-1 launched | Glamsterdam testing underway |
| ~June 2026 (aspirational) | Glamsterdam mainnet | ePBS, BALs, gas repricing, potentially EIP-8061 or 8080 (exit throughput) |
| H2 2026 | Hegotá mainnet | Verkle Trees, FOCIL, possibly deferred staking EIPs |
10. Summary of Key Resources
| Resource | URL | Type |
|---|---|---|
| Ethereum Beacon API Spec | ethereum.github.io/beacon-APIs | Primary raw data source |
| Beaconcha.in | beaconcha.in | Explorer + API (v2) |
| Pectrified | pectrified.com | Pectra-specific queue dashboard |
| ValidatorQueue.com | validatorqueue.com | Queue wait time dashboard |
| Miga Labs | migalabs.io | Network analytics + open-source tools |
| Blockdaemon Dashboard | docs.blockdaemon.com | Institutional validator management |
| EIP-7002 (EL Exits) | eips.ethereum.org/EIPS/eip-7002 | Spec for EL-triggered withdrawals |
| EIP-7251 (MaxEB) | github.com/ethereum/EIPs/.../eip-7251.md | Spec for 2,048 ETH validators |
| EIP-7773 (Glamsterdam Meta) | eips.ethereum.org/EIPS/eip-7773 | Full list of Glamsterdam EIPs and their status |
| EIP-8061 (Increase Churn) | eips.ethereum.org/EIPS/eip-8061 | Proposed churn limit increase for exits |
| EIP-8062 (Sweep Fee) | eips.ethereum.org/EIPS/eip-8062 | Proposed fee on 0x01 sweeps (declined for Glamsterdam) |
| EIP-8080 (Exits via Consolidation Queue) | eips.ethereum.org/EIPS/eip-8080 | Democratize consolidation queue for exits |
| EIP-8081 (Hegotá Meta) | eips.ethereum.org/EIPS/eip-8081 | Hegotá upgrade scope (draft) |
| Ethereum Roadmap | ethereum.org/roadmap/ | Official upgrade timeline (Glamsterdam H1 2026, Hegotá H2 2026) |
| EF Checkpoint #8 (Jan 2026) | blog.ethereum.org/en/2026/01/20/checkpoint-8 | Glamsterdam/Hegotá scope and timelines |
| Christine Kim ACDE Notes | christinedkim.substack.com/archive | Most detailed ACDE/ACDC call summaries |
| RIG Glamsterdam Analysis | notes.ethereum.org/@css/rig-glamsterdam | EF Robust Incentives Group EIP rankings |
| Sigma Prime Glamsterdam Prefs | blog.sigmaprime.io/glamsterdam-eip-preferences | Lighthouse client team EIP positions |
| Lodestar Glamsterdam Proposal | blog.chainsafe.io/lodestar-glamsterdam-upgrade-proposal/ | Lodestar client team EIP positions |
| Lido V3 Whitepaper | hackmd.io/@lido/v3-whitepaper | stVault architecture and risk model |
| Lido stVaults Design | hackmd.io/@lido/stVaults-design | Technical design spec |
| Pier Two Pectra Withdrawals | piertwo.com/insights/pectra-withdrawals-explained | Excellent withdrawal mechanics breakdown |
| EthStaker Knowledge Base | docs.ethstaker.cc | Withdrawal process explanation |
| Vitalik's Annotated Spec | github.com/ethereum/annotated-spec | Design rationale for sweep mechanism |
| Fusaka Upgrade | ethereum.org/roadmap/fusaka/ | Fusaka details (shipped Dec 3, 2025) |
Vouch
Monitoring
We have a vouch dashboard
located here for production.
Logs are output to the usual /var/log/vouch/vouch.log file and are rotated daily.
Maintenance
vouch is deployed via ansible and controlled by the usual systemctl process,
e.g. systemctl status attestant-vouch.service.
Configuration of vouch is controlled by the config file at /home/vouch/.vouch.yml. The per environment values are injected in to the config file via ansible.
Alerts
| Alert Name | Description | Action |
|---|---|---|
| Vouch no attestations produced | Vouch is not producing attestations. Only triggers if Vouch has been up for the past minute. | Verify that vouch is running correctly. If no obvious issues possibly flip to the failover instance. |
| Attestation failures | There has been an increase in Attestation failures in the past minute. | Verify that vouch is running correctly. If no obvious issues and the Repeated attestation failures alert doesn't trigger then it is possible this was a one off and we can take no action, but continue to monitor. |
| Repeated attestation failures | There have been repeated Attestation failures in the last 2 minutes. | Verify that vouch is running correctly. If no obvious issues possibly flip to the failover instance. |
| Attestation denials | There has been an increase in Attestation denials in the past minute. | Verify that vouch is running correctly. If no obvious issues and this alert continues to fire possibly flip to the failover instance. |
| Proposal failures | There has been an increase in Proposal failures in the past 10 minutes. | Verify that vouch is running correctly. If no obvious issues and this alert continues to fire possibly flip to the failover instance. |
Stark Attestations
Monitoring
We have a Stark Attestations dashboard located here for production.
Logs are present at /var/log/stark_attestation/stark-attestation.log
Alerts
| Alert Name | Description | Action |
|---|---|---|
| Incorrect number of stark_attestation instances | There is more than one instance running. | Stop all but one instance and ensure the ansible is not trying to start multiple at once. |
| Stark_Attestation performance below 90% | We are submitting more attestations than are being confirmed on chain. | Check the logs and if nothing obviously wrong raise to the development team. |
| Stark_Attestation latest block number has not increased | The latest block number has not incremented. This suggests we are not getting chain data. | Check the stark clients that the stark_attestation instance is connected to as well as the stark_attestation process. |
AVS Applications
This section of the runbook contains information specific to supporting AVS applications we run internally.
EigenDA
Project documentation
https://docs.eigenda.xyz/operator-guides/overview
Monitoring
We have an EigenDA V2 dashboard located here for production.
Logs are in docker can be access with docker logs -f eigenda-native-node.
Maintenance
There are two containers that are running as part of this setup:
eigenda-native-node- the eigenda AVS software.bin-reverse-proxy-1- this is an nginx sidecar container that is used to provide rate limiting and request size limit protections.
The hyperlane validator is deployed via docker and controlled by the usual docker commands,
e.g. docker start eigenda-native-node.
The docker containers are managed by a docker compose file stored in ansible. Configuration of the eigenda node and nginx sidecar are controlled via an environment file stored in ansible and installed at /home/docker/eigenda/bin/.env. The per environment values are injected in to these files via ansible.
There is a supporting script that is used for manual interaction with eigenda, located in /home/docker/eigenda/bin/run.sh. This script has various commands that can be performed:
./run.sh list-quorums- this simply lists the quorums that the operator is registered to../run.sh opt-in 0,1- this attempts to opt in quorums supplied, e.g. the example is opting in to 0 and 1../run.sh opt-out 0,1- this attempts to opt out of all quorums that are supplied, e.g. the example is opting out of quorum 0 and 1../run.sh update-socket- this updates the node ip and ports that are registered on-chain. We run this automatically on rollout as, when switching between hosts, the values can be cached.
SLAs
There are various SLAs defined in the eigen docs. The SLAs vary depending on the % of stake we have in any given quorum. If we drop below the SLAs then we can be ejected out of quorum for a cooldown period - currently 3 days.
Alerts
| Alert Name | Description | Action |
|---|---|---|
| EigenDA not in any quorums | We are not part of any quorum when we should be. | Try running /home/eigenda/bin/opt_in.sh to opt in to quorums. |
| EigenDA signing rate has dropped below 90% | The signing rate is below all SLA. | This indicates a problem with the node. Check the logs, resources and network connectivity. |
| EigenDA dispersal is offline | The node dispersal port cannot be contacted. | Check the node is running and that the dispersal port (typically 32005) can be reached. |
| EigenDA retrieval is offline | The node retrieval port cannot be contacted. | Check the node is running and that the retrieval port (typically 32004 external, 32014 internal) is responsive. This port is routed to the node via trafaek so check logs on trafaek also. |
| EigenDA latency is too high | The 95th percentile execution time for operations is over 500ms. | This indicates a problem with the node. Check the logs, resources and network connectivity. |
| EigenDA request rate is high | The RPS for inbound requests has exceed 0.1 rps. | This indicates an unexpectedly high inbound request rate. Need to investigate why and if this is expected. trafaek should rate limit request to the node to 10rps with a burst of 50. |
eOracle
Project documentation
https://docs.eo.app/docs/operators/installation
Monitoring
We have an eOracle dashboard located here for production.
Logs are in docker can be access with docker logs -f eoracle-data-validator.
Maintenance
The eoracle validator is deployed via docker and controlled by the usual docker commands,
e.g. docker start eoracle-data-validator.
The docker container is managed by a docker compose file stored in ansible. Configuration of the eoracle-operator is
controlled via an environment file stored in ansible and installed at /home/docker/eoracle/bin/.env. The per
environment values are injected in to these files via ansible.
Alerts
| Alert Name | Description | Action |
|---|---|---|
| Incorrect number of eoracle instances | We expect one instance running and we have found more or fewer. | Find which instances should/should not be running and start/stop as appropriate. |
| eOracle performance has dropped below 95% | The performance score for the AVS has dropped below 95%. | Investigate the logs to see why we are not performing our duties. |
| eOracle error rate is above 0.05 | The number of errors has increased above a rate of 0.05 in the last 5 minutes. | Investigate the logs and troubleshoot the errors raised. |
Hyperlane
Project documentation
https://docs.hyperlane.xyz/docs/operate/validators/run-validators
Monitoring
We have a Hyperlane dashboard located here for production.
Logs are in docker can be access with docker logs -f hyperlane-ethereum-validator.
Maintenance
The hyperlane validator is deployed via docker and controlled by the usual docker commands,
e.g. docker start hyperlane-ethereum-validator.
The docker container is managed by a docker compose file stored in ansible. Configuration of the validator is controlled via a config file stored in ansible and installed at /home/docker/hyperlane/bin/ethereum/config.json. The per environment values are injected in to these files via ansible.
S3 Buckets
Hyperlane requires a public accessible S3 bucket for network participants to access the validated, details:
- IAM user:
hyperlane-validator-ethereum - S3 bucket:
hyperlane-validator-signatures-prod-01-ethereum
The Access key and Access secret is stored in ansible.
Alerts
| Alert Name | Description | Action |
|---|---|---|
| Incorrect number of hyperlane instances | We expect one instance running and we have found more or fewer | Find which instances should/should not be running and start/stop as appropriate. |
| Hyperlane block height not increased in 30 mins | The indexed block height has not changed in 30 mins. | This could indicate an issue with the associated RPC or connectivity to it. Check the logs and diagnose the problem (may need to restart the container). |
| Hyperlane warnings have increased by more than 2 in the last 10 mins | Unexpected increase in warnings. | Check the logs and investigate the warnings. |
| Hyperlane errors have increased by more than 1 in the last 10 mins | Unexpected increase in errors. | Check the logs and investigate the errors. |
Predicate
Project documentation
https://docs.predicate.io/operators/run
Monitoring
We have a Predicate dashboard located here for production.
Logs are in docker can be access with docker logs -f predicate-operator.
Maintenance
The predicate validator is deployed via docker and controlled by the usual docker commands,
e.g. docker start predicate-operator.
The docker container is managed by a docker compose file stored in ansible. Configuration of the predicate-operator is
controlled via an environment file stored in ansible and installed at /home/docker/predicate/bin/.env. The per
environment values are injected in to these files via ansible.
Alerts
| Alert Name | Description | Action |
|---|---|---|
| Incorrect number of predicate instances | We expect one instance running and we have found more or fewer | Find which instances should/should not be running and start/stop as appropriate. |
Redstone
Project documentation
https://docs.redstone.finance/docs/avs/running-avs-operator-mainnet/
Monitoring
We have a Redstone dashboard located here for production.
Logs are in docker can be access with docker logs -f redstone-operator-attester.
Maintenance
The redstone validator is deployed via docker and controlled by the usual docker commands,
e.g. docker start redstone-operator-attester.
There is also a sidecar container called redstone-operator-validation-api. Presently, this is not exposed externally.
The docker container is managed by a docker compose file stored in ansible. Configuration of the redstone-operator is
controlled via an environment file stored in ansible and installed at /home/docker/redstone/bin/.env. The per
environment values are injected in to these files via ansible.
Alerts
| Alert Name | Description | Action |
|---|---|---|
| Incorrect number of redstone instances | We expect one instance running and we have found more or fewer | Find which instances should/should not be running and start/stop as appropriate. |
| Redstone not publishing messages | We expect redstone to be publishing messages frequently and it is not doing | Review the logs and see why it is not publishing. |
| Redstone has restarted | The container has restarted | Investigate what caused the restart and mitigate based on that. |
Starknet
Overview
Starknet is a permissionless Layer 2 network on Ethereum that uses STARK proofs to achieve scalability while maintaining Ethereum's security guarantees. We operate a validator on Starknet, participating in staking and governance.
Architecture
The Starknet validator setup involves several distinct accounts and roles:
- Validator account: The primary staking account that holds the stake and is registered with the staking contract.
- Rewards account: A dedicated account for receiving and claiming staking rewards.
- Operator account: Used for operational tasks.
- Updater account: Used for configuration updates.
Each account has its own keystore (encrypted private key) and account descriptor file managed via starkli.
Key Contracts
| Contract | Description |
|---|---|
| STRK Token | The native staking token (0x04718...938d) |
| Staking Contract | Manages validator registration and stake |
| Minting Curve Contract | Controls STRK token minting for rewards |
| Reward Supplier Contract | Distributes staking rewards |
| Delegation Pool Contract | Manages delegated stake from third parties |
Network Configuration
Mainnet
- RPC:
https://starknet-mainnet.public.blastapi.io - Chain ID:
SN_MAIN
Sepolia (Testnet)
- RPC:
https://starknet-sepolia.drpc.org - Chain ID:
SN_SEPOLIA
Tooling
References
Starknet
Overview
Starknet is a permissionless Layer 2 network on Ethereum that uses STARK proofs to achieve scalability while maintaining Ethereum's security guarantees. We operate a validator on Starknet, participating in staking and governance.
Architecture
The Starknet validator setup involves several distinct accounts and roles:
- Validator account: The primary staking account that holds the stake and is registered with the staking contract.
- Rewards account: A dedicated account for receiving and claiming staking rewards.
- Operator account: Used for operational tasks.
- Updater account: Used for configuration updates.
Each account has its own keystore (encrypted private key) and account descriptor file managed via starkli.
Key Contracts
| Contract | Description |
|---|---|
| STRK Token | The native staking token (0x04718...938d) |
| Staking Contract | Manages validator registration and stake |
| Minting Curve Contract | Controls STRK token minting for rewards |
| Reward Supplier Contract | Distributes staking rewards |
| Delegation Pool Contract | Manages delegated stake from third parties |
Network Configuration
Mainnet
- RPC:
https://starknet-mainnet.public.blastapi.io - Chain ID:
SN_MAIN
Sepolia (Testnet)
- RPC:
https://starknet-sepolia.drpc.org - Chain ID:
SN_SEPOLIA
Tooling
References
Argent X Wallet Setup
Prerequisites
- Chrome, Brave, or other Chromium-based browser
- ETH on Ethereum mainnet for funding via bridge
- Basic understanding of crypto wallets
Installation
- Visit the Chrome Web Store
- Click "Add to Chrome"
- Click the extension icon in your browser
- Click "Create a new account"
Wallet Creation
- Create a new password for your wallet
- Back up your seed phrase
- Write it down physically
- Store it securely in at least two separate locations
- Never share it with anyone
- This is your only recovery method
Account Activation
Argent X uses account abstraction, meaning your account must be deployed as a smart contract on Starknet. This requires ETH on Starknet for the deployment transaction.
Fund via Starkgate Bridge
- Visit Starkgate
- Connect your Ethereum wallet (e.g. MetaMask)
- Enter the amount of ETH to bridge (minimum 0.01 ETH recommended)
- Paste your Argent X deposit address
- Click "Transfer" and confirm in your Ethereum wallet
- Wait for the bridging process (usually 4-6 hours)
Complete Activation
- Once ETH arrives on Starknet, open Argent X
- Click "Activate account"
- Confirm the transaction
- Wait for deployment confirmation - your account status will change to "Active"
Managing Funds
Depositing
Use Starkgate to bridge ETH or STRK from Ethereum to your Argent X account address.
Withdrawing
- Connect your Argent X wallet to Starkgate
- Select "Withdraw"
- Enter amount and provide your Ethereum destination address
- Confirm the transaction
- Wait for the withdrawal period (usually several days)
Security Best Practices
- Seed phrase: Store offline in a secure location, never store digitally
- Browser security: Only install from the official Chrome Web Store, verify extension ID
dlcobpjiigpikoobohmabehhmhfoodbb - Account security: Use a strong password, never share private keys, consider setting up a guardian
Integration with Starkli
After setting up your Argent X wallet, you can use it with starkli for CLI-based operations. See Starkli Installation and Configuration for creating an encrypted keystore from your private key and performing transactions from the command line.
Troubleshooting
- Account activation failing: Ensure sufficient ETH for activation, check network congestion, wait a few minutes and retry.
- Bridging issues: Verify correct address input, ensure sufficient ETH for gas fees, check bridge status on Starkgate.
- Transaction failures: Confirm sufficient balance for fees, check network status, verify transaction parameters.
References
Starkli Installation and Configuration
starkli is the CLI tool for interacting with Starknet. It handles account management, transaction signing, and contract invocations.
Prerequisites
- macOS or Linux
- An existing Starknet account (e.g. Argent X wallet)
- Your account's private key
Installation
Install starkli using the official installer:
curl https://get.starkli.sh | sh
Restart your terminal or reload your shell configuration:
source ~/.zshrc
Run the updater to fetch the latest version:
starkliup
Verify installation:
starkli -V
Directory Structure
Create the directories for storing starkli configuration and key material:
mkdir -p ~/.config/starkli
mkdir -p ~/.starkli-wallets
For multi-account setups (e.g. validator operations with separate accounts per role), use a network-scoped layout:
mkdir -p ~/.starknet/mainnet/signers
mkdir -p ~/.starknet/mainnet/accounts
mkdir -p ~/.starknet/sepolia/signers
mkdir -p ~/.starknet/sepolia/accounts
Network Configuration
Mainnet
Create the profiles configuration:
cat << 'EOF' > ~/.config/starkli/profiles.toml
[default.networks.mainnet]
chain_id = "SN_MAIN"
provider = { type = "free", vendor = "blast" }
EOF
Set the default network:
export STARKNET_NETWORK="mainnet"
export STARKNET_RPC="https://starknet-mainnet.public.blastapi.io"
Sepolia (Testnet)
cat << 'EOF' > ~/.config/starkli/profiles.toml
[default.networks.sepolia]
chain_id = "SN_SEPOLIA"
provider = { type = "free", vendor = "blast" }
EOF
export STARKNET_NETWORK="sepolia"
export STARKNET_RPC="https://starknet-sepolia.drpc.org"
Add the exports to your ~/.zshrc to persist across sessions.
Account Setup
Create Encrypted Keystore
Convert a plain text private key into an encrypted keystore:
starkli signer keystore from-key ~/.starkli-wallets/keystore.json
You will be prompted to enter your private key and set an encryption password.
Fetch Account Descriptor
Fetch your account details from the network:
starkli account fetch YOUR_ACCOUNT_ADDRESS --output ~/.starkli-wallets/account.json
Replace YOUR_ACCOUNT_ADDRESS with your Starknet account address.
Set Environment Variables
export STARKNET_KEYSTORE="$HOME/.starkli-wallets/keystore.json"
export STARKNET_ACCOUNT="$HOME/.starkli-wallets/account.json"
Add these to your ~/.zshrc to persist across sessions.
Creating a New Account
To create a fresh account using starkli directly:
ACCOUNT=my-account
starkli signer keystore new ~/.starknet/${STARKNET_NETWORK}/signers/${ACCOUNT}.json
starkli account argent init \
    --keystore=~/.starknet/${STARKNET_NETWORK}/signers/${ACCOUNT}.json \
    ~/.starknet/${STARKNET_NETWORK}/accounts/${ACCOUNT}.json
Fund the account with ETH, then deploy it:
starkli account deploy \
    --keystore=~/.starknet/${STARKNET_NETWORK}/signers/${ACCOUNT}.json \
    ~/.starknet/${STARKNET_NETWORK}/accounts/${ACCOUNT}.json
Verification
Check account balance:
starkli balance YOUR_ACCOUNT_ADDRESS
Check account nonce:
starkli nonce YOUR_ACCOUNT_ADDRESS
Check a transaction receipt:
starkli transaction-receipt TRANSACTION_HASH
Troubleshooting
- Network errors: Verify your network configuration and that you are targeting the correct network (mainnet vs sepolia).
- Signing failures: Ensure keystore path is correct, verify you are using the correct password, check that the account address matches the keystore's public key.
- Environment variables not working: Reload your shell with
source ~/.zshrcand verify paths.
References
Staking Operations
This page covers validator staking, delegation pool management, and token transfers on Starknet.
Prerequisites
starkliinstalled and configured (see Starkli Installation and Configuration)- Environment variables set for the target network (see environment setup scripts)
- Sufficient STRK and ETH balances in the relevant accounts
Environment Setup
Before running any staking commands, source the appropriate setup script to configure environment variables for all accounts and contract addresses.
Mainnet
export STARKNET_NETWORK=mainnet
export STARKNET_RPC=https://starknet-mainnet.public.blastapi.io

export VALIDATOR_KEYSTORE=~/.starknet/${STARKNET_NETWORK}/signers/validator.json
export VALIDATOR_ACCOUNT=~/.starknet/${STARKNET_NETWORK}/accounts/validator.json

export REWARDS_KEYSTORE=~/.starknet/${STARKNET_NETWORK}/signers/rewards.json
export REWARDS_ACCOUNT=~/.starknet/${STARKNET_NETWORK}/accounts/rewards.json

export OPERATOR_KEYSTORE=~/.starknet/${STARKNET_NETWORK}/signers/operator.json
export OPERATOR_ACCOUNT=~/.starknet/${STARKNET_NETWORK}/accounts/operator.json

# Contract addresses
export STAKING_CONTRACT_ADDRESS=0x00ca1702e64c81d9a07b86bd2c540188d92a2c73cf5cc0e508d949015e7e84a7
export STRK_CONTRACT_ADDRESS=0x04718f5a0fc34cc1af16a1cdee98ffb20c31f5cd61d6ab07201858f4287c938d
Sepolia (Testnet)
export STARKNET_NETWORK=sepolia
export STARKNET_RPC=https://starknet-sepolia.drpc.org

export VALIDATOR_KEYSTORE=~/.starknet/${STARKNET_NETWORK}/signers/validator.json
export VALIDATOR_ACCOUNT=~/.starknet/${STARKNET_NETWORK}/accounts/validator.json

export REWARDS_KEYSTORE=~/.starknet/${STARKNET_NETWORK}/signers/rewards.json
export REWARDS_ACCOUNT=~/.starknet/${STARKNET_NETWORK}/accounts/rewards.json

export OPERATOR_KEYSTORE=~/.starknet/${STARKNET_NETWORK}/signers/operator.json
export OPERATOR_ACCOUNT=~/.starknet/${STARKNET_NETWORK}/accounts/operator.json

# Contract addresses
export STAKING_CONTRACT_ADDRESS=0x03745ab04a431fc02871a139be6b93d9260b0ff3e779ad9c8b377183b23109f1
export STRK_CONTRACT_ADDRESS=0x04718f5a0fc34cc1af16a1cdee98ffb20c31f5cd61d6ab07201858f4287c938d
Initial Stake
Staking requires two transactions: first approve the STRK spend, then call stake on the staking contract. This creates a new delegation pool.
Approve STRK Spend
starkli invoke \
    --account=${VALIDATOR_ACCOUNT} \
    --keystore=${VALIDATOR_KEYSTORE} \
    ${STRK_CONTRACT_ADDRESS} approve ${STAKING_CONTRACT_ADDRESS} u256:20000000000000000000000
Register Stake
starkli invoke \
    --account=${VALIDATOR_ACCOUNT} \
    --keystore=${VALIDATOR_KEYSTORE} \
    ${STAKING_CONTRACT_ADDRESS} stake \
    ${REWARDS_ADDRESS} \
    ${OPERATOR_ADDRESS} \
    0x43c33c1937564800000 \
    0x01 \
    0x2bc
NOTE: The stake transaction emits a NewDelegationPool event. Record the pool contract address from this event for use in delegation operations.
export DELEGATION_POOL_CONTRACT_ADDRESS=<address from NewDelegationPool event>
Increase Stake
To add more STRK to an existing validator stake:
starkli invoke \
    --account=${VALIDATOR_ACCOUNT} \
    --keystore=${VALIDATOR_KEYSTORE} \
    ${STRK_CONTRACT_ADDRESS} approve ${STAKING_CONTRACT_ADDRESS} u256:2000000000000000000

starkli invoke \
    --account=${VALIDATOR_ACCOUNT} \
    --keystore=${VALIDATOR_KEYSTORE} \
    ${STAKING_CONTRACT_ADDRESS} increase_stake ${VALIDATOR_ADDRESS} 0x1bc16d674ec80000
Delegation
Enter Delegation Pool
A delegator can stake STRK into the validator's delegation pool:
starkli invoke \
    --account=${STAKER_ACCOUNT} \
    --keystore=${STAKER_KEYSTORE} \
    ${STRK_CONTRACT_ADDRESS} approve ${DELEGATION_POOL_CONTRACT_ADDRESS} u256:5000000000000000000

starkli invoke \
    --account=${STAKER_ACCOUNT} \
    --keystore=${STAKER_KEYSTORE} \
    ${DELEGATION_POOL_CONTRACT_ADDRESS} enter_delegation_pool ${STAKER_REWARDS_ADDRESS} 5000000000000000000
Increase Delegation
starkli invoke \
    --account=${STAKER_ACCOUNT} \
    --keystore=${STAKER_KEYSTORE} \
    ${STRK_CONTRACT_ADDRESS} approve ${DELEGATION_POOL_CONTRACT_ADDRESS} u256:3000000000000000000

starkli invoke \
    --account=${STAKER_ACCOUNT} \
    --keystore=${STAKER_KEYSTORE} \
    ${DELEGATION_POOL_CONTRACT_ADDRESS} add_to_delegation_pool ${STAKER_REWARDS_ADDRESS} 5000000000000000000
Token Transfers
Transfer ETH
eth is a hard-coded address in the Starknet address book:
starkli invoke \
    --account=${SENDER_ACCOUNT} \
    --keystore=${SENDER_KEYSTORE} \
    eth transfer ${RECIPIENT_ADDRESS} u256:50000000000000000000
Transfer STRK
starkli invoke \
    --account=${SENDER_ACCOUNT} \
    --keystore=${SENDER_KEYSTORE} \
    ${STRK_CONTRACT_ADDRESS} transfer ${RECIPIENT_ADDRESS} u256:50000000000000000000
Governance Voting
** This is included for reference only. It's likely not going to work anymore. **
This page covers authenticating and submitting governance votes on Starknet mainnet using starkli.
Prerequisites
starkliinstalled and configured for mainnet (see Starkli Installation and Configuration)- Your account keystore and descriptor set up
- Environment variables configured:
export STARKNET_NETWORK="mainnet"
export STARKNET_KEYSTORE="$HOME/.starkli-wallets/keystore.json"
export STARKNET_ACCOUNT="$HOME/.starkli-wallets/account.json"
Verify Setup
Before submitting a vote, verify that your account and signing are working:
starkli invoke $STARKNET_ACCOUNT getVersion
Submitting a Vote
The authenticate_vote function is called on the governance space contract. The function signature is:
authenticate_vote(
    space: ContractAddress,
    voter: EthAddress,
    proposal_id: u256,
    choice: Choice,
    user_voting_strategies: Array,
    metadata_uri: Array<felt252>
)
Parameters
| Parameter | Description |
|---|---|
space | The governance space contract address |
voter | Your account address |
proposal_id | The ID of the proposal being voted on |
choice | Your vote choice |
user_voting_strategies | Voting strategy configuration array |
metadata_uri | IPFS metadata URI encoded as a felt252 array |
Example Transaction
starkli invoke \
    0x0687b57bc5459d05d9575483be8ed8e623c379484fdb1aad18b073ffd4602099 \
    authenticate_vote \
    $STARKNET_ACCOUNT \
    8 \
    0 \
    '[(2, [20, 0, 26, 21, 0, '$STARKNET_ACCOUNT', 0x3860e639d806400000])]' \
    '[0x697066733a2f2f6261666b726569647069706974746770376b326473786b35, 0x3371636f653570356f6e7577376f336b347432356a763572706166356c6564, 0x73327661]'
The metadata_uri field contains an IPFS URI encoded as felt252 values. The example above decodes to:
ipfs://bafkreidpipittgp7k2dsxk53qcoe5p5onuw7o3k4t25jv5rpaf5leds2va
Monitoring the Transaction
After submitting, check the transaction status:
starkli transaction-receipt TRANSACTION_HASH
Replace TRANSACTION_HASH with the hash returned from your invoke.
Troubleshooting
-
"Failed to create Felt from string" error:
- Remove
u256:prefix from account addresses and numbers - Ensure hexadecimal values start with
0x - For arrays, use single quotes for the outer array and double quotes for nested values if needed
- Remove
-
Transaction rejected:
- Verify you are on mainnet (
STARKNET_NETWORK=mainnet) - Confirm the proposal is still open for voting
- Check that your account has sufficient ETH for gas
- Verify you are on mainnet (
Rewards Management
This page covers checking, claiming, and transferring staking rewards on Starknet.
Prerequisites
- Environment variables configured for the target network (see Staking Operations)
- Access to the rewards and operator account keystores
Checking Rewards
Query the current unclaimed rewards for a validator:
starkli call ${STAKING_CONTRACT_ADDRESS} get_staker_info_v1 ${VALIDATOR_ADDRESS} | jq -r ".[5]"
The sixth field in the response contains the pending reward amount.
Updating the Global Index
This is no longer required. The staking rewards accounting has changed and the global index is now updated automatically. Kept here for reference only.
The global reward index was previously required to be periodically updated to ensure accurate reward calculations. This was performed using the operator account:
starkli invoke \
    --account=${OPERATOR_ACCOUNT} \
    --keystore=${OPERATOR_KEYSTORE} \
    ${STAKING_CONTRACT_ADDRESS} update_global_index_if_needed
Claiming Validator Rewards
Rewards can be claimed by the rewards account or the operator account:
starkli invoke --watch \
    --account=${REWARDS_ACCOUNT} \
    --keystore=${REWARDS_KEYSTORE} \
    ${STAKING_CONTRACT_ADDRESS} claim_rewards ${VALIDATOR_ADDRESS}
starkli invoke --watch \
    --account=${OPERATOR_ACCOUNT} \
    --keystore=${OPERATOR_KEYSTORE} \
    ${STAKING_CONTRACT_ADDRESS} claim_rewards ${VALIDATOR_ADDRESS}
The --watch flag waits for the transaction to be confirmed before returning.
Transferring Rewards
After claiming, transfer STRK to a spend wallet:
starkli invoke --watch \
    --account=${REWARDS_ACCOUNT} \
    --keystore=${REWARDS_KEYSTORE} \
    ${STRK_CONTRACT_ADDRESS} transfer ${SPEND_ADDRESS} u256:1000000000000000000
Replace ${SPEND_ADDRESS} with the destination wallet address and adjust the amount as needed. The value 1000000000000000000 equals 1 STRK (18 decimals).
Claiming Delegator Rewards
Delegator rewards are claimed through the delegation pool contract. This must be run by the staker (either from the rewards address or the staker address):
starkli invoke --watch \
    --account=${STAKER_ACCOUNT} \
    --keystore=${STAKER_KEYSTORE} \
    ${DELEGATION_POOL_CONTRACT_ADDRESS} claim_rewards ${STAKER_ADDRESS}
This moves the accumulated delegation rewards to the staker's address.
Developer Workflow and Standards
This section is the source of truth for how developers work across our repositories. It captures the day-to-day practices we expect teams to follow, from collaboration norms to tooling and testing. If a standard matters for consistency, reliability, or velocity, it belongs here.
Tooling
Collaboration
Testing
- [Add testing standards here]
Coding Standards
- [Add coding standards here]
CI/CD
- [Add CI/CD expectations here]
Security and Compliance
- [Add security and compliance guidance here]
Release and Incident Practices
- [Add release and incident practices here]
Git PR Merging Strategy (Draft)
Draft: This document is under discussion and may change. Treat it as guidance, not policy, until formally adopted.
This document defines how we open, review, and merge pull requests across our repositories.
Principles
- Every change goes through a pull request.
- Keep history readable and intentional.
- A clean
git logshould tell the story of the codebase without merge noise. - Developers are free to work however they want on their branch, but merges to
masterfollow a strict standard.
The intent is to keep collaboration disciplined and auditable while still giving developers freedom on their branch. It also ensures that the project history stays readable and useful for debugging and audits.
Branching
- Use short, descriptive branch names based on type and ticket when available.
- Preferred format:
<type>/<ticket>-<slug>(for example,feat/123-foo). - Optional author suffix if needed:
<type>/<ticket>-<slug>-<author>(for example,feat/123-foo-alice).
The format keeps branches easy to scan and tie back to work items, while keeping the ticket visible and the intent clear in PR lists and tooling.
Pull Request Requirements
- Clear title and description that explains the why, not just the what.
- Link to any relevant ticket, issue, or incident.
- Keep PRs small and focused; split when scope expands.
Clear requirements reduce review time and preserve context for future readers. They also make it easier to trace changes back to user needs or incidents, and help avoid oversized PRs that are hard to review safely.
Review Requirements
- At least one approving review is required.
- Address all comments or explicitly resolve with reviewer agreement.
- No self-merge without approval.
- Repo rules must enforce required reviews before merge.
The goal is to ensure changes are independently reviewed, align with ISO expectations for controlled change, and prevent silent merges without oversight.
Merging
- We use squash and merge only.
- No merge commits or rebase merges.
- The squash commit is the canonical record of the change.
We use squash-only merges so each PR becomes a single, narrative change in git log.
This avoids merge commits, branch remnants, and mid-flight work-in-progress commits, and keeps review focused on the PR rather than on commit choreography.
Squash Commit Standards
- Use a short, imperative summary that describes the user- or system-visible outcome.
- Add context in the body if the change is non-obvious.
- Treat the squash commit message as the durable project history.
The squash commit is the only one that survives in main/master, so it must stand on its own.
Clear summaries keep git log useful for debugging and incident follow-ups.
CI and Checks
- All required checks must pass before merging.
- Flaky tests must be fixed or quarantined before merge. Do not merge while any required check is failing.
- Repo rules must enforce that merges are blocked when required checks fail.
"Quarantine" means isolating the test so it does not run in required CI (for example, moving it to a non-blocking job or marking it as quarantined in the test runner).
Conventional Commits (Distant Future Option)
- If we ever adopt Conventional Commits, it will apply to the squash commit only.
- This keeps compliance simple and encourages narrower, more reviewable PRs.
- The change type in the title (e.g.,
feat,fix,chore) naturally discourages mixing unrelated work.
A single, enforceable commit can drive changelog automation without forcing developers to curate their entire branch history. It also nudges PRs toward a single, coherent change, which makes reviews faster and reduces scope creep.
Mockery (Go)
This document defines how we use Mockery to generate and maintain mocks for Go interfaces.
Policy
- Mockery is the default tool for mocks in Go.
- Prefer Mockery-generated mocks over handcrafted mocks or other mocking tools.
- Exceptions are allowed only with a documented justification in the PR or the owning package README.
When to Use
- Use Mockery for unit tests that need to isolate a dependency behind a Go interface.
- Prefer fakes/stubs for simple cases (return canned data with minimal setup).
- Use mocks when the test must verify interactions (calls, arguments, order).
Rationale
- Faster to create and update than handcrafted mocks.
- Reduces interface drift because regeneration is quick when interfaces change.
- Keeps test assumptions in tests rather than embedded in hand-written mock logic.
- We often use mocks as stubs; Mockery supports that without extra tooling.
Installation
- Prefer
brewfor local installation. - If the repo pins a specific version, ensure the installed version matches.
- If a non-
brewinstall is required (e.g., CI), document it in the repo.
Configuration
- Use
.mockery.yamlin the module root when available. This file is the source of truth for what gets generated. - Treat Mockery usage as config-driven and curated (not ad-hoc CLI usage).
- Keep output paths stable and consistent across packages.
Usage
Run Mockery using the config in .mockery.yaml (no flags):
mockery
Note: run from the repo root so paths in .mockery.yaml resolve correctly.
Operational expectations:
- We generate only the interfaces and packages explicitly listed in
.mockery.yaml. - Output locations are standardized (typically under
testing/mockery/...ortesting/mocks/...). - Formatting is consistent and enforced by the config (e.g.,
goimports). - Recursion is opt-in per package when configured.
Conventions
- Place generated mocks in the locations defined by
.mockery.yaml(typically undertesting/mockery/...). - Commit generated mocks to version control.
- Regenerate mocks whenever the interface changes.
- Do not hand-edit generated mocks.
Review Checklist
- Mocks regenerated after interface changes.
- Generated code is committed.
- Tests pass using the updated mocks.
References
New applications
This section contains information related to add new applications.
DevOps Integration for new apps
In order to onboard a new application to the DevOps stack there are two components:
- Ansible setup - we need to codify they deployment and running operation of the application.
- Monitoring setup - we need to integrate the service with the monitoring stack so that the Operations team can maintain it in production.
Ansible setup
Repository: https://github.com/attestantio/ops
In the ansible directory:
- Inventories - relates to hosts and groups of hosts (pod)
- Roles - software definitions
Inventories
Relationship:
- a host has many roles (software elements) and host vars and host files.
- a pod has many hosts and group vars the pod/hosts file defines which software (role) is running on which hosts.
Pod structure:
- the
group_varsdefines variables for all hosts in that group (constant for all hosts - the
host_filesdefines files specific to that host (not shared) - the
host_varsdefines variables specific to that host
Role
4 folders:
- defaults - these are essentially app constants
- handlers - where we define ansible handlers, this is typically a restart handler. A handler is something that is notified by another task or tasks and run once. Eg. if 3 tasks notify the same handler, the handler will be run once at the end.
- tasks - this is where we define the ansible tasks. They do things like:
- open firewalls
- copy files
- create directories
- copy templates while injecting ansible variables in to them
- create systemctl unit files
- download software
- templates - place where templates are stored
NB: We do not build software in the install steps. If the software needed does not have a binary/release distribution then we should build the required binary and upload it to S3 via the build server. See here for more details
App structure
- all app related data/bins is stored in /home/<app_name>, and the app_name is the role_name
- we tend to run all apps using
systemctland we create service unit files, e.g. /etc/systemd/system/attestant-vouch.service. We have a convention of prefixing the service name with attestant. - we log all logs for an app to
/var/log/<app_name>/<app_name>.log, e.g./var/log/vouch/vouch.log`
Running ansible
An example command that limits the host and app (role).
dev-ansible-playbook -i inventories/development-pod4-hoodi/hosts --limit eth-val-d04-01.attestant.io near.yaml
Monitoring setup
- Need to open firewalls (see tasks called
configure ufw for prometheus) - Ensure
promgenis aware of the port (repository: https://github.com/attestantio/ops-tools) - Need to add alerts to
ansible/roles/prometheus/files/rulesin ops. - Need to run ansible on prometheus instance
Build Server integration for new apps
When we need to deploy software that does not have a binary or release distribution we need to build a version of that software and upload it to our S3 bucket. We do this by adding build and upload instructions to ansible in our ops repository.
New app build server setup
In order to add build steps for a new application you need to:
- Add a new
build_<app_name>.ymlfile toansible/roles/build/tasks/. In this file you need to include the ansible tasks to build the target software bin/distrib and then upload it to S3. You also need to include a task that prints the checksum of the created distribution or binary. See other files in this folder for good examples of how to do so. - Update the
ansible/roles/build/tasks/main.ymlto reference the file you created in step 1. It should have awhenclause for when the<app_name>_versionansible variable is defined. - Test the setup against the dev build server with a command such as the following:
dev-ansible-playbook -i inventories/development-operations/hosts --limit build-d01.attestant.io build.yml --extra-vars "<app_name>_version=v1.2.3"
Each build_<appname>.yml should be a self-contained set of build instructions, run entirely by the build user. We shouldn’t assume anything is pre-installed - all prerequisites for the application should be explicitly installed as part of the build tasks. The goal is to ensure the build works on a freshly baselined machine. A baseline setup typically includes only volumes, SSH configs, and firewall rules — nothing application-specific is installed at that point.
Existing applications
This section contains information related to developing existing applications.
Vouch
This section relates to vouch.
Public Dashboard
Overview
Vouch has a publicly available Grafana Dashboard located here.
There are instructions available in the vouch repository for installing.
Publishing
In order to publish the dashboard you need to:
- Create a new version of the dashboard and export the json.
- Check the json has no internal information present.
- Log in to the Grafana account (details TBD).
- Go to Dashboard Details.
- Click
Upload revisionand this should allow you to upload the exported json from step 1.
Development release and deployment
Vouch has the following stages of deployment and release for the dev cycle:
- Deploy WIP binaries manually in dev
- Release alpha artifacts. Usually deployed via ansible to dev
- Release beta artifacts intended to be the next stable release candidate
Deploy WIP binaries manually in dev
- Ensure you update the
ReleaseVersioninmain.goto something appropriate for your changes, e.g.v1.9.0-alpha.dev. - Build a
vouchbinary from your changes that is appropriate for the target infrastructure - most likelylinux/amd64. - Copy the binary to the target host, e.g.
scp /path/to/vouch eth-val-d04-01.attestant.io:/home/vouch. - Log in to the host and execute
./home/vouch/vouch --versionto verify it is the same as set in the first step. - If you're changes require updates to the config be sure to create a backup of
/home/vouch/.vouch.ymland then edit accordingly. - Move the new binary to the vouch
binlocation and restartvouch, e.g.mv /home/vouch/vouch /home/vouch/bin/vouch && chown vouch /home/vouch/bin/vouch && systemctl restart attestant-vouch
Release alpha artifacts
- Create branch of intended changes and be sure to update
ReleaseVersioninmain.goto match the tag in the next step. - Tag the branch with a dev label, e.g.
git tag -a v1.x.0-alpha.y -m "<insert message briefly describing changes>", wherexis the target minor version andyis the next iteration of thealpha. For example, if the current version in dev wasv1.9.0-alpha.1the next version would bev1.9.0-alpha.2. - Push the tag to github, e.g.
git push origin v1.9.0-alpha.7, this will automatically create a Draft release in the github releases page. - The Draft release is not immediately visible to others - it needs to be published first. You can do this by navigating to the github releases page, finding the release and clicking the edit button. Once there you should update the release description and ensure
Set as a pre-releaseis selected at the bottom. Finally, click the publish button. - Once the release is published it should be possible to update the release ansible and push the new version to dev.
- Announce the release in #vouch on Discord.
- Do NOT pin the release announcement.
Release beta artifacts
- Create branch of intended changes and be sure to update
ReleaseVersioninmain.goto match the tag in the next step. - Tag the branch with a dev label, e.g.
git tag -a v1.x.0-beta.y -m "<insert message briefly describing changes>", wherexis the target minor version andyis the next iteration of thebeta. For example, if the current version in dev wasv1.9.0-beta.1the next version would bev1.9.0-beta.2. - Push the tag to github, e.g.
git push origin v1.9.0-beta.7, this will automatically create a Draft release in the github releases page. - The Draft release is not immediately visible to others - it needs to be published first. You can do this by navigating to the github releases page, finding the release and clicking the edit button. Once there you should update the release description and ensure
Set as a pre-releaseis selected at the bottom. Finally, click the publish button. - Once the release is published it should be possible to update the release ansible and push the new version to dev.
- Announce the release in #vouch on Discord.
- Do NOT pin the release announcement.
Production release
Vouch has the following release processes for production:
- Release new minor version artifact to be the latest stable release
- Release patch version as a backport to current stable release
Release new minor version artifact to be the latest stable release
- Choose a commit that you would like to be the new minor version, be sure to update
ReleaseVersioninmain.goto match the tag in the next step. - Tag the branch with a release label, e.g.
git tag -a v1.x.0 -m "<insert message briefly describing changes>", wherexis the target minor version. For example, if the current latest version wasv1.8.3the next version would bev1.9.0. - Push the tag to github, e.g.
git push origin v1.9.0, this will automatically create a Draft release in the github releases page. - The Draft release is not immediately visible to others - it needs to be published first. You can do this by navigating to the github releases page, finding the release and clicking the edit button. Once there you should update the release description and ensure
Set as latest releaseis selected at the bottom. Finally, click the publish button. - Announce the release in #vouch on Discord.
- Pin the release announcement.
Release patch version as a backport to current stable release
- Create/Find a branch of the current minor release patch version increments. E.g. if the current version of vouch is
v1.8.0, you should create a branch off that commit explicitly calledv1.8.x, or simply change to that branch if it already exists. - Create a new branch from the above branch to add your changes to. E.g. if the latest version is
v1.8.2you wouldgit checkout v1.8.x, then create a branch for the next version, which in this example would begit checkout -b v1.8.3. - Add your changes to the new branch, be sure to update
ReleaseVersioninmain.goto match the tag in the later step. Push your changes to github and raise a PR from your new branch to the patch versions branch. E.g. in the example above you would add your changes tov1.8.3and raise a PR to merge those changes in tov1.8.x - Tag the branch with a release label, e.g.
git tag -a v1.x.y -m "<insert message briefly describing changes>", wherexis the target minor version andyis the next patch version. For example, if the current latest version wasv1.8.1the next version would bev1.8.2. - Push the tag to github, e.g.
git push origin v1.8.2, this will automatically create a Draft release in the github releases page. - The Draft release is not immediately visible to others - it needs to be published first. You can do this by navigating to the github releases page, finding the release and clicking the edit button. Once there you should update the release description and ensure
Set as latest releaseis selected at the bottom. Finally, click the publish button. - Announce the release in #vouch on Discord.
- Pin the release announcement.
Current microservices
This section contains information related to the current microservices, their database dependencies, and the planned GDPR data segregation work.
Database inventory
Overview
The current microservices use helper-backed PostgreSQL databases. From the inspected daemon wiring these are chaindb, opsdb, extdb, intdb, and comptrollerdb.
This page summarises the known purpose and contents of the current databases from the supplied source material.
extdb (schema version 4)
extdb stores external market and reference data, together with compliance-derived transaction flags.
t_metadata: generic key/value JSONB metadata, including schema versiont_fx: provider/base/counter timestamped exchange ratest_benchmark_rates: named benchmark rates by currency and timestampt_overnight_rates: Attestant overnight rate calculations by date and percentile, with notest_eth_breaks: Ethereum compliance break events keyed by relay/height/tx/addresst_eth_breaks.f_source: text array indicating source list(s), for example OFAC SDN
intdb (schema version 2)
intdb is a small internal workflow and summary database for reward distribution job tracking and AUM rollups.
Schema metadata
t_metadata: generic key/value JSONB metadata, including schema version
Reward distribution jobs
t_solana_reward_distributions: Solana reward distribution requests, stored distributions payload, status, optional error, and lifecycle timestamps
AUM summaries
t_aum_summary: timestamped asset-under-management summary rows by asset and denomination, with total stake and own-stake amounts
opsdb (schema version 25)
opsdb is the application and operations database for customers, users, validator assignments, configuration, and customer-facing financial records across multiple networks.
Core metadata
t_metadata: schema and process metadata
Users and authentication artifacts
t_users: user profile, authentication flags, timezone/currency, UI preferences, and reporting and billing configuration JSON fieldst_user_tokens: API and access tokens scoped to userst_user_files: user-published files such as invoices, reports, and statements, with MIME and data payloadst_audit: audit trail of user operations, including IP, action, success or failure, and error
MEV and proposer configuration
t_eth_mev_relays: catalog of MEV relayst_proposer_config_histories: time-ranged proposer config history per customer and subaccount
Validator and customer relationship model
t_customer_validators: validator assignment state per customer, including proposer config and optional Rocket Pool or EigenLayer JSON attachmentst_unassigned_validators: lifecycle pool for unassigned validatorst_rejected_validators: lifecycle pool for rejected validatorst_customer_epoch_metrics: per-customer, per-epoch aggregated performance metrics
Financial and accounting records
t_customer_financials: primary customer financial ledger-style entries for capital and income deltas, balance, and notest_near_financials: NEAR-specific financial entries with epoch metadata and NEAR price
Staking and delegation by ecosystem
t_customer_rocketpool_node_operatorst_customer_eigenpodst_customer_starknet_delegatorst_customer_solana_delegatorst_customer_near_delegators: includes validator address
Chain metadata reference
t_chainmeta: network constants such as deposit contract addresses, genesis roots, fork versions, minimum deposit, and genesis timestamp for networks including Mainnet, Sepolia, Holesky, and Hoodi
comptrollerdb (schema version 1)
comptrollerdb is a MEV relay and comptroller analytics database centred on registrations, bids, and block payment outcomes.
Schema metadata
t_metadata: generic key/value JSONB metadata, including schema version
Relay registration data
t_validator_registrations: validator registrations sent to relays, including fee recipient, gas limit, timestamp, and signature
Bid comparison and bid flow
t_alternate_bids: chosen relay/value versus best available relay/value for a slott_received_bids: bids received by relays, including proposer/builder identities, block hashes, gas fields, timestamp, and bid valuet_delivered_bids: bids actually delivered by relays, with proposer/builder identities, block hashes, gas fields, and bid value
Block payment outcomes
t_block_payments: proposer and builder payment information per execution block, including expected proposer payment and fee recipients
chaindb (schema version 16)
chaindb is the Ethereum consensus and execution chain data warehouse used for indexing, analytics, and reward and accounting derivations.
Chain identity and metadata
t_metadatat_chain_spect_genesist_fork_schedule
Validator state and balances
t_validators: canonical validator registry and lifecycle epochst_validator_balances: per-epoch balances and effective balances
Block-level canonical chain and execution payload data
t_blocks: beacon blocks with canonical marker and blob KZG commitmentst_block_execution_payloads: execution payload fields including block number/hash, fee recipient, gas/base fee, timestamp, and blob gas fields
Consensus duties and events
t_beacon_committeest_proposer_dutiest_attestationst_sync_aggregatest_sync_committeest_attester_slashingst_proposer_slashingst_voluntary_exitst_depositst_eth1_deposits
Execution and withdrawal transition data
t_block_bls_to_execution_changest_block_withdrawalst_block_deposit_requestst_block_withdrawal_requestst_block_consolidation_requestst_blob_sidecars
Derived summaries for analytics and reporting
t_validator_epoch_summariest_validator_day_summariest_block_summariest_epoch_summaries
Service dependencies
Overview
This page lists the database dependencies visible from daemon entrypoint wiring in main.go.
Current dependencies
| Service | Database dependencies |
|---|---|
attestantd | chaindb, opsdb, extdb |
opsd | chaindb, opsdb |
financialsd | chaindb, extdb |
reportd | opsdb, extdb |
summaryd | opsdb |
feerd | opsdb |
fxd | extdb |
lidod | opsdb |
nearfinancialsd | opsdb |
solanad | opsdb |
starkd | opsdb |
bridged | intdb |
breakd | extdb, comptrollerdb |
acli | opsdb, chaindb, extdb, comptrollerdb |
GDPR segregation plan
Executive summary
opsdb currently mixes high-sensitivity customer identity and authentication data with operational and pseudonymous validator and financial data in a single database boundary. This forces strict access control on all services and data in the database regardless of their sensitivity. To allow wider access to operational data, we need to segregate the database into two boundaries:
- keep low-risk and pseudonymous operational data in
coredb - keep direct identifiers, credentials, and high-risk free-text or file content in a sensitive database boundary
- expose only minimal join-safe identifiers to most runtime services
Data classification definitions
- Class A data can directly identify a user or customer, enable account access, or contain unbounded sensitive content.
- Class B data is not directly identifying on its own, but is linked to customer IDs or pseudonymous data or commercially sensitive.
- Class C data is public chain or reference data.
opsdb inventory and sensitivity
| Table | Primary contents | Classification | Notes | Accessing services and host box | Surfacing requirements |
|---|---|---|---|---|---|
t_users (identity profile fields) | f_name, f_email, f_email_verified, f_timezone, f_created | A | Direct customer identity and contact profile | attestantd, reportd, acli | |
t_users (authentication/control fields) | f_webauthn_credentials, f_allow_registration, f_acting_for | A | Authentication and delegated-access controls | attestantd, acli | |
t_users (f_fee_rate JSONB) | Fee/tax percentages by source/asset and validity windows (FeeRateConfig) | A/B | Commercial terms; not direct identity, but commercially sensitive | reportd, acli | BAM for accounting and revenue projections |
t_users (f_invoice_configs JSONB) | Invoice options (InvoiceConfig): tax title/number/description, contact addresses, payment preferences | A | Customer billing metadata | attestantd, reportd, acli | |
t_users (f_periodic_reports JSONB + comms flag) | Report schedule and preferences (PeriodicReport): recipients/cc, subaccounts, assets/sources, timing/frequency/theme, plus email notification flag | A | Contains contact emails for reporting preferences | attestantd, opsd/reports | |
t_users (f_mev_relay JSONB + UI/account metadata) | Per-customer relay config (CustomerRelayConfig: relay ID, grace, min value) plus f_currency, f_ui_scope, f_theme, f_enc_pubkey | B | Mostly account and operational metadata; no direct identity in the relay JSON itself | attestantd, opsd, acli | |
t_user_tokens | User bearer/API tokens, scope, expiry | A | Secret credential material | attestantd, acli | |
t_user_files | User files and metadata | A | File content can include PII and financial documents | opsd/reports (writes reports), attestantd (reads), acli | |
t_audit | User operation logs, IP, payload JSON, errors | A | IP and payload content are privacy-sensitive | attestantd (write/read), acli (read) | Attestant compliance team |
t_customer_financials | Customer financial ledger | B | Financial and operational accounting data | opsd, opsd/reports, attestantd, reportd | C1 for reporting (subaccount grouping) |
t_near_financials | NEAR financial ledger plus epoch metadata | B | Same model as financials with NEAR enrichments | nearfinancialsd, reportd; reportd nearfinancialsd | |
t_customer_validators | Customer-validator assignments, states, balances, proposer config (JSON), rocketpool and EigenLayer validator metadata (JSON) | B | Customer-linked pseudonymous data | opsd, opsd/reports, attestantd, feerd, lidod, summaryd, acli | C1 for reporting (subaccount grouping, fee recipient addresses) |
t_customer_epoch_metrics | Per-customer epoch performance metrics | B | Commercially sensitive customer performance | opsd, attestantd, acli | |
t_proposer_config_histories | Historical proposer config by customer/subaccount | B | Contains customer-linked operational config | opsd, opsd/reports, attestantd, feerd, acli | C1 for reporting (historical fee recipient addresses) |
t_rejected_validators | Rejected validator pubkeys by user | B | Customer-to-validator linkage | services/eth2 flows via attestantd and opsd | |
t_customer_rocketpool_node_operators | Rocket Pool operators linked to customer | B | Addresses are public on-chain; the linkage is sensitive | opsd, attestantd | To be deprecated |
t_customer_eigenpods | Eigenpods linked to customer | B | Same pattern | attestantd, services/eigenlayer | |
t_customer_starknet_delegators | Starknet delegators linked to customer | B | Same pattern | starkd | |
t_customer_solana_delegators | Solana delegators linked to customer | B | Same pattern | solanad, summaryd | |
t_customer_near_delegators | NEAR delegators and validator address linked to customer | B | Same pattern | nearfinancialsd, summaryd | |
t_unassigned_validators | Unassigned validator pool metadata | B | Mostly operational inventory data | opsd, opsd/reports, acli | C1 for reporting (all validator keys in the pool) |
t_eth_mev_relays | Relay catalog: name/url/pubkey | C | Public-facing reference set | attestantd, acli | |
t_chainmeta | Chain constants, genesis data, and deposit contract metadata | C | Public chain metadata | attestantd, services/eth2 | |
t_metadata | Internal key/value JSON metadata | N/A | Mostly operational | attestantd, opsd, and DB versions |
Access flow diagram
The following Sankey diagram shows the service-to-table access flow represented by the table above.
If the embedded diagram does not render, open opsdb_sankey_access_flow.html directly.
Target architecture overview
- The current
opsdbserves two concerns at once: high-sensitivity customer and account workflows, and lower-sensitivity operational workflows. - The target architecture separates those concerns into two database boundaries and places services according to the highest-sensitivity data they require.
coredbbecomes the new operational database, holding mainly Class B and Class C data, together with only the minimum internal identifiers needed to join operational records.core boxhosts that lower-sensitivity operational boundary. Services moved there should not need direct access to names, emails, authentication material, audit logs, reporting-recipient data, or file contents.- The existing high-sensitivity boundary remains the home for direct identity, authentication, account-control, audit, reporting-contact, and file-content workflows.
- Initially, that sensitive boundary can remain in the current
opsdb, and later be reduced into a dedicated sensitive database as the migration progresses.
Data exposure on core box
corebox should expose onlycoredband the services that need that data.- The exposed dataset should be limited to Class B and Class C information, plus minimal join-safe internal identifiers such as customer IDs where operational linking is still required.
- This includes customer-linked operational data such as Customer IDs, subaccounts, validator assignments, proposer config history, performance metrics, customer financial ledger data, unassigned validator pool data, and customer-to-on-chain linkages such as eigenpods, and delegated addresses.
- It also includes public or low-confidentiality reference data such as MEV relay metadata, chain metadata, and other internal service metadata.
corebox will not expose direct identity or account-control data such as names, emails, auth credentials, audit/IP logs, invoice contact details, periodic report recipient lists, or user file contents.- Report generation, account management, authentication, and other workflows that require direct identifiers should remain outside
corebox and continue to use the sensitive boundary (in client box).
Migration phases
Phase 0: move non-sensitive tables and dependent flows to coredb
- Stand up
coredbon a separatecorebox. - Run
coredbin parallel with the existingopsdb. - Migrate whole tables that are already non-sensitive or acceptable to expose on
corebox, together with the read and write paths that depend on them. - Ensure all services on
corebox that need these datasets can readcoredbbefore any cutover.
Phase 1: move sensitive tables into a dedicated sensitive boundary
- Create a separate sensitive database boundary for Class A tables and other high-risk content.
- Move services that rely only on
coredbto thecorebox. - Remove duplicated non-sensitive data from the legacy
opsdbonce the new paths are live. - Leave account management, reporting-contact, authentication, audit, and file workflows on the sensitive side.
Phase 2: split t_users by data class
- Split the current
t_userstable into purpose-specific tables aligned to sensitivity. t_userskeeps identity profile fields and authentication/control fields.t_users_reportingstores invoice configuration and periodic report data.t_users_configstores non-sensitive account and runtime configuration data.- Expose only the minimum identifiers and configuration needed by services running on
core box.
Phase 3: move services according to final data requirements
- Move the
opsd/reportsservice, which is responsible for periodic reports, intoreportd. - Move the remaining
opsdservices to thecorebox once they depend only oncoredbandt_users_config. - Keep any service that still requires Class A identity, authentication, audit, reporting-contact, or file data on the sensitive side until it is split or redesigned.
🆕 🖥️ DRAFT - Server Commissioning, setting up a new server
✨ This is the DRAFT, work in progree central guide to ordering, commissioning, baselining and decommissioning servers for our infrastructure.

Please follow this page only by clicking the links from this page, do not click any subtopic in left side bookmark.



🔐 Initial Considerations
- Determine the server role early (validator, signer, core etc). See: Server Roles
- Production servers must use trusted suppliers and diverse datacentres.
For example - two validating servers in a Pod must NOT be in the same data centre. - Prefer UK region by default — check if any exceptions first.
- Ensure specs meet or exceed the role requirements in the Server Roles guidelines.
- Commitment varies by supplier, ranging from None to many years.
Ensure the server will remain fit for the purpose/role throughout the commitment period.
🔑 Follow our Host naming convention
🚀 Operating System
All new servers must be installed with Ubuntu Linux OS - 24.04.1 LTS or newer
🛒 Shop and order a server
Each supplier has a unique server provisioning method.
Following are are our vendors, with links to their ordering processes and tasks to complete before we proceed to post delivery steps:
🛠️ Post OS install immediate hardening
🎯 Post server delivery setup
🧭 Baseline configuration
🔄 Post baseline actions
🗑️ Decommissioning servers
📝 Referrences
🖥️ Server Roles
We have 3 main server roles:
-
🧾 Signing server:
For running Dirk.
Requires fast CPU for burst response, medium to low memory and local storage. -
✅ Validation server:
For managing blockchain interaction.
Requires high CPU, memory and local storage. -
⚙️ Core server:
For general purpose operations outside of the validating infrastructure.
Depending on the exact role, the requirements will vary considerably..
🛠️
| Role | CPU Speed(GHz) | CPU Cores | RAM (Gb) | NVMe (Tb raided) | Raid Level |
|---|---|---|---|---|---|
| 🧾 Signing | 3.5 | 8 | 64 | 1 | 1 |
| ✅ Validating 2 x NVMe | 3+ | 32 | 128 | 14 | 1 |
| ✅ Validating 4 + NVMe | 3+ | 32 | 128 | 14 | 10 |
💽 Disk considerations
🧩 RAID Configuration
-
Ensure full redundancy.
-
Determine the RAID layout during server commissioning as per instructions above.
-
Suppliers differ in how they set up RAID during OS installation (see suuplier specific notes).
-
You may need to create additional RAID devices based on disk count.
🧰 File-system layout
Minimum requirements:
- / (root) - 60Gb + RAM size.
- /boot - 4Gb
✨ Note:
-
All filesystems are ext4
-
No swap partition, we use swap file instead.
-
'Signing' and 'Validating' applications are installed in /home filesystem.
All remaining disk space is allocated to a separate /home partition. -
For 'Core' servers running Postgres: Create a large /var/lib/postgresql partition with a custom layout.
↩️ Back to the Server Commissioning main page
🖥️ Host naming convention
Determine a name for the new server based on following guidelines.
🧭 Historic naming convention
Historically we used following naming convention for servers(NOT now):
<purpose>-<location/environment><id>
Example:
- signer-eu03 = A production signing box acting as Dirk 3 in an EU data centre
- beacon-d01 = A development beacon node (jurisdiction is irrelevant)
✅ Current naming convention (April 2022 onwards)
For all new servers, the name clearly indicates the purpose of the server:
<asset>-<function>-<environment/pod number>-<slot id>
Example:
- eth-val-d01-01 = An Ethereum validating server in development pod 1 (slot 1)
- eth-sgn-p02-03 = An Ethereum signing server in production pod 2 (slot 3)
↩️ Back to the Server Commissioning main page
🏗 OVH — ordering & commissioning.
This page documents our recommended flow for ordering and commissioning OVH dedicated servers. It covers SSH key preparation, interactive/template installs, partitioning guidance for signing/validating/core servers, and post-install hardening steps.
🔑 Prepare SSH key first
In your Mac, create an SSH key pair for OVH access.
ssh-keygen -t ed25519 ~/.ssh/id_tempOVH -C "yourname@attestant.io"
cat ~/.ssh/id_tempOVH.pub
In the OVH manager choose Public key as the login method and paste the public key to avoid emailed root passwords.
🛒 Ordering checklist
- Open OVH Manager (use a private browser window and 2FA).
- Choose Dedicated → select product and location.
- Choose Attestant-approved Ubuntu LTS image (or Rescue system if pre-configuration is needed).
- Attach extra NVMe disks if required for validating or DB servers.
- Select Public key and paste your public key.
- Complete checkout and wait (typically 5–15 minutes) for provisioning.
🧭 Install / OS steps
After the server appears in the OVH dashboard, start the OS install from the Manager UI:
- Dashboard → Dedicated Servers → select server → System (OS) → Install.
- Choose the Attestant-approved OS.
- If using a template, either pick a saved template or select “Install from an OVHcloud template”.
- When customizing partitions, remove swap partitions (we use swap files) and set partition sizes per the role.
Example partition layout (validating servers):
PART /boot  ext4 4G
PART /      ext4 60G
PART /home  ext4 all
Notes:
-
Use the template save option if you'll provision more servers with the same layout.
-
For Scale-a3 or large-core machines, configure the small OS disks first (e.g., the two 500GB drives) and then configure the large NVMe array per the DB runbook.
✅ Post-setup checks
- Confirm OS:
cat /etc/os-release - Verify disk layout:
lsblk,cat /proc/mdstat - Check RAID:
mdadm --detail /dev/mdX - Confirm that swap partition was removed and no unexpected swap exists:
swapon --show - Ensure SSH key login works for root before removing any admin user.
⚠️ Tips & troubleshooting
- If the install UI doesn't present the
PARTentries as expected, retry with Rescue mode or contact OVH support. - For complex DB/core servers, follow the dedicated ChainDB/Postgres commissioning runbook after the OS install.
- Keep a copy of any OVH-supplied rescue credentials until the server is fully configured and handed over to Ansible.
Links
- OVH Manager: https://www.ovh.com/manager/dedicated/
- OVH docs & install templates: https://docs.ovh.com
↩️ Back to the Server Commissioning main page
🛰️ Hetzner — ordering & initial setup.
This page documents our standard workflow for provisioning and preparing Hetzner servers for Attestant workloads. It covers both signing (small, fast storage) and validating (larger, RAIDed NVMe) server types.
Quick summary
| Server type | Typical disk layout | Notes |
|---|---|---|
| Signing | 2 x NVMe (RAID1) | Use Attestant Ubuntu LTS image, default template usually sufficient |
| Validating | 4 x NVMe (RAID10) | Requires custom partitioning during installimage — follow the steps below |
🔑 Prepare SSH keys
Generate a new disposable ED25519 keypair if you don't already have one (recommended):
ssh-keygen -t ed25519 -C "yourname@attestant.io"
cat ~/.ssh/id_ed25519.pub  # copy this into Hetzner Robot during order
When ordering, choose Public key and paste it.
🛒 Ordering (fast checklist)
- Go to: https://robot.your-server.de/
- Select a suitable product (Dedicated Server) and location (e.g., Helsinki).
- Choose an Attestant-approved Ubuntu LTS release (or Rescue system if you need NVMe pre-configuration).
- Add extra NVMe disks if required for validating servers.
- Choose Public key login and paste the ED25519 public key.
- Complete checkout and wait (typically up to 60 minutes) for provisioning.
🧭 Initial access & rescue
After provisioning, SSH into the server using the assigned IP. If you need to run the interactive installer, use Hetzner's installimage from the rescue system.
ssh -F /dev/null root@<ip-address>
# or boot into Rescue mode via Robot → then SSH into the rescue environment
🛠️ Using installimage for validating servers (RAID10)
Validating servers typically use 4x NVMe in RAID10. Hetzner's interactive installimage script is commonly used to configure this. Below are the important knobs to set; the UI is interactive so follow prompts carefully.
Steps (high-level):
- From the rescue shell, run:
installimage
- In the installer UI:
- Select Ubuntu and your preferred Attestant OS image.
- Find SOFTWARE RAID and set
SWRAIDLEVELto10. - Locate PARTITIONS / FILESYSTEMS and ensure partitions are set to our preferred sizes.
Example partition configuration (adapt to current spec):
PART swap swap 128G
PART /boot ext3 4G
PART / ext4 60G
PART /home ext4 all
Notes:
- The installer is interactive — use F2 to save changes and F10 to exit the editor when done.
- The
PARTlines above are examples; validate the exact syntax in the install UI before saving.
After the install completes:
reboot
# log back in, then
apt update && apt upgrade -y
reboot
Then follow the Post Server Delivery runbook to complete baseline configuration.
🧾 Signing servers (2 × NVMe, RAID1)
Signing servers usually work fine with Hetzner's standard templates. Ensure the installer uses your SSH key and confirm RAID1 is active (if provided by template). Verify installed OS and disk sizes after first boot.
✅ Post-setup checks
- Confirm the OS:
cat /etc/os-release - Verify disk layout:
lsblk,cat /proc/mdstat - Check RAID details:
sudo mdadm --detail /dev/mdX - Confirm SSH key access and disable password root login in
/etc/ssh/sshd_configif enabled.
⚠️ Troubleshooting & tips
- If
installimagedoesn't expose the expectedPARTlines for NVMe, try booting the rescue system and using Hetzner's support or manual partitioning. - If RAID/volume sizes don't match expectations after install, contact Hetzner support to confirm disk assignment and RAID creation.
- Always double-check that you pasted the correct SSH public key to avoid lockout.
Links & references
- Hetzner Robot: https://robot.your-server.de/
- Hetzner Rescue/Install docs: https://docs.hetzner.com
↩️ Back to the Server Commissioning main page
🌐 Zare — ordering & commissioning
This page captures the Attestant workflow for provisioning and commissioning Zare dedicated servers: ordering checklist, enabling root access safely, and preparing the host for our baseline (Post Server Delivery) steps.
🛒 Ordering (fast checklist)
- Sign in to Zare Manager: https://manager.zare.com/dedicated
- Add new service → choose dedicated server with required CPU/RAM/disk.
- Select the nearest/appropriate data centre.
- Select Attestant-approved Ubuntu LTS if available; otherwise request via support.
- Wait for provisioning email (it typically contains the initial username and password).
✅ Prepare for Post Server Delivery
- Ensure root SSH key access works for Ansible automation.
- Update server hostname and DNS to match inventory, and add PTR record if required.
- Run the
Post Server Deliverybaseline runbook to complete OS hardening, install monitoring agents, and apply configuration.
Links & references
- Zare Manager: https://manager.zare.com/dedicated
↩️ Back to the Server Commissioning main page
🖥️ ServerX — initial deployment & commissioning notes
This document captures the Attestant-specific steps we apply when commissioning ServerX machines: ordering choices, initial SSH access, filesystem/fstab adjustments, DNS/netplan fixes, and apt sources corrections.
Quick summary
| Area | Action |
|---|---|
| OS image | Use Ubuntu 24.04-server (Attestant base image) |
| Auth | Use SSH public key (store private key as mode 400) |
| RAID | Select vendor RAID; use Advanced Settings if UI locks fields |
| Post-setup | Fix fstab, regenerate ext4 with our options, update netplan & apt sources |
🔐 Initial deployment checklist
- Log in to the ServerX portal: https://portal.servers.com/login
- Select Ubuntu 24.04-server (64 bit) as the OS.
- Provide your SSH public key (ensure private key is saved locally with mode 400).
- Choose RAID options appropriate to the server role.
- If the RAID UI appears locked, toggle to "Advanced Settings" and back to unlock editing.
- (Optional) Add partitions like
/optif needed for workloads — we usually move PostgreSQL to/var/lib/postgresqllater.
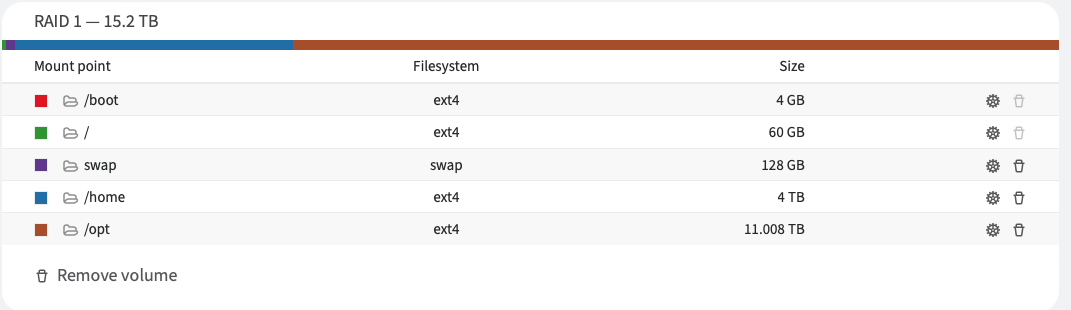
After provisioning you'll receive an email. SSH in as the provided user (often root):
ssh root@<ip-address>
Set the DNS name in our DNS provider and update the ServerX control panel hostname to match (e.g. eth-val-p01-03.attestant.io). Add PTR record for reverse DNS from the ServerX Networks panel.
🧰 Correct initial filesystem configuration
ServerX may create LVM and fstab entries by default. We standardise filesystems to our options.
Warning: destructive operations follow. Confirm device names before running any mkfs or umount commands.
Steps (example for /home):
# unmount target
sudo umount /home || true

# find UUID and device
blkid | grep <UUID-or-partial> || lsblk -f

# (example) regenerate ext4 with our recommended options
sudo mkfs.ext4 -I 256 -b 4096 -O has_journal,ext_attr,sparse_super,resize_inode,dir_index,filetype,extent,flex_bg,large_file,huge_file,uninit_bg,dir_nlink,extra_isize /dev/mapper/<vg>-<lv>.home

# reload systemd units and remount
sudo systemctl daemon-reload
sudo mount -a
If you created /opt for PostgreSQL during provisioning but prefer /var/lib/postgresql, create the target and update /etc/fstab accordingly, then repeat the same regenerate/remount process for that mount.
Example /etc/fstab entry:
UUID=xxxxxxxx-xxxx-xxxx-xxxx-xxxxxxxxxxxx /home ext4 noatime 0 0
🌐 Netplan, DNS and apt repo fixes
ServerX can use internal DNS and internal apt mirrors which are blocked by our firewall. Replace internal nameservers and apt sources with public mirrors.
Netplan example (update the nameservers section to use public resolvers):
# /etc/netplan/01-netcfg.yaml (snippet)
network:
  version: 2
  ethernets:
    ext0: {}
    ext1: {}
  bonds:
    agge:
      interfaces: [ext0, ext1]
      parameters:
        mode: 802.3ad
      addresses: [88.211.226.236/29]
      nameservers:
        addresses: [8.8.8.8, 8.8.4.4]
      routes:
        - to: 0.0.0.0/0
          via: 88.211.226.235
Apply changes safely:
sudo chmod 600 /etc/netplan/01-netcfg.yaml
sudo netplan generate
sudo netplan apply

sudo rm -f /etc/resolv.conf
sudo ln -s /run/systemd/resolve/resolv.conf /etc/resolv.conf
sudo systemctl restart systemd-resolved.service
Replace internal apt sources in /etc/apt/sources.list with a public mirror (example uses UK mirror):
deb http://gb.archive.ubuntu.com/ubuntu noble main restricted universe multiverse
deb http://gb.archive.ubuntu.com/ubuntu noble-updates main restricted
deb http://gb.archive.ubuntu.com/ubuntu noble-security main restricted
Then update packages:
sudo apt update && sudo apt upgrade -y
✅ Post-setup checks
- Verify filesystems:
lsblk -fanddf -h - Confirm no unexpected swap:
swapon --show - Check DNS resolution:
dig +short example.comorgetent hosts attestant.io - Confirm apt sources are reachable and
apt updatesucceeds.
Links
- ServerX portal: https://portal.servers.com
↩️ Back to the Server Commissioning main page
⚙️ FastHosts — vendor notes & initial setup
FastHosts are typically used for signing servers (not usually for validating clusters). This document covers ordering guidance, initial access, and how to adjust the default RAID/LVM layout to provide adequate space for signer workloads.
🛒 Ordering (fast checklist)
- Login to FastHosts: https://admin.fasthosts.co.uk/Home/
- Choose "Dedicated Servers" and select a server spec suitable for signing (CPU, RAM, NVMe/HDD as required).
- Pick the nearest/appropriate data centre location.
- Select an Attestant-approved Ubuntu LTS release as the base image.
- Do not enable extra backups/control panel unless specifically requested.
Tip: If you need NVMe-backed disks for speed, pick a plan with NVMe devices and confirm the number of namespaces presented to the OS.
🔐 Initial access & verification
FastHosts will typically email initial root credentials. Access the server via SSH on port 22:
# example (replace with actual details)
ssh root@<ip-address>
On first boot, quickly verify disk and partition layout:
lsblk -o NAME,SIZE,TYPE,MOUNTPOINT
df -h
cat /etc/os-release
If / (or /home) already shows ~800GB and /boot ~1–2GB, you can probably skip the RAID/LVM adjustment below.
🧩 Adjust RAID/LVM for FastHosts baseline
FastHosts can ship with a minimal LVM/RAID layout. For signer servers we prefer dedicating ~800GB to the main data volume (/ or /home). The example below shows a conservative sequence used on an existing signer box — adapt to your inventory and always double-check device names.
- List physical volumes and note names:
sudo pvdisplay
Example output might show a PV like /dev/md4.
- Resize the PV to consume the new space (if the underlying RAID was expanded by the provider):
sudo pvresize /dev/md4
- List logical volumes to identify the LV names:
sudo lvdisplay
- Extend the logical volume (example extends
/dev/vg00/hometo use all free space):
sudo lvextend -l +100%FREE /dev/vg00/home
- Grow the filesystem (ext4 example):
sudo resize2fs /dev/vg00/home
- Confirm space is available:
df -h /home
Notes & safety
- Confirm PV/LV/device names before running
pvresize/lvextend— these operations are powerful and affect the whole volume group. - If the server uses XFS instead of ext4, use
xfs_growfsto expand the filesystem instead ofresize2fs.
✅ Post-setup checks
- Confirm expected disk sizes with
lsblkanddf -h. - Verify mount points in
/etc/fstabif you made persistent changes. - Check RAID health (if using mdadm):
sudo mdadm --detail /dev/md4
cat /proc/mdstat
Troubleshooting
- If
pvresizefails because the underlying device size didn't change, contact FastHosts support to confirm the RAID expansion or request a configuration change. - If
lvextendor filesystem resize reports errors, stop and collect logs (dmesg,journalctl -xe) and escalate to InfraOps.
Helpful links & vendor docs
- FastHosts help: https://help.fasthosts.co.uk/app/answers/detail/a_id/2982/kw/2982
- LVM man pages:
man pvresize,man lvextend,man resize2fs - todo https://www.fasthosts.co.uk/guides#/articles/additional-users-for-your-fasthosts-control-panel----749aae62-344a-4a0e-89d6-8496dd91b444
↩️ Back to the Server Commissioning main page
🍒 Cherry — ordering & commissioning
This page captures the Attestant workflow for provisioning and commissioning cherry dedicated servers: ordering checklist, enabling root access safely, and preparing the host for our baseline Post Server Delivery steps.
🛒 Ordering (fast checklist)
.....
.....
✅ Prepare for Post Server Delivery
- Ensure root SSH key access works for Ansible automation.
- Update server hostname and DNS to match inventory, and add PTR record if required.
- Run the
Post Server Deliverybaseline runbook to complete OS hardening, install monitoring agents, and apply configuration.
Links & references
- cherry
- cherry
↩️ Back to the Server Commissioning main page
🏗 Post OS install immediate hardening
- Run this procedure immediately after server rebuild.
🔐 Post-install hardening & Ansible prep
Once the OS is installed and the server is reachable, perform these steps to prepare for Ansible to do the rest.
Login to the newly built server
-
Login with your ssh key 🗝️ as user root/ubuntu:
ssh -F /dev/null -i ~/.ssh/id_cherry -l ubuntu <servername>.attestant.io -
Or/Else login with temporary user password in your email 📩 or as shown in portal
ssh -F /dev/null ubuntu@<servername>.attestant.io -
Or/Else login with root password in your email 📩 or as shown in portal
ssh -F /dev/null root@<servername>.attestant.io
Add your current dev or prod public key to the server as per environment:
-
Run as root:
-
PUBKEY='YOUR_STD_PUBLIC_KEY_HERE'
rm -rf /root/.ssh
install -d -m 0700 /root/.ssh
echo $PUBKEY > /root/.ssh/authorized_keys
chmod 0600 /root/.ssh/authorized_keys
echo -e "Port 789\nPermitRootLogin Yes" >> /etc/ssh/sshd_config
systemctl daemon-reload && systemctl restart ssh ssh.socket
Login to the server as you would login to any attestant server:
```bash
 ssh <servername>.attestant.io
```
On successful login as root with your key:
-
Update the OS: Servers are usually built with vendor supplied old ISO's. We need to update the OS to latest.
Run following and reboot:
# 1. Update system packages
export DEBIAN_FRONTEND=noninteractive
apt update
apt -y install nvme-cli mdadm parted
apt -y upgrade
apt -y autoremove
reboot
Retry login.
DNS & Hostname
Create DNS record (Route 53 example)
-
Record type: A (or AAAA)
-
Name: shortname (eg. eth-val-p01-01)
-
Value: server public IP
-
TTL: 300.
Verify with:
dig +short eth-val-p01-01.attestant.io 8.8.8.8
dig +short eth-val-p01-01.attestant.io 1.1.1.1

ping -c4 eth-val-p01-01.attestant.io
Note - It may take a while to propagate the new dns entry to entire world 🌐
Set hostname on the server(Optional) :
hostnamectl set-hostname eth-val-p01-01
Configure reverse DNS (PTR) in supplier portal once forward name is resolvable.
Verify the DNS host name and its reverse DNS(PTR) are resolving correctly before next steps.
Post Invoice / Billing
If an invoice arrives, forward it to Xero and tag it to the appropriate project/cost centre.
Swap file (preferred over swap partition)
Recommendations:
-
Use a swap file sized to the system's needs. Common starting point: 50% of RAM, check other similar server.
Example:
fallocate -l 64G /swapfile
chmod 600 /swapfile
mkswap /swapfile
swapon /swapfile
cp -p /etc/fstab /etc/fstab.$(date +%d_%b_%y_%H%M).preswap.bak
echo '/swapfile none swap sw,nofail 0 0' >> /etc/fstab
Verify:
  swapon --show
  free -h
RAID (for multi-disk servers)
Inspect devices
nvme list
lsblk -o NAME,SIZE,MODEL
cat /proc/mdstat
Apply this when machine has multiple NVMe. For example RAID10 for 4x7TB nvme disks:
NAME        MAJ:MIN RM   SIZE RO TYPE  MOUNTPOINTS
nvme2n1     259:4    0     7T  0 disk
nvme3n1     259:3    0     7T  0 disk
nvme4n1     259:1    0     7T  0 disk
nvme5n1     259:0    0     7T  0 disk
Optional - wipe old data(⚠️ CAUTION - following commands are destructive and not recoverable):
Wipe the RAID metadata and any filesystem signatures from the partitions(adjust device names)
mdadm --zero-superblock /dev/nvme[2345]n1p1
wipefs -a /dev/nvme[2345]n1p1
wipefs -a /dev/nvme[2345]n1
Partition disks (example using parted)
-
Adjust device names
-
⚠️ following commands are destructive and not recoverable. Confirm device names twice.
 for dev in nvme2n1 nvme3n1 nvme4n1 nvme5n1; do
  parted --script /dev/$dev mklabel gpt mkpart primary 2048s 100% set 1 raid on
 done
Create RAID10
-
Example (4 data disks; adapt
--raid-devicesand device list):mdadm --create --verbose /dev/md127 \ --level=10 \ --raid-devices=4 \ --metadata=1.2 \ --chunk=512 \ --bitmap=internal \ /dev/nvme2n1p1 /dev/nvme3n1p1 /dev/nvme4n1p1 /dev/nvme5n1p1 -
Verify
watch -n5 cat /proc/mdstat
Persist mdadm config and initramfs.
- Run
mv /etc/mdadm/mdadm.conf /etc/mdadm/mdadm.conf.o

mdadm --detail --scan > /etc/mdadm/mdadm.conf

update-initramfs -u -k all
LVM & Filesystems (optional)
Use LVM for flexible volume sizing on top of RAID devices.
Create LVM stack
pvcreate --dataalignment 512k /dev/md127
vgcreate vg_data /dev/md127
lvcreate --name lv_home --size 1T vg_data
Keep ~10–20% free for snapshots.
Create filesystems
mkfs.ext4 -m 1 -O metadata_csum,64bit,^has_journal -i 65536 -E stride=128,stripe-width=256 /dev/vg_data/lv_home
Mount using UUIDs in /etc/fstab
blkid /dev/vg_data/lv_home
cp -p /etc/fstab /etc/fstab.o
# add lines : UUID=<uuid> /home ext4 noatime 0 0
mkdir -p /home
mount -a
Create filesystem directly on the RAID volume:
mkfs.ext4 -m 1 -O metadata_csum,64bit,^has_journal -i 65536 -E stride=128,stripe-width=256 /dev/md127
Verification & Monitoring
- Confirm RAID state:
cat /proc/mdstatandmdadm --detail /dev/md0. - Confirm LVM:
vgs,lvs. - Confirm mounts and free space:
df -h.
↩️ Back to the Server Commissioning main page
⚙️ Baseline Configuration — Attestant
This document explains the standard, repeatable steps to bring a newly provisioned server to the Attestant baseline using Ansible. Follow the checklist and playbooks below — do not make OS or application changes outside of Ansible.
✳️ Before you start
- Do not install software or change OS settings manually. Use Ansible.
- Make sure you have SSH access and the required local keys.
- Ensure you have appropriate access to the
opsrepo.
🔑 Hardware keys
Summary:
- Validating/operational servers (chainDB, execDB, etc.) typically share the same hardware key per staff member (e.g.
id_xy_dev_1). Verify the keys listed ininventories/<pod>/group_vars/all/main.yml. - Signing servers use unique hardware keys stored in the host_vars for that signing host. Ensure those keys are present in
roles/ssh/files/.
🧾 Adding a server to Ansible (existing pod)
- Open
inventories/<pod>/hostsand add the new host in the appropriate groups (e.g., validators, signers). - Update
inventories/<pod>/group_vars/all/main.yml(for exampledirk_permissionsor other pod-wide vars). - Copy a similar host's
host_vars/<host>/as a starting point:
cp -a inventories/<pod>/host_vars/<example-host> inventories/<pod>/host_vars/<new-host>
# then edit host-specific vars (IP, serial, vault.yml, etc.)
🆕 Adding a new pod (summary)
Create a new inventory directory and copy structures from an existing pod as a base. Example:
cd ~/ops/ansible/inventories
mkdir pod6
cp ../pod5/hosts pod6/hosts
mkdir -p pod6/group_vars/all
cp -a ../pod5/group_vars/all/* pod6/group_vars/all/
mkdir -p pod6/host_vars
Important: remove any hostnames from the copied files that belong to the old pod. Edit vault.yml using ansible-vault edit vault.yml.
Add the new pod to the operations inventory so automation daemons are aware of it (edit inventories/<development->operations>/group_vars/all/main.yml as required).
🔐 Create and place server certificates
Requirements:
- OpenSSL >= 3.0.2 locally (for certificate work).
- Ansible-vault passphrase available for encrypting files.
Generate certificates via Ansible (example):
dev/prd-ansible-playbook -i inventories/<pod>/hosts create_client_certificate.yml --connection=local --limit <host>
The playbook will create encrypted certificate files in inventories/<pod>/host_files/<host>/.
🧰 Bring the system to baseline
Run the full baseline playbook to install OS-level configuration, harden network ports and apply the standard Attestant baseline:
dev/prd-ansible-playbook -i inventories/<pod>/hosts system.yml --limit <host>
After successful completion:
-
Reboot the machine
-
Update the Server Info spreadsheet: mark server as Baseline.
✅ Git workflow — commit inventory changes
Create a local branch, commit inventory/host_var changes, and open a PR for review.
Create a pull request in GitHub and add reviewers.
Utilities & tips
- Generate strong passwords if needed:
pwgen -B 24(installpwgenif needed). - Keep
vault.ymledits viaansible-vault editto avoid accidental plaintext secrets in the repo.
↩️ Back to the Server Commissioning main page
✅ Post-baseline actions
This document lists the tasks to complete after a server reaches the Ansible baseline: installing approved applications, validating connectivity (for validators), handling signing servers (special process), and adding the server to monitoring dashboards.
1 — Install Attestant-approved applications
When a host is added to inventories/<pod>/hosts it is typically assigned roles and associated applications. Deploy them with the site playbook:
dev/prd-ansible-playbook -i inventories/<pod>/hosts site.yml --limit <host>.attestant.io
When clients are fully synced and services are healthy, proceed to final checks.
2 — Validating servers: open Dirk access on signers
If the new validating server needs to communicate with signers (Dirk), update Dirk on each signer in the pod so it allows the validator's IP/host through the signer firewall and configuration.
Run the playbook (example):
# Run from ops repo; replace wrapper if required
ansible-playbook -i inventories/<pod>/hosts dirk.yml --limit <signer>.attestant.io
After updating Dirk on each signer, validate connectivity from the validating server:
# From the validating server
nc -vz <signer-host> <dirk-port>
# or use the vouch endpoint test (replace with your service endpoints):
curl -fS http://localhost:port/healthz
Add any successful checks to the ticket and mark the validator for "Final Checks" once sync and connectivity are green.
3 — Signing servers (special process)
⚠️ Signing servers are highly sensitive. Only senior operators with explicit permission should perform replacements or key operations.
All signing-server operations (creating keys, wallets, restoring, rotation) live in the separate Signing Servers document:
- Signing Servers - Creating Keys & Wallets: https://docs.google.com/document/d/1WPAP6zahegCen7U0HqqJjYFsS7KIEK3GJEpvQbpArXc/edit
If you are not the designated signing-server owner, escalate to the owner and follow the separate runbook.
4 — Add server to Grafana / Prometheus
To ensure observability, update Prometheus scrape configs and dashboards:
- Update Prometheus job config or service discovery to include the new host.
- Reload Prometheus or push the updated configuration via your automation.
- Confirm metrics are present in Grafana and add the host to relevant dashboards.
Reference: Update Prometheus configuration in ops-tools (internal doc): https://docs.google.com/document/d/1eMChMtfbXatSPtIrmF4BwMZTL7UV0-lN6IMATVzsqtc/edit#heading=h.6b7ijhhlcbsw
Example (validate Prometheus target up):
curl -s http://prometheus:9090/api/v1/targets | jq '.data.activeTargets[] | select(.discoveredLabels.instance|contains("<host>"))'
5 — Final checks & mark complete
Checklist before marking server as fully deployed:
-
All assigned applications deployed via
site.ymland services are running - Consensus & execution clients fully synced (for validators)
- Dirk connectivity validated for signer<->validator flows (if applicable)
- Monitoring metrics present and dashboard updated
- Backups/rotate keys and any post-deploy automated tasks scheduled
When done, mark the server as Final Checks or Ready in the Server Info spreadsheet and add links to logs/PRs/tickets in the change record.
Resources
- Signing servers runbook (sensitive): https://docs.google.com/document/d/1WPAP6zahegCen7U0HqqJjYFsS7KIEK3GJEpvQbpArXc/edit
- Prometheus/Grafana update doc: https://docs.google.com/document/d/1eMChMtfbXatSPtIrmF4BwMZTL7UV0-lN6IMATVzsqtc/edit
↩️ Back to the Server Commissioning main page
🗑️ 01 — Decommissioning servers (runbook)
When a server reaches end-of-life (hardware failure, end-of-support, or replaced by newer hardware) follow this runbook to remove it from our fleet safely and consistently.
Quick checklist
| Step | Owner | Notes |
|---|---|---|
| 1. Remove references from Ansible inventory | InfraOps | Search and remove host from inventories/ and host_vars/; commit changes |
| 2. Remove certs and host_files | InfraOps | Delete host_files/<host> and host_vars/<host> directories |
| 3. Disable monitoring & DNS | Monitoring / InfraOps | Remove Prometheus target, Grafana dashboards, and DNS A/PTR records |
| 4. Secure-erase disks | InfraOps (or DC tooling) | NVMe: crypto-erase (nvme-cli) where supported; HDD: secure-erase/hdparm |
| 5. Reinstall OS via provider dashboard | InfraOps / DC | Re-image to vendor/vanilla image |
| 6. Update records & commit | InfraOps | Mark Server Info spreadsheet and commit ansible changes (PR) |
1 — Remove server from Ansible inventory & files
From the ansible repository root, search for references to the host (replace <host> with the hostname):
# fast search using git (preferred when repo is available locally)
git -C ~/ops grep -n "<host>" || true

# fallback recursive grep (exclude .git)
grep -RIn --exclude-dir=.git "<host>" . || true
Common places to update:
inventories/<pod>/hosts— remove host entry from groupsinventories/<pod>/group_vars/all/main.yml— remove from pod-wide lists (e.g. dirk_permissions)inventories/<pod>/host_vars/<host>/— remove host variablesinventories/<pod>/host_files/<host>/— remove certificate files
After removing references, run the search again to confirm nothing remains.
Delete host-specific directories (careful, irreversible):
rm -rf inventories/<pod>/host_files/<host>.attestant.io
rm -rf inventories/<pod>/host_vars/<host>.attestant.io
Commit your Ansible inventory changes following the normal git workflow (create branch, commit, PR):
git checkout -b decomm/<host>
git add -A
git commit -m "remove <host> from <pod> inventory and host files"
git push --set-upstream origin decomm/<host>
# open PR and add reviewers
2 — Disable monitoring & remove from DNS
Before deleting DNS, remove the server from monitoring and alerting so you don't generate noise.
Prometheus example (validate target removal):
curl -s http://prometheus:9090/api/v1/targets | jq '.data.activeTargets[] | select(.discoveredLabels.instance|contains("<host>"))'
Remove DNS records (A and PTR) via Route53 / provider portal. Verify DNS removal:
dig +short <host>.attestant.io @your-resolver
dig +short -x <ip> @your-resolver
3 — Securely erase disks
Warning: these steps are destructive and irreversible. Confirm you are operating on the correct device(s) before running any format/erase commands.
Prefer provider-side secure-erase tooling where available (most providers support a secure wipe during repurpose). If you must wipe disks yourself, prefer NVMe crypto-erase using nvme-cli for SSDs and the vendor-recommended secure-erase for HDD.
Install nvme-cli (Debian/Ubuntu):
sudo apt update && sudo apt install -y nvme-cli
nvme list
Check controller capabilities (look for fna field; 0x4 indicates crypto erase supported):
nvme id-ctrl /dev/nvme0 | grep fna
# example output: fna : 0x4
If the drive supports crypto-erase, run a crypto-erase (quick):
sudo nvme format /dev/nvme0 -n 0xffffffff --ses=2
If the drive does not support crypto-erase, use the vendor's recommended method (example uses --ses=1 as an alternative and --force if needed):
sudo nvme format /dev/nvme0 -n 0xffffffff --ses=1 --force
Notes on NVMe secure-erase:
- Crypto-erase typically replaces the media encryption key in the controller, instantly rendering data unrecoverable.
- The operation may make the running OS unstable; a reboot or provider re-image is expected.
- Confirm success with
nvme listornvme id-ctrl /dev/nvme0showing usage reset.
For spinning disks (HDD) use vendor-appropriate secure erase (e.g. hdparm --security-erase) or the provider's secure-wipe feature. Example (careful):
# Example only — confirm drive and vendor docs before using
sudo hdparm --user-master u --security-set-pass p /dev/sdX
sudo hdparm --user-master u --security-erase p /dev/sdX
If in doubt, ask the data centre to perform the wipe or use their portal to securely erase before returning hardware.
4 — Reinstall OS / hand back to provider
After secure erase, use the data centre dashboard to reinstall a vanilla operating system image or follow the provider's return workflow.
Steps:
- Use DC console to re-image to the vendor/vanilla image.
- Verify that the server boots to the installer or base image.
- Confirm disks show zeroed/empty usage (e.g.,
lsblk,nvme listoutputs show 0.00 B usage for NVMe where applicable).
5 — Finalize records
- Update the Server Info spreadsheet: mark server as Decommissioned and record the date and ticket/PR reference.
- Close any monitoring alerts and remove escalation policies tied to the host.
- Ensure the Ansible PR is merged (or the changes are otherwise recorded) and that the runbook ticket contains links to the PR and DC wipe logs.
Resources & references
- Ansible inventory patterns:
inventories/<pod>/hosts,inventories/<pod>/host_vars/,inventories/<pod>/host_files/ - Prometheus target API:
http://prometheus:9090/api/v1/targets - nvme-cli man page:
man nvme-format - Provider console docs (follow your DC vendor guidance for secure wipe and returns)
↩️ Back to the Server Commissioning main page
📖 References
Common reference commands, test patterns, and links to related documentation.
🔑 SSH access patterns
With RSA key (safe)
ssh -i <key-path> \
    -o StrictHostKeyChecking=no \
    -o UserKnownHostsFile=/dev/null \
    -p 22 \
    <user>@<host>.attestant.io
With password (temporary)
ssh -o PreferredAuthentications=password \
    -o PubkeyAuthentication=no \
    -o StrictHostKeyChecking=no \
    -o UserKnownHostsFile=/dev/null \
    -p 22 \
    <user>@<host>.attestant.io
🔄 Infrastructure updates
For Grafana updates, see "Update Prometheus configuration" in the ops-tools runbook.
🔐 Testing Dirk connectivity to Vouch
Run these tests from your validating host to verify Dirk signing connectivity.
Quick pod reference
| Pod | Servers | Batch | Notes |
|---|---|---|---|
| Pod1 | 01-05 | Batch0008 | signer-eu01 to signer-eu05 |
| Pod2 | 06-10 | Batch0108 | signer-eu06 to signer-eu10 |
| Pod3 | 11-15 | Batch0208 | signer-eu11 to signer-eu15 |
| Pod4 | 16-20 | Batch0308 | signer-eu16 to signer-eu20 |
| Pod5 | 21-25 | Batch0408 | signer-eu21 to signer-eu25 |
| Pod6 | 26-30 | Batch0508 | signer-eu26 to signer-eu30 |
| Pod7 | 31-35 | Batch0608 | signer-eu31 to signer-eu35 |
| Pod8 | 36-40 | Batch0708 | signer-eu36 to signer-eu40 |
| Pod9 | 01-05 | Batch0808 | eth-sgn-p09-01 to eth-sgn-p09-05 |
Testing script (generic)
This script can test any pod by adjusting the variables. Example for Pod1:
#!/bin/bash
# Test Dirk connectivity for a pod's signers

# Configure these per pod
START_NUM=1
END_NUM=5
BATCH="0008"
PREFIX="signer-eu"  # or "eth-sgn-p09" for Pod9

# Common test data
TEST_DATA="0x000102030405060708090a0b0c0d0e0f101112131415161718191a1b1c1d1e1f"
TEST_DOMAIN="0x202122232425262728292a2b2c2d2e2f303132333435363738393a3b3c3d3e3f"

# Current hostname for certs
host=$(uname -n)

for i in $(seq $START_NUM $END_NUM); do
    server=$(printf '%02d' $i)
    echo -n "${PREFIX}${server}: "

    ethdo signature sign \
        --remote="${PREFIX}${server}.attestant.io:12381" \
        --server-ca-cert /home/vouch/certs/ca.crt \
        --client-cert "/home/vouch/certs/${host}.attestant.io.crt" \
        --client-key "/home/vouch/certs/${host}.attestant.io.key" \
        --account="Batch${BATCH}/00275" \
        --data="$TEST_DATA" \
        --domain="$TEST_DOMAIN"
done
Per-pod variables
Quick reference for pod-specific values:
# Pod1: servers 01-05, Batch0008
START_NUM=1;  END_NUM=5;   BATCH="0008"; PREFIX="signer-eu"

# Pod2: servers 06-10, Batch0108
START_NUM=6;  END_NUM=10;  BATCH="0108"; PREFIX="signer-eu"

# Pod3: servers 11-15, Batch0208
START_NUM=11; END_NUM=15;  BATCH="0208"; PREFIX="signer-eu"

# Pod4: servers 16-20, Batch0308
START_NUM=16; END_NUM=20;  BATCH="0308"; PREFIX="signer-eu"

# Pod5: servers 21-25, Batch0408
START_NUM=21; END_NUM=25;  BATCH="0408"; PREFIX="signer-eu"

# Pod6: servers 26-30, Batch0508
START_NUM=26; END_NUM=30;  BATCH="0508"; PREFIX="signer-eu"

# Pod7: servers 31-35, Batch0608
START_NUM=31; END_NUM=35;  BATCH="0608"; PREFIX="signer-eu"

# Pod8: servers 36-40, Batch0708
START_NUM=36; END_NUM=40;  BATCH="0708"; PREFIX="signer-eu"

# Pod9: servers 01-05, Batch0808 (different naming)
START_NUM=1;  END_NUM=5;   BATCH="0808"; PREFIX="eth-sgn-p09-"
Tips & troubleshooting
- Always run tests from your validating host to ensure proper cert access.
- Check cert paths if you get TLS errors (
/home/vouch/certs/). - Use
--verbosewithethdofor detailed error output. - Pod9 uses a different naming scheme; ensure you adjust
PREFIXaccordingly.
Last reviewed: 2025-10-26 • InfraOps
📝 Example Usage
Testing Pod4
# Use these variables with the generic script above
START_NUM=16; END_NUM=20; BATCH="0308"; PREFIX="signer-eu"
Testing Pod9 (different naming scheme)
# Note the different PREFIX for Pod9
START_NUM=1; END_NUM=5; BATCH="0808"; PREFIX="eth-sgn-p09-"
🚀 Getting Started
- Copy the generic testing script to a file (e.g.,
test-dirk.sh) - Make it executable:
chmod +x test-dirk.sh - Set the pod variables from the reference above
- Run the script:
./test-dirk.sh
For more information about Dirk and Vouch setup, see the operations guide.
↩️ Back to the Server Commissioning main page
Introduction
This appendix provides the reader with sufficient information to begin using Ansible and Amazon S3 for automated software management.
Software depot
The Attestant software depot holds binaries for Attestant's internal infrastructure. These are specifically binaries that are not available to the public, and carry out operations such as report generation, client interaction, and internal monitoring.
Ansible is able to use the depot to install and verify softwares.
Location
The Attestant software depot is an Amazon S3 bucket at depot.attestant.io and has the following structure:
-
depot.attestant.io the bucket
-
bin the directory containing all of the binaries
- <name>-<version> the specific binary
-
For example, version 1.2.0 of the Attestant binary financialsd can be found at s3://depot.attestant.io/bin/financialsd-1.2.0
Writing files to the depot
Writing files to the depot requires specific Amazon S3 user credentials. Only this user is allowed to upload files to the depot.
Reading files from the depot
The depot is configured to allow read access to binaries through use of bearer token authorisation. Specifically, a request using a URL providing the token in the Referer header can retrieve files. This provides a sensible balance between not allowing unauthorised access and allowing automated deployment of software.
Configuration management
Attestant uses Ansible for configuration management. Ansible uses remote connections to servers to carry out tasks, which removes the requirement (and security risk) for every Attestant server to have a software agent listening for connections.
Ansible groups tasks, such as creating a user or installing a piece of software, in bundles called "roles". Attestant has roles for all major components, as well as some for system configuration.
Ansible provides arbitrary grouping of hosts. A single host may be in the groups "geth", "vouch" and "prysm", for example. This allows for significant flexibility when it comes to defining which software should be operating on which servers.
Installing Ansible
Ansible should be installed on the client to allow playbooks to run. Typically this is done using an appropriate package manager (e.g. Homebrew for Mac, or apt for Linux):
brew install ansible
sudo apt-get install ansible
Clone the /ops repository
Ansible runs on client computers, connecting to the servers via SSH. The Ansible configurations are available in the Attestant /ops GitHub repository. To obtain this run from ~/attestant :
git clone https://github.com/attestantio/ops.git
Inside this repository is an ansible directory, containing all Ansible configuration information.
Do the following to install additional dependencies in the /ops repo after cloning:
cd ops/ansible
./install-dependencies.sh
Please refer to the "Software Development Lifecycle Procedure" for information about how changes are made to this repository.
Base inventory layout
The inventory defines which hosts are in which groups, and the variables that apply to them. The base inventory layout is as follows:
-
inventories/
-
development/
-
hosts
-
group_vars/
-
all
-
main.yml
-
vault.yml
-
-
-
host_vars/
-
-
operations/
-
hosts
-
group_vars/
-
all
-
main.yml
-
vault.yml
-
-
-
host_vars/
-
-
pod1/
-
hosts
-
group_vars/
-
all
-
main.yml
-
vault.yml
-
-
-
host_vars/
-
-
pod2/
...
-
At the top level there are directories named development and pod2. These ensure that the two environments are kept as separate as possible, reducing the chance of configuration mistakes.
Underneath each of these levels are three items: hosts, which is the list of hosts and their groups, group_vars, which is a directory containing group-specific variables, and host_vars, which is a directory containing host-specific variables. The use of both group-specific and host-specific variables allows per-server customisation if required without needing to create an individual configuration for every host.
The hosts file will look something like:
all:
  hosts:
    eth-val-p01-01.attestant.io:
    eth-val-p01-02.attestant.io:
    eth-val-p01-03.attestant.io:
    client-eu01.attestant.io:
    client-eu02.attestant.io:

children:

  financialsd:
    hosts:
      client-eu01.attestant.io:

  fxd:
    hosts:
      client-eu01.attestant.io:
      client-eu02.attestant.io:

  vouch:
    hosts:
      eth-val-p01-01.attestant.io:
      eth-val-p01-02.attestant.io:
      eth-val-p01-03.attestant.io:
Base role layout
The role defines what software and configuration the hosts will have applied to them. The base role layout is /ops/ansible/roles/
- ssh/files - Location of SSH public keys for authentication
- geth/tasks/main.yml - Task list to install the geth application along with its version and checksum
- ufw/vars/debian.yml - Variables for the ufw firewall application on Debian
Local SSH configuration for Ansible
Ansible requires an SSH connection from the client running Ansible (staff member's laptop/desktop) to the servers it will be updating. Because Attestant uses hardware-based public keys to access servers some setup is required to provide Ansible with suitable connections.
The remote server should have a copy of your public key so that it will allow you to log in. To do so, run:
ssh-copy-id -i ~/.ssh/
.pub root@ .attestant.io
where
Next, a change must be made to the ~/.ssh/config file on the operations client that will be running Ansible. An example file is given below (bold indicates items that require changing for each staff member):
# Ansible
Host *.attestant.io
  PreferredAuthentications publickey
  IdentityFile ~/.ssh/<id>-prd1
  ControlMaster auto
  ControlPath ~/.ssh/cm-%r@%h:%p
  ControlPersist 30m
  Port 789
  User root

# Overrides

Host operations-eu01.attestant.io
  User ops

Host signer-eu01.attestant.io
  IdentityFile ~/.ssh/<id>-signer-eu01-1
where
ssh
.attestant.io
Once this is configured, an initial connection to any Attestant server will result in a persistent connection (for 30 mins) where further connections will not require hardware authentication, allowing Ansible to carry out its required tasks.
To terminate or kill this ssh persistent connection, use:
ssh -O stop
.attestant.io
The SSH configuration file can be overridden on the command line as usual if a specific server requires a non-standard approach for some reason.
Tip for Apple Users: See the document “Attestant Apple Laptop Setup Procedure” for how to assign different background colours to terminals based on the domain you are logging into.
Using vault.yml for secrets
Secrets such as passwords and API keys are contained in vault.yml files within the relevant group or host’s directory. The secrets are encrypted; contact the CTO for access to the decryption key.
Note that whenever Ansible is run it will ask for the vault password to decrypt the secrets.
Running Ansible scripts
To run an Ansible script the operations user must be in the ops/ansible directory. From here, they should run the following command:
dev|prd-ansible-playbook -i inventories/
/hosts .yml --limit .attestant.io
Where
For example, to configure fxd on the development server jack-d02.attestant.io the following command would be run:
dev|prd-ansible-playbook -i inventories/development/hosts fxd.yml --limit jack-d02.attestant.io
You only also update a few components on the same line, for example updating Prysm and Teku:
dev|prd-ansible-playbook -i inventories/development/hosts prysm.yml teku.yal --limit jack-d02.attestant.io
It is also possible to do a dry run by using the --check flag to see what would have been updated. Also adding the --verbose flag will give you a lot more detail of the changes that will be applied:
dev|prd-ansible-playbook -i inventories/development/hosts prysm.yml teku.yal --limit jack-d02.attestant.io --check --verbose
Core Server Types
Client server
The client server is responsible for the customers interactions with Attestant and their validators. It handles a range of operations, including handling deposits, reporting and alerting.
Install PostgreSQL
The customer data for their validators is coordinated through PostgreSQL using two main databases: chain DB and ops DB. The first is for validators, the second is for operational data (such as customer information).
Initial configuration and settings
Open /ops/eth2-client/setup and view in "Raw" mode for easier text manipulation. Open a terminal and use SSH to login on to the box as root, e.g.
ssh root@client-eu01.attestant.io
Work through the script. As you reach each new section ensure you read the notes below before proceeding to ensure you understand why you are doing these commands.
Install from apt repository
The PostgreSQL application releases are provided through the standard Linux package manager.
Configure PostgreSQL
Attestant requires customised settings which are held in /etc/postgresql/12/main/conf.d/attestant.conf for PostgreSQL v12.
At this point no databases should be installed as there are no validating servers in place to provide data.
Install Operations support
To track the beacon nodes on each of the servers, an operations database is required. This is used by beacond, attestantd, reportd, financialsd, opsd, and acli.
Configure ops DB user
The Ops DB has its own user within PostgreSQL to isolate it from other database applications.
Create Ops DB in PostgreSQL
It is now necessary to create the ops DB schema to support the various daemons coordinating with each other. Typically this will require a secure copy of the raw data from the private Attestant repository to a local machine and then back up to the server:
wget https://raw.githubusercontent.com/attestantio/ops/master/client/schema.sql
scp schema.sql root@client-eu01.attestant.io:/root/client/
Scripts & Snippets
Verify server login audit logs are working
While observing the Security dashboard, SSH login panel do the following:
- Log in to the target server (this should increment the SSH monitor)
- From operations-eu01 run
curl -s <host>:14148/metrics | egrep '^auth_'
- Verify prsesence of a result like this:
auth_ssh_logins_total{event="Accepted",from="82.69.59.40",method="publickey"} 1
Verify customer on-boarding is working using acli
TODO Reference the "Validator activation" procedure
Verify end to end signatures with vouch
In order to verify that vouch is running and capable of talking to dirk instances, run the following from a vouch installation (e.g. eth-val-p01-01):
cd /home/vouch
ethdo signature sign \
--remote=signer-eu01.attestant.io:12381 \
--client-cert=certs/validator-eu02.attestant.io.crt \
--client-key=certs/validator-eu02.attestant.io.key \
--server-ca-cert=certs/ca.crt \
--domain=0xffffffffffffffffffffffffffffffffffffffffffffffffffffffffffffffff \
--data=0xffffffffffffffffffffffffffffffffffffffffffffffffffffffffffffffff \
--account=Batch0001/00001
This should return a signature. If not, verify that ethdo is available in /root/sw and $PATH.
Repeat the above command for each remote signer (e.g. signer-eu02, 03, 04, 05). All should return the same signature.
Signing servers
Due to the sensitivity of Signing servers and the potential impact of any misconfiguration, the replacement of a Signing server should not be attempted by anyone who does not have a deep understanding of the Attestant method of managing Private Keys and Distributed Wallets.
Overall process
When the Dirk signing pool is first created it requires all 5 servers to be present before keys can be generated. This is to ensure that a rogue server cannot enter the pool later and disrupt the composite private key threshold.
The overall process for setting up Dirk production keys, including a dry run, is as follows:
-
The coordinator initiates a video call with all primary owners - although this can be skipped if not on Production.
-
The primary owners manage the creation of private keys on the servers they control.
-
The coordinator uses ethdo on the client server to create distributed wallets in batches and then distributed accounts.
-
The primary owners each make an encrypted backup with a passphrase known only to them of the Dirk key directory.
-
The primary owners verify that their backup works.
-
The primary owners make a second encrypted backup with a passphrase distributed to 3 other primary owners of signing servers using Shamir Secret Sharing. These owners are selected using the table in the "Business Continuity Plan".
-
Verify that the second backup works.
Generate the wallets holding the private keys
Use the following script to generate 40 wallets. This should be run by the primary owners on their signer machines.
for wallet in $(seq 1 40); do
    id=$(printf '%02d' $wallet)
    ethdo --base-dir=/home/dirk/wallets \
      wallet create \
       --type=distributed \
       --wallet=BatchXY${id}
done
Remember to edit the above for the pod you're working on. For example BatchXY=Batch04 for pod5, Batch05 for pod6 and so on. Note that the convention NetworkXY is used for networks other than production, e.g. Prater01
Ownership of the wallets should be set to dirk:
chown -R dirk /home/dirk/wallets
Verify the Batch number is correct for the pod as errors can be hard to undo later:
ethdo --base-dir=/home/dirk/wallets wallet list
If an error has been made, the following script can be used to undo the wallet generation:
   for wallet in $(seq 1 40); do
        id=$(printf '%02d' $wallet)
        ethdo --base-dir=/home/dirk/wallets \
          wallet delete --wallet=BatchXY${id}
   done
The final step is to restart the dirk instance on each server.
At this point the "Signer Info" spreadsheet should be updated with a note in the Data Flow Status column to indicate that this server has wallets in place, e.g. "Wallets generated."
Generate the private keys
Use the following script to generate 400 private keys in accounts held by Dirk. This should be run by the coordinator on the client-eu01 machine, separate from the signing servers. Due to the time taken to generate private keys in a distributed manner it may take a few hours to complete this step.
The reason that private keys are generated in batches is a combination of performance and segregation. First, having all private keys in a single wallet would mean that Dirk would need to search through a large number of entries every time a signature had to be made. Over time this would become unwieldy. Second, splitting keys across multiple wallets allows for easier backup and restore processes and the possibility of allowing a customer to be placed into a particular wallet.
If you are only considering a dry run it might be worth reducing the key count to 10 or so. Also, if you are running in a development environment you may find the certificates are named in line with the network, e.g. client-prater.attestant.io.key.
    su ops
    #
    #
    for i in $(seq 1 40); do
        wallet=`printf '%02d' $i`
        for j in $(seq 1 400); do
          id=`printf '%05d' $j`
          echo ${wallet}/${id}
          ethdo account create \
            --remote=signer-eu01.attestant.io:12381 \
            --server-ca-cert ${HOME}/certs/ca.crt \
            --client-cert ${HOME}/certs/client.attestant.io.crt \
            --client-key ${HOME}/certs/client.attestant.io.key \
            --account=BatchXY${wallet}/${id} \
            --signing-threshold=3 \
            --participants=5
        done
    done
In general unassigned keys are attached to customer's validators during the on-boarding process either as a single operation (via the client website) or as part of a larger batch where multiple keys can be assigned or made available to Dirk. The acli batch activate command provides more details.
Common errors are:
-
Failure to generate keys - check that dirk is the owner of the /home/dirk/wallets directory
-
Failure to find accounts - check that dirk has been restarted on each signing server after wallet generation
Confirm the validator keys are present on every signer
Obtain the accounts from each signer individually, counting them to confirm that the expected number of accounts are present:
    ethdo wallet accounts \
        --remote=signer-eu01.attestant.io:12381 \
        --server-ca-cert ${HOME}/certs/ca.crt \
        --client-cert ${HOME}/certs/client.attestant.io.crt \
        --client-key ${HOME}/certs/client.attestant.io.key \
        --wallet=Batch0001 | wc -l
This should return 400 (being the number of accounts created in the previous step). Repeat this command for each signer (i.e. change signer-eu01 to signer-eu02, then signer-eu03, signer-eu04 and finally signer-eu05).
Verify that the private keys are working
Create a signature, selecting one of the created accounts at random (in this example, Batch0002/00300):
    ethdo signature sign \
        --remote=signer-eu01.attestant.io:12381 \
        --server-ca-cert ${HOME}/certs/ca.crt \
        --client-cert ${HOME}/certs/client.attestant.io.crt \
        --client-key ${HOME}/certs/client.attestant.io.key \
        --account=BatchXY02/00300 \
        --data=0x000102030405060708090a0b0c0d0e0f101112131415161718191a1b1c1d1e1f \
        --domain=0x202122232425262728292a2b2c2d2e2f303132333435363738393a3b3c3d3e3f
Note that the data field is just a random block of 32 bytes that has no larger meaning. The domain field is another random block of 32 bytes that is used to provide unique signatures for the same data across logically separated instances (for example, across a production and test blockchain). The output should show the signature for the public key referenced in the account.
Obtain the composite public key of the selected account:
    ethdo account info \
        --remote=signer-eu01.attestant.io:12381 \
        --server-ca-cert ${HOME}/certs/ca.crt \
        --client-cert ${HOME}/certs/client.attestant.io.crt \
        --client-key ${HOME}/certs/client.attestant.io.key \
        --account=BatchXY02/00300
The output should show a composite public key with a signing threshold of 3 out of 5.
Verify the signature created in the first command with the composite public key obtained in the second command (replace the entries in bold as required):
ethdo signature verify \
    --data=0x000102030405060708090a0b0c0d0e0f101112131415161718191a1b1c1d1e1f \
    --domain=202122232425262728292a2b2c2d2e2f303132333435363738393a3b3c3d3e3f \
    --signature=0xb3d1e5c72ebc6d6dc06555201c632bbbf9262456f4fe305a8b47de36f472d10709783e0f6d22e4c1c3f4c6a7788deac519519bfb18f0a3f8c198abea7e209b9ffcee3994e81fcf7e67ba702c1814791eafac786b6c01e37287a0c53f00ccb3e1 \
    --signer=0xa3d34ad2746a4ab02ee8eed60ae6a9a4ea150b3ff404a0bd804b7d229c684d6cc7678ca4cfe911cb054f44a796bd3490 \
    --verbose
This should report "Verified". This shows that the signature matches the private key.
Backup the private keys
At this point each Dirk instance will have a collection of accounts within their local wallets. Each wallet needs to be backed up by both its primary and secondary owners. The backup for the primary owner should be carried out as follows:
-
Primary owner (PO) logs into their signing server as root.
-
PO verifies that the version of ethdo is 1.7.0+ copying in an appropriate version if needed (ethdo version)
-
PO generates a strong passphrase 24+ mixed case alphanumeric (pwgen -B 24) and stores it safely for later use.
-
While unobserved (no screen sharing) PO creates an environment variable and sets it to the passphrase using a leading space to hide this command from the history:
  PASSPHRASE=<passphrase>
  clear
-
Once the screen is cleared, the PO can permit screen sharing
-
PO makes a backup of the first wallet (changing the sequence start/end as directed by the coordinator for the pod):
    for i in $(seq 501 540); do
        id=$(printf '%04d' $i);
        ethdo wallet export \
        --base-dir=/home/dirk/wallets \
        --passphrase=${PASSPHRASE} \
        --wallet=Batch${id} > $(hostname)-Batch${id}-backup.dat
    done
Remember to update the index values appropriately for the pod (401-440 for pod 5, 501-540 for pod 6 and so on).
- The contents of the backup should be verified (adjusting the sequence start/end as before):
    for i in $(seq 501 540); do
        id=$(printf '%04d' $i);
        ethdo wallet import \
            --verify \
            --passphrase=${PASSPHRASE} \
            --data=$(hostname)-Batch${id}-backup.dat
    done
The output from the above should be similar to:
Wallet name: Batch0502
Wallet type: distributed
Wallet UUID: 12341234-1234-1234-1234-12341234
Wallet accounts: 400
The Wallet UUID can be verified manually using ls -la /home/dirk/wallets.
- The PO will unset the passphrase to ensure that they have a working copy later.
unset PASSPHRASE
Delete the private keys
It is essential to have total confidence in the backup process using disposable data (or data that has minimal value).
- The PO will delete all the generated keys from their server leaving only the backups.
  for i in $(seq 501 540); do
    batch=Batch$(printf '%04d' $i)
    ethdo --base-dir=/home/dirk/wallets wallet delete --wallet=${batch}
  done

  systemctl restart attestant-dirk
- The PO will verify that the wallet has been deleted (using the earlier UUID):
ls -la /home/dirk/wallets
-
The other POs will delete their wallets so that 2 out of 5 signing servers do not have the keys.
-
The POs who have deleted their wallets will restart and verify their dirk instances using:
systemctl restart attestant-dirk.service systemctl status attestant-dirk.service
-
The coordinator will verify that signatures are still operational from the client-eu02 machine using the signature checking procedure earlier (3 out of 5 continues to run).
-
A third PO will delete all the generated keys from their server so that 3 out of 5 signing servers do not have the keys.
-
The coordinator will verify that signatures are now broken from the client-eu01 machine using the signature checking procedure earlier.
-
Each PO makes a local copy of their backup:
scp -P 789 'root@signer-eu03.attestant.io:/root/*-backup.dat'
At this point the signing servers should be in a state where 3 out of 5 (or more) do not have their wallets in place. The backup file should be left on the machine as an additional backup location and for the secondary owner to use later in the process.
Restore the private keys
The primary owner (PO) should be able to restore all the private keys for their server using the encrypted backup as follows:
-
Primary owner (PO) logs into their signing server as root (if needed).
-
PO verifies that the version of ethdo is 1.7.0+ copying in an appropriate version if needed.
-
PO retrieves their backup passphrase.
-
While unobserved (no screen sharing) PO creates an environment variable and sets it to their recorded passphrase using a leading space to hide this command from the history:
PASSPHRASE=
clear
-
Once the screen is cleared, the PO can permit screen sharing.
-
PO uploads their local copy of the encrypted backup archives to their server:
scp -P 789
pwd/signer-eu03-Batch0002-backup.tar.gz root@signer-eu03.attestant.io:/root/
- Decrypt and import the backup archives (adjusting the values and Batch appropriately):
  for i in $(seq 501 540); do
    batch=Batch$(printf '%04d' $i);
    ethdo --base-dir=/home/dirk/wallets wallet import \
        --passphrase=$PASSPHRASE \
        --data=/root/$(hostname)-$batch-backup.dat
done
- Ensure dirk owns the wallet data
chown -R dirk /home/dirk/wallets
- One PO should restart and verify their dirk instance:
systemctl restart attestant.service systemctl status attestant-dirk.service
-
The coordinator should verify that 3 out of 5 signing servers are online and successfully signed a transaction.
-
The remaining POs should now restart and verify their dirk instances:
systemctl restart attestant.service systemctl status attestant-dirk.service
-
The coordinator will verify that all the Dirk instances are now participating in the signer pool.
-
The PO will assist the secondary owner for the server (defined in the "Business Continuity Plan" document) in logging on to the machine using a screen share private to just the PO and the secondary owner.
-
The secondary owner will verify the contents of the backups:
for i in $(seq 501 540); do
  batch=Batch$(printf '%04d' $i);
  ethdo --base-dir=/home/dirk/wallets wallet import \
    --verify \
    --passphrase=$PASSPHRASE \
    --data=/root/$(hostname)-$batch-backup.dat;
done
- The secondary owner will view the verified passphrase (known to thePO) and make a local copy in a secure setting (e.g. encrypted key manager):
echo $PASSPHRASE
- The secondary owner will make a local copy of the encrypted backup using:
scp -P 789 root@signer-eu03.attestant.io:/root/*-backup.dat .
Note that shells such as zsh may require /root/*-backup.dat to escape the wildcard.
- The PO will now ensure that their passphrase is removed from the server environment:
unset PASSPHRASE
- The PO will close the shared screen session with the secondary owner.
Verify threshold signatures are working
To ensure that the pod is working properly, the final check is to engineer a situation where various combinations of threshold and below threshold signatures are taking place. In general the procedure for this is as follows:
-
The coordinator will arrange for the POs for all signing servers to be present via a video call.
-
The coordinator will ask the POs of signers 2 and 4 within the pod to shut down their dirk instances (e.g. signer-eu02, signer-eu04 in pod 1 or signer-eu17 and signer-eu19 in pod 4)
-
The coordinator will run the following script on client-eu01 (or equivalent operations server) to confirm that signatures can be generated:
for i in $(seq 16 20); do
    echo -n "${i}: "
    server=$(printf '%02d' $i)
    ethdo signature sign \
        --remote=signer-eu${server}.attestant.io:12381 \
        --server-ca-cert ${HOME}/certs/ca.crt \
        --client-cert ${HOME}/certs/<host>.attestant.io.crt \
        --client-key ${HOME}/certs/<host>.attestant.io.key \
        --account=Batch0308/00275 \
        --data=0x000102030405060708090a0b0c0d0e0f101112131415161718191a1b1c1d1e1f \
        --domain=0x202122232425262728292a2b2c2d2e2f303132333435363738393a3b3c3d3e3f
done
Note that the values in bold will need to be adjusted for the specific situation of the pod under test (e.g. 21-25 for pod 5)..
The output should show that successful signatures were received from signers 1, 3 and 5 within the pod but 2 and 4 failed.
-
The coordinator will now ask for the PO of signer 3 to shut down dirk and re-run the script. The output should show no successful signatures as the participation of 3 is the minimum threshold to achieve a signature.
-
The coordinator will now ask for dirk to be shut down on signer 5 and for signers 2 and 4 to be started.
-
The coordinator will run the script and confirm that signatures are once again generated using signers 1, 2 and 4.
-
The coordinator will now ask for dirk to be started on signers 3 and 5 and will rerun the script. The output should show signatures from all 5 signers and act as the final proof that all signers are communicating with each other and that the threshold signature is working correctly.
At this point the server should be marked as "Final Checks" in the "Server Info" spreadsheet to indicate that only final system testing is required before the pod can go live.
Create a live validator
As a final verification that the pod has been configured correctly, a live validator should be created as follows:
-
The coordinator will manually prepare the attestantd configuration file (attestantd.yml) on the client API server to register the new pod so that the correct signers will be used.
-
The PO providing the validator will use their client API to request a new validator
  curl -X POST \
   -H 'Content-type: application/json' \
   -H 'Accept: application/json' \
   -H "Authorization: Bearer xxxxxx" \
   -d '{"amount": "32000000000", \
        "withdrawal_eth1_address": "xxxxxx", \
        "name":"Validator 4","pod":"pod-4"}' \
    https://client.attestant.io/v1/eth2/validators  | jq
-
The coordinator will update the operations database so that Batch0X01/00001 (the first validator) is assigned to the validator (t_unassigned_validators):
-
The PO will deposit ETH to initiate the validator.
-
The coordinator will verify /var/log/attestantd/attestantd.log and the database audit log (t_audit) to confirm that the validator has been assigned correctly.
-
Given the nature of the Ethereum deposit queue it may take some time for the validator to start and any errors at that point should be reported.
Final steps to add and activate new wallets in vouch
The final step is to add the new wallets to the appropriate pod in ansible. Edit the file located at ops/ansible/inventories/podX/group_vars/all/main.yml for the correct pod, and add the wallets under the vouch_accountmanager_accounts field. This change must then be rolled out to all validator boxes in the pod so that vouch can recognize the new wallets.
After adding the wallets, the new keys need to be added to the unallocated validators table, making them available for assignment. This can be done using the following acli batch activate command:
    acli --remote=signer-euXX.attestant.io:12381 \
         --ca-cert ${HOME}/certs/ca.crt \
         --client-cert ${HOME}/certs/client.attestant.io.crt \
         --client-key ${HOME}/certs/client.attestant.io.key \
         batch activate \
           --network=Mainnet \
           --batch=Batch0XXX \
           --pod=pod-X
Wiki Editing
There are 3 ways to edit the documents here:
- Simple page edits via github code browser UI.
- Multi page edits via github code editor UI.
- Checkout the docs-server repo and push changes.
1. Simple page edits via github code browser UI.
-
Navigate to a page you want to edit, e.g. https://github.com/attestantio/docs-server/blob/master/operations/vouch.md
-
Click the edit button in the top right corner:

-
Make changes as required.
-
Click commit changes and then either merge directly to master or raise a PR for feedback:
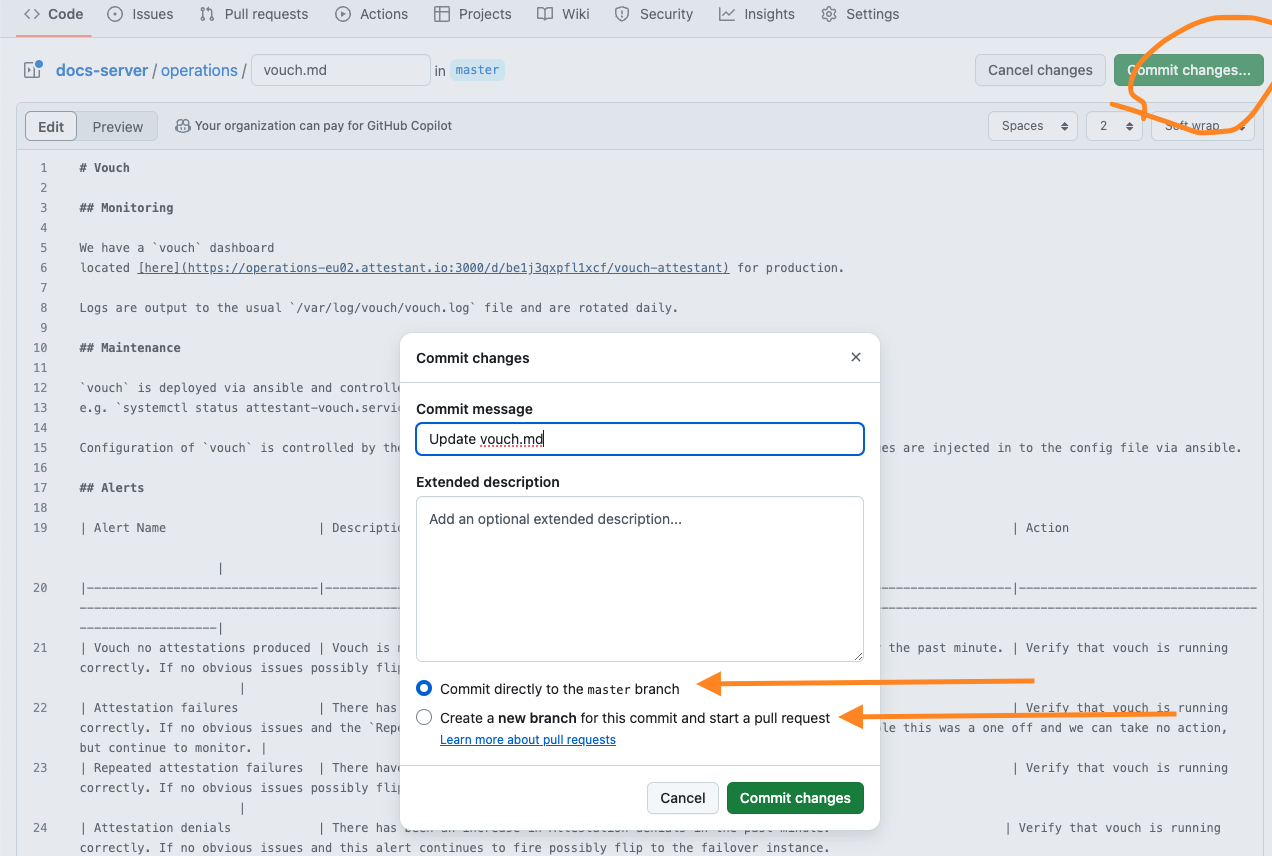
2. Multi page edits via github code editor UI.
-
Navigate to https://github.dev/attestantio/docs-server/, which will open the VSCode integrated editor.
-
Make changes as required.
-
Open the commit dialog on the left hand side, enter a commit message and then click
Commit & Push: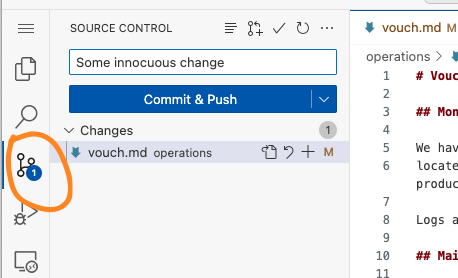
3. Checkout the docs-server repo and push changes.
- Clone the repo https://github.com/attestantio/docs-server/.
- Make changes as required.
- Either commit and push the changes or create a branch and raise a PR if you would like feedback